Create an allocation key (wizard)
Guide utilisateur
User guide
1 Open the create menu
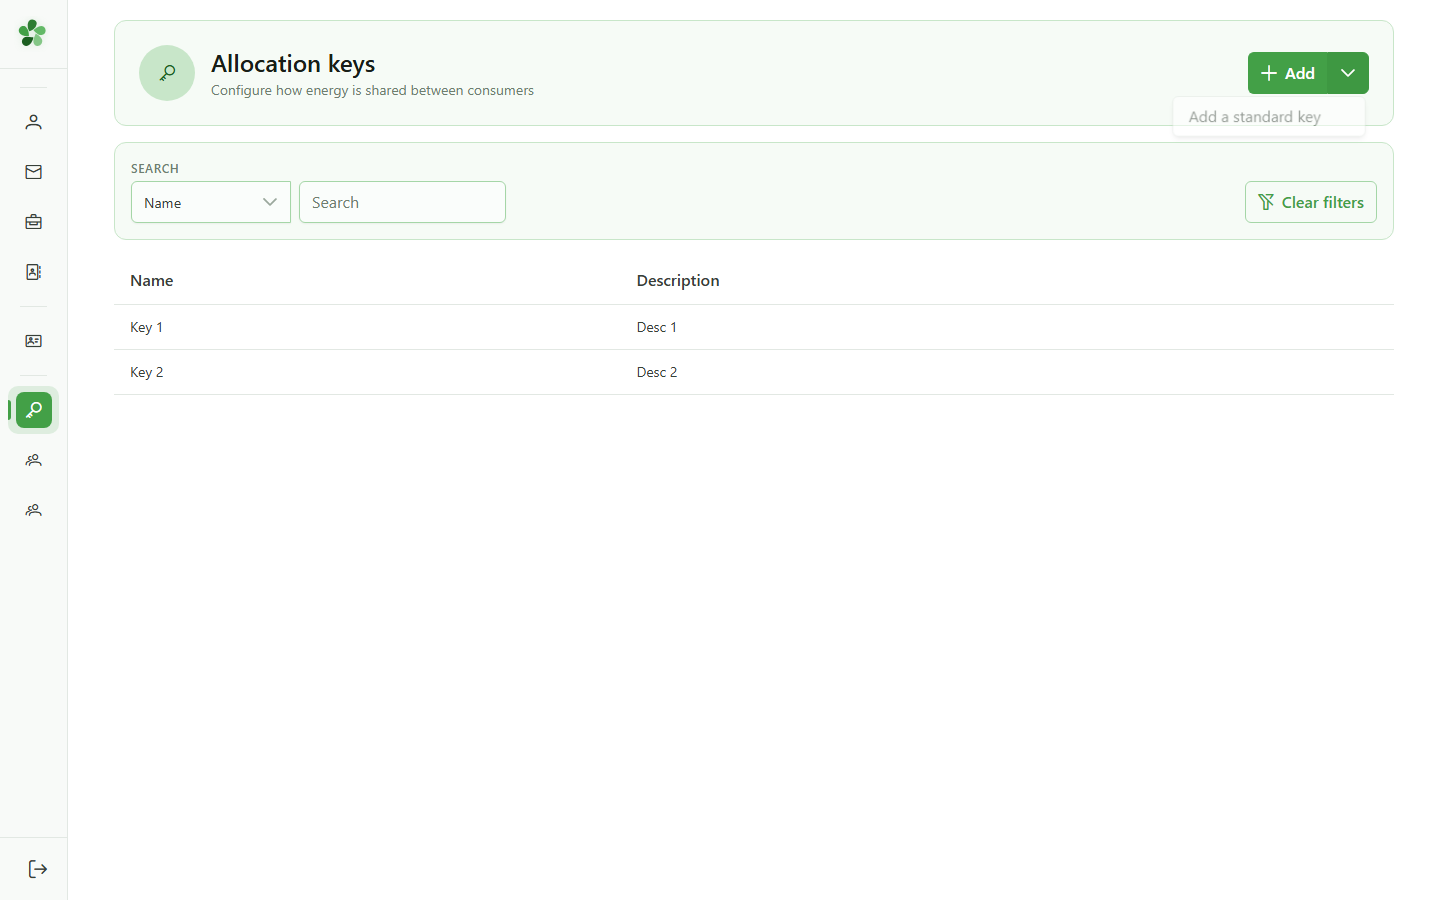
Creating a key
Click the dropdown arrow next to "Add" to reveal the available creation modes — the free grid or the step-by-step wizard.
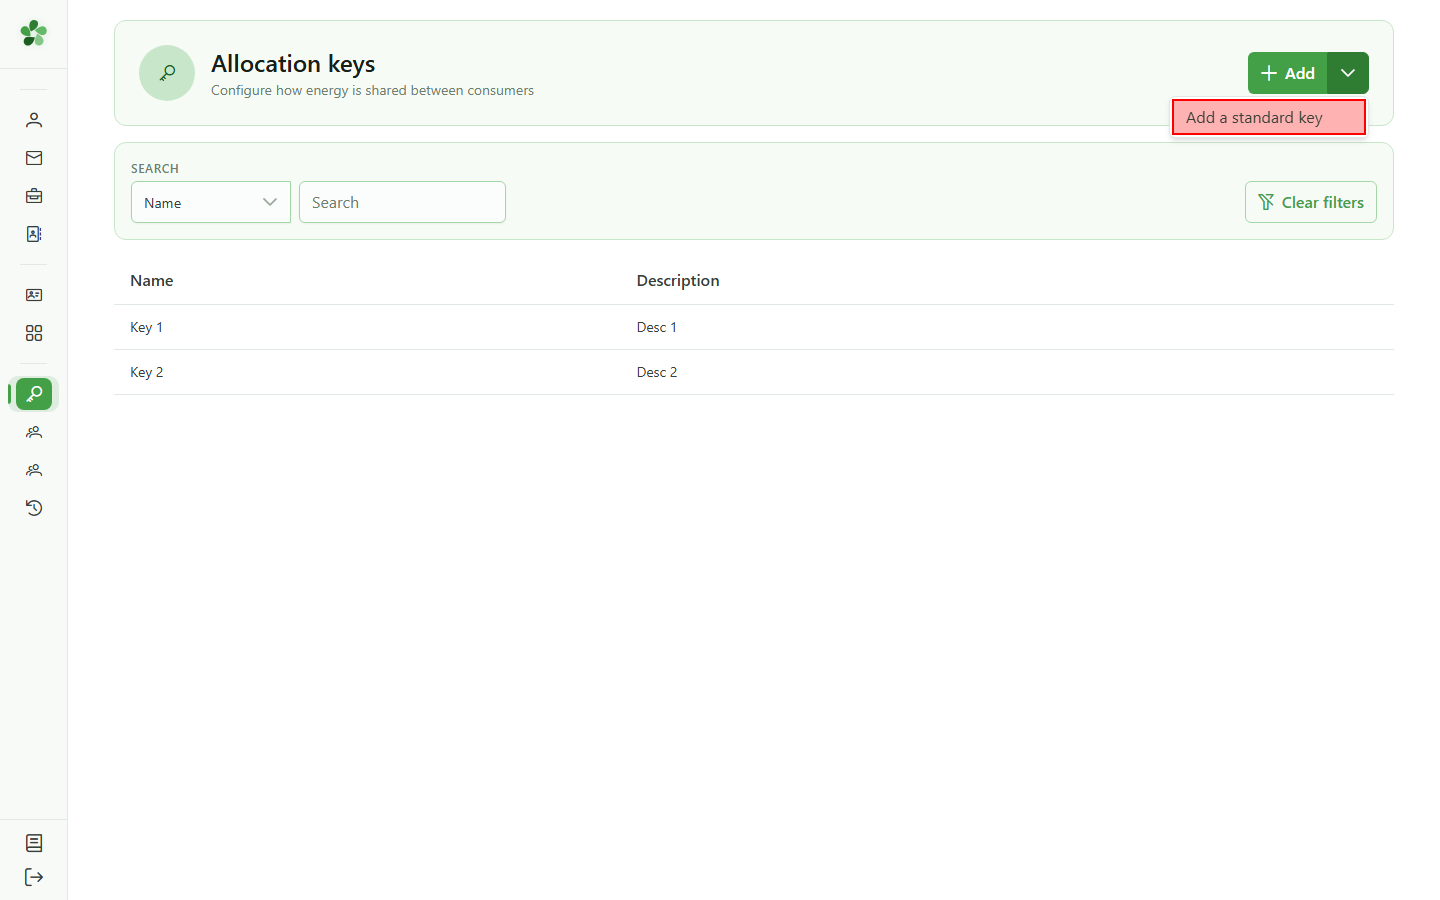
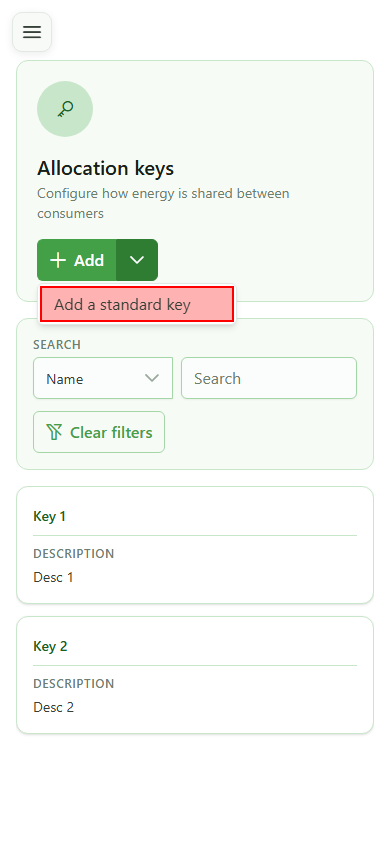
2 Launch the wizard
Creating a key
Select "Add standard key" to start the step-by-step wizard, which walks you through the configuration in four steps.
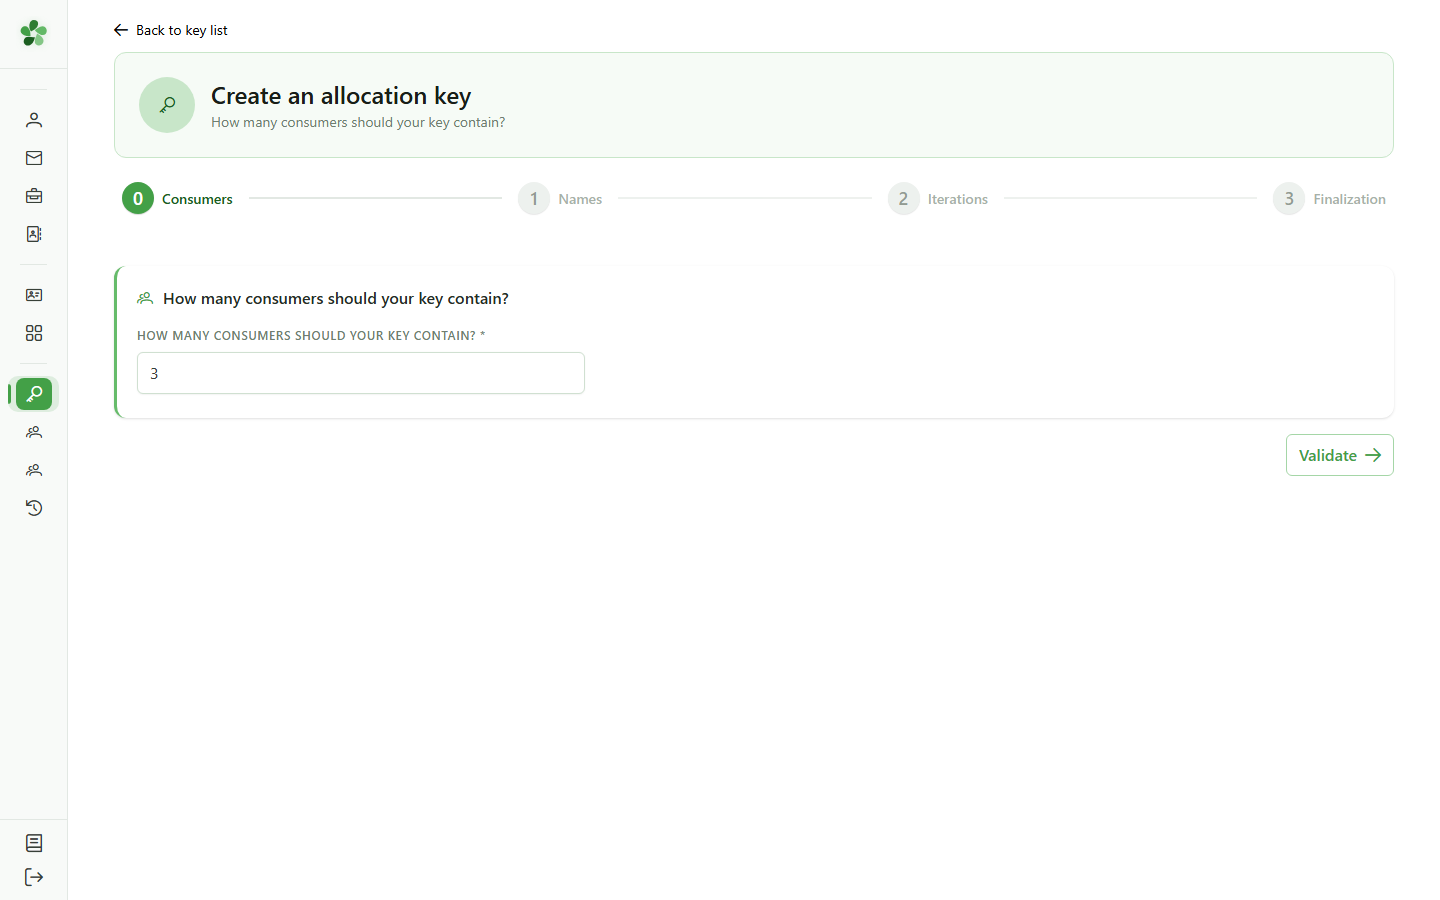
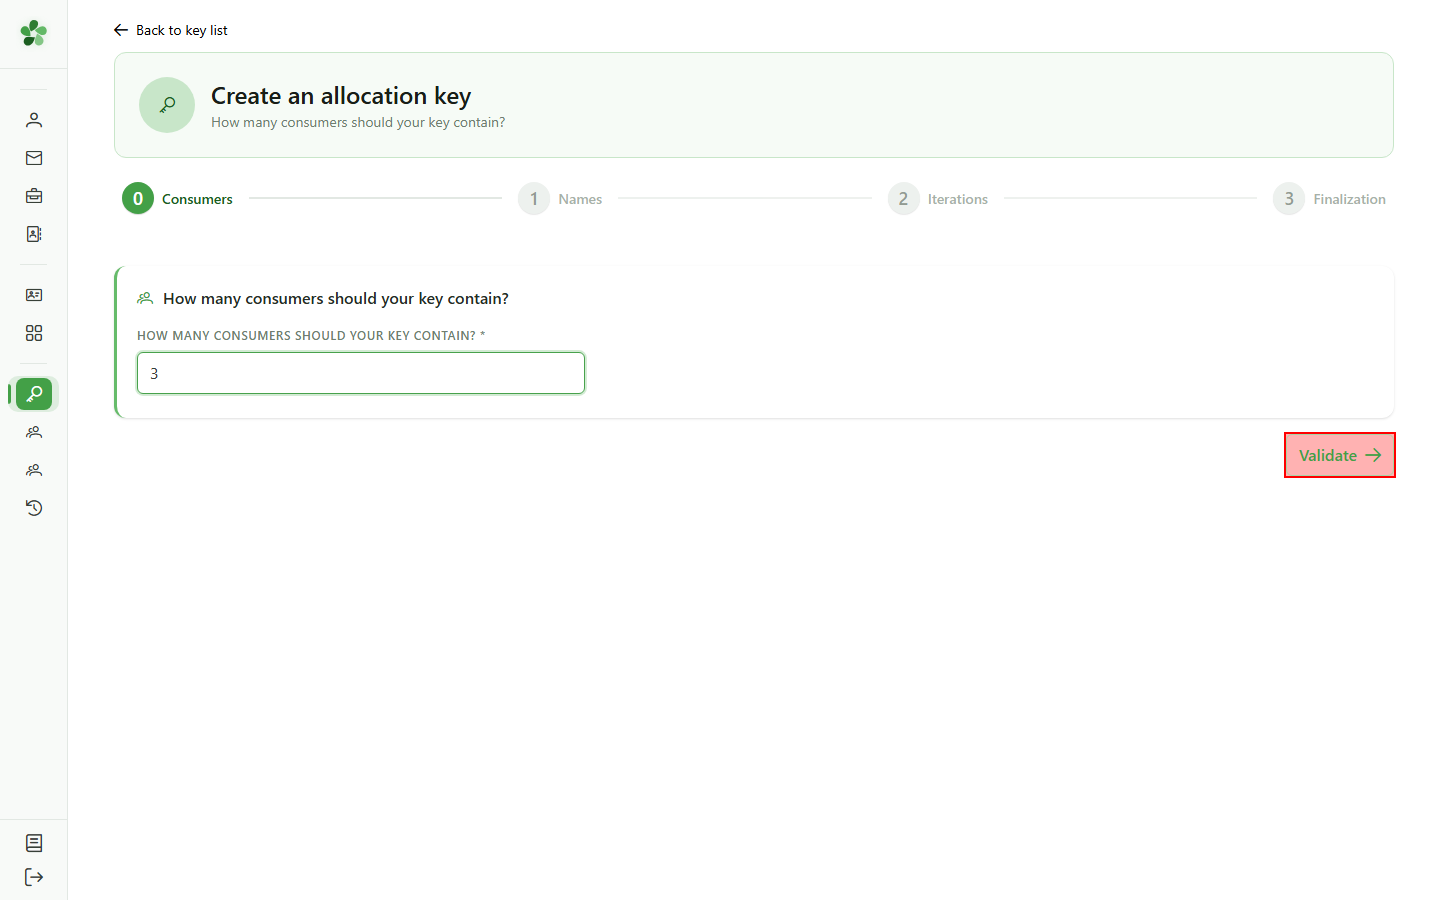
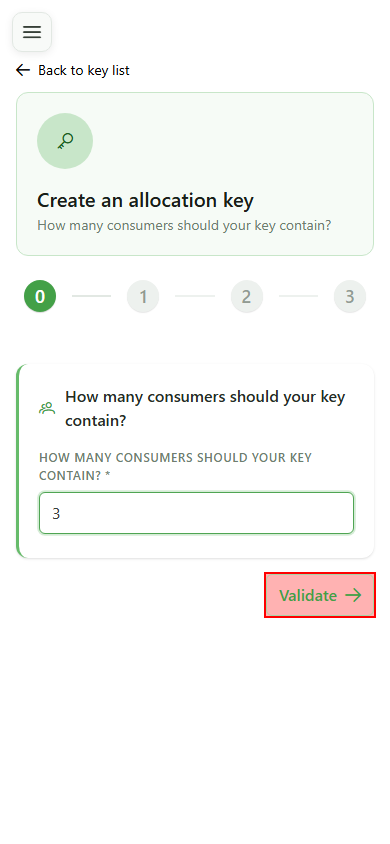
3 Number of consumers
Step 1/4 — Consumers
Indicate how many consumers will share the energy. This count drives the size of every iteration the wizard creates — three here.
4 Confirm the step
Step 1/4 — Consumers
Click "Validate" to confirm the consumer count and proceed to the next step.
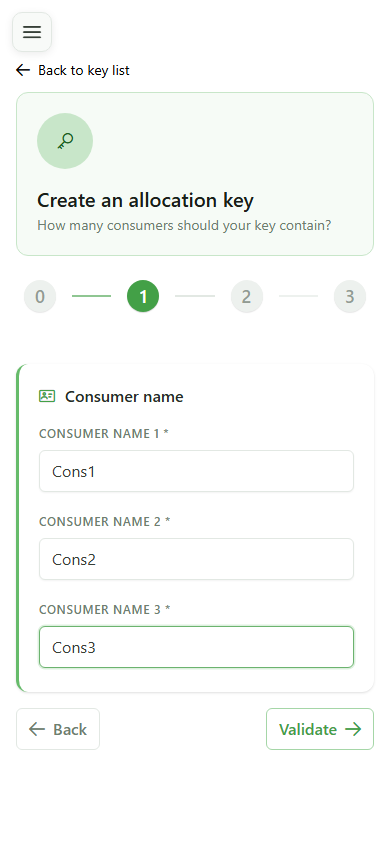
5 Name the consumers
Step 2/4 — Names
Enter a name for each of the three consumers (Cons1, Cons2, Cons3). These names carry over to every subsequent iteration.
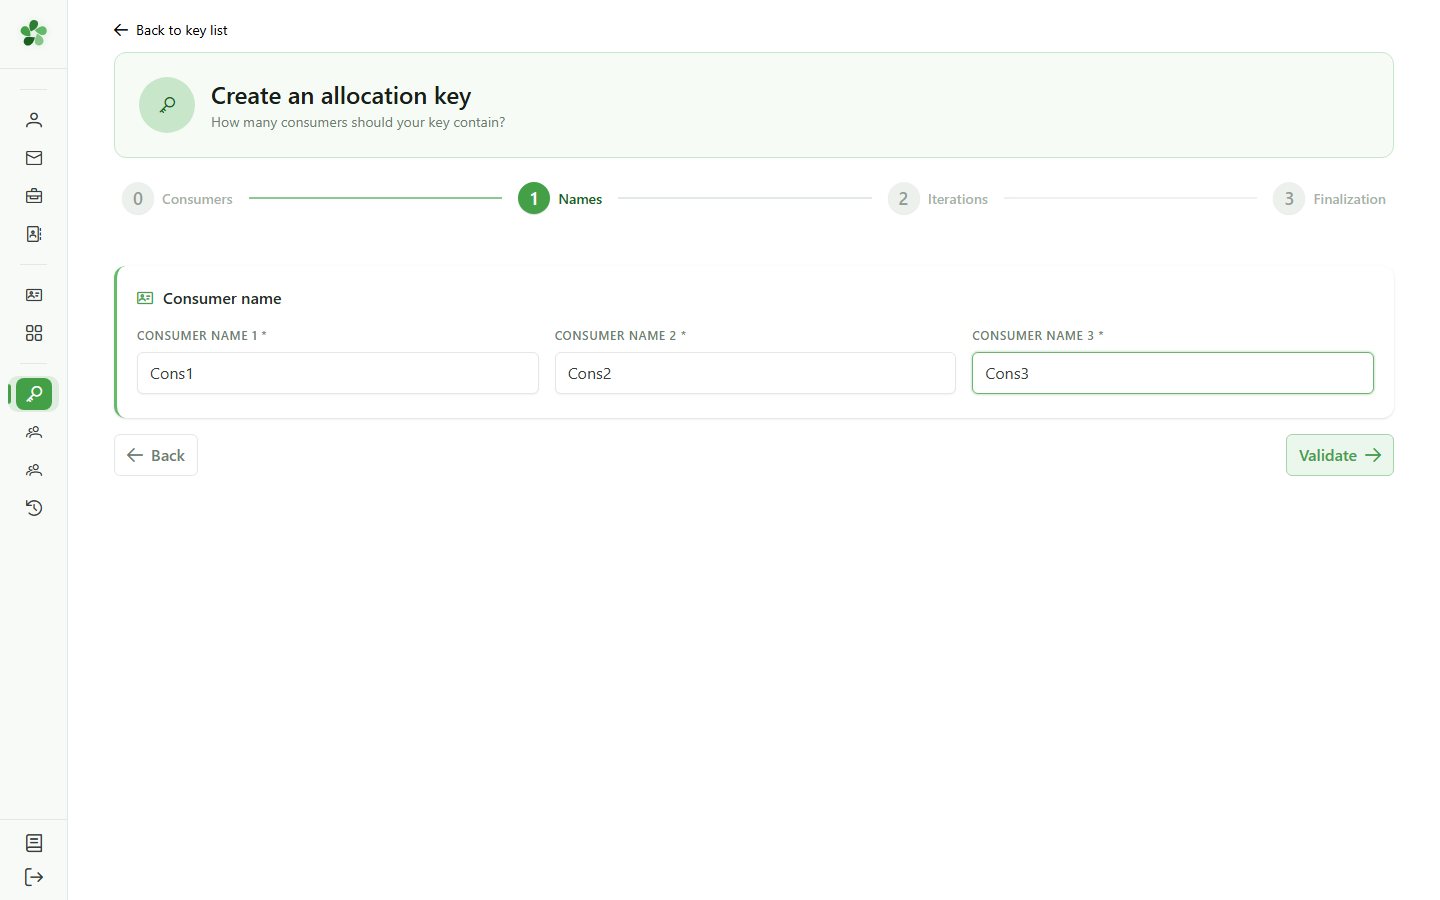
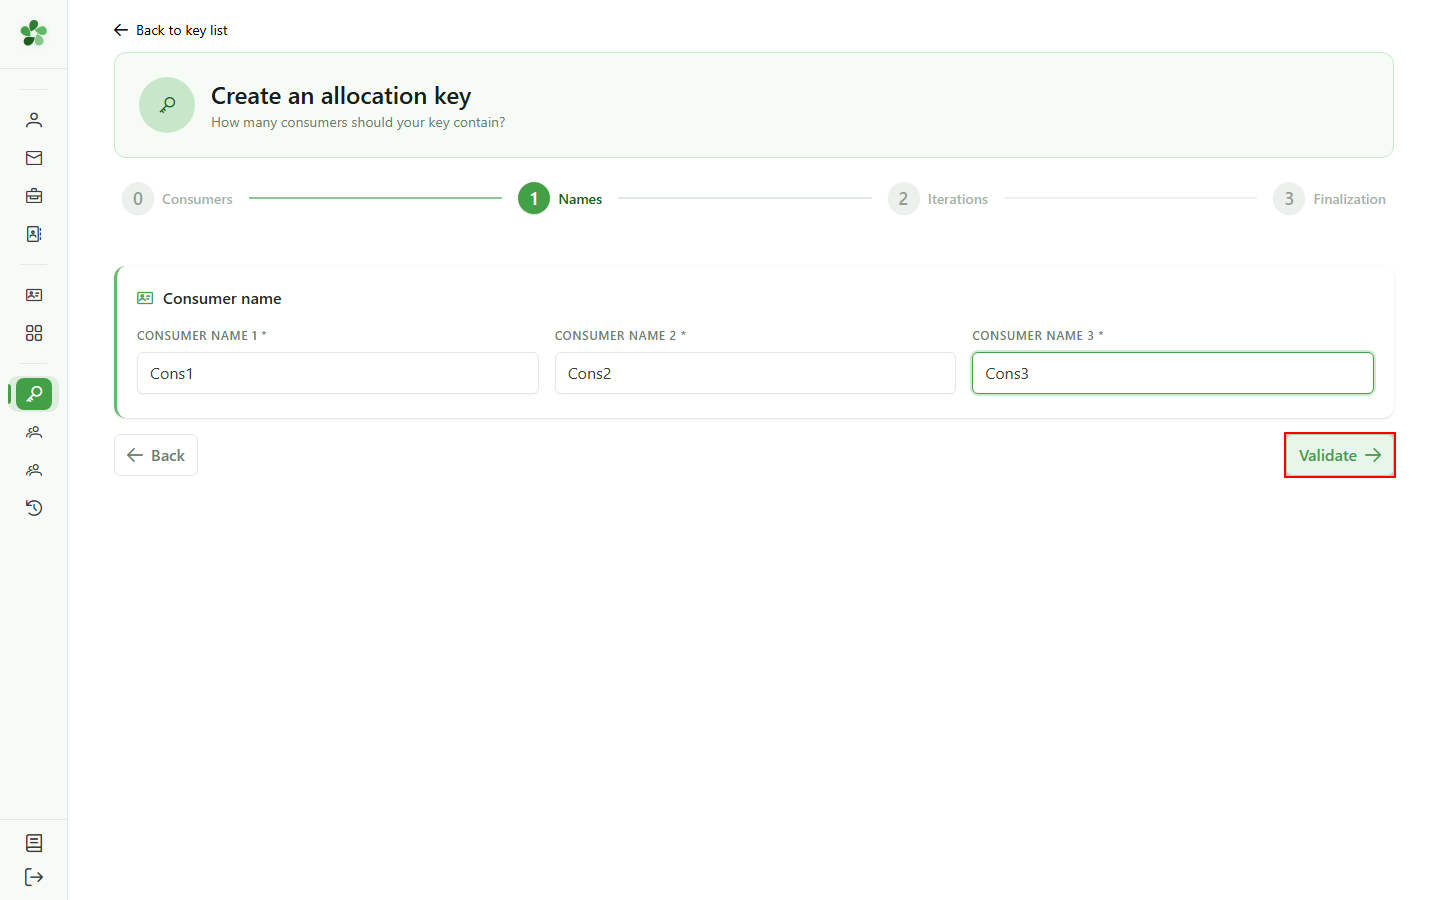
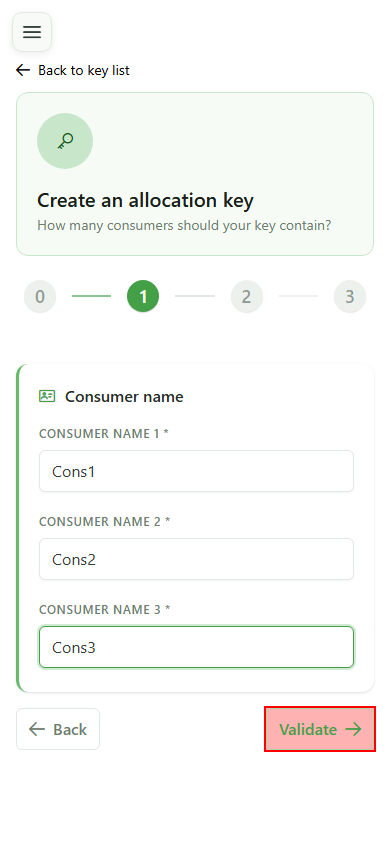
6 Confirm the names
Step 2/4 — Names
Click "Validate" to lock in the consumer names and move on to configuring the iterations.
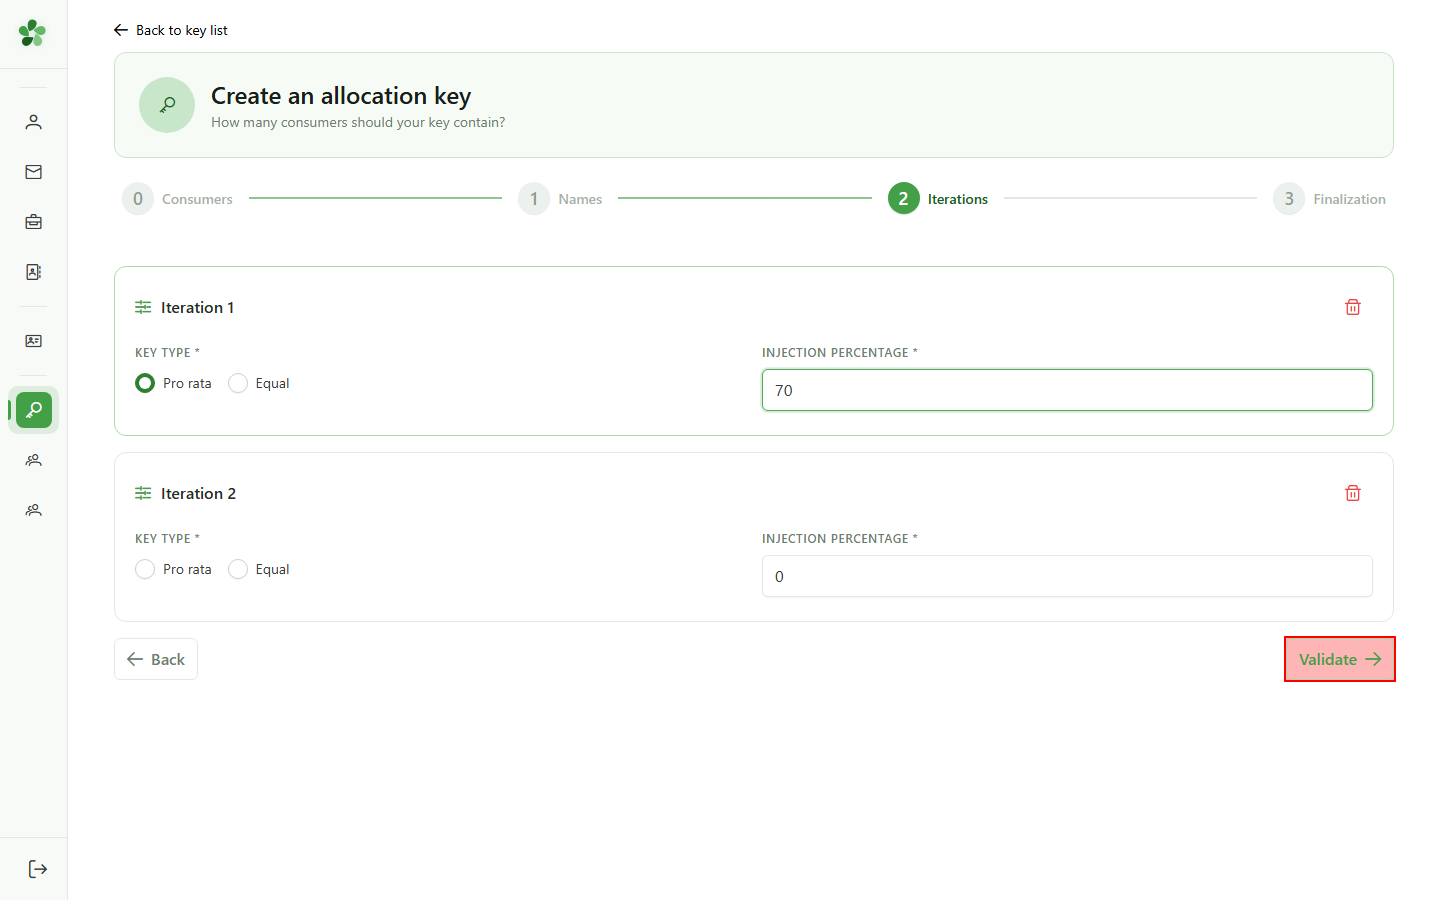
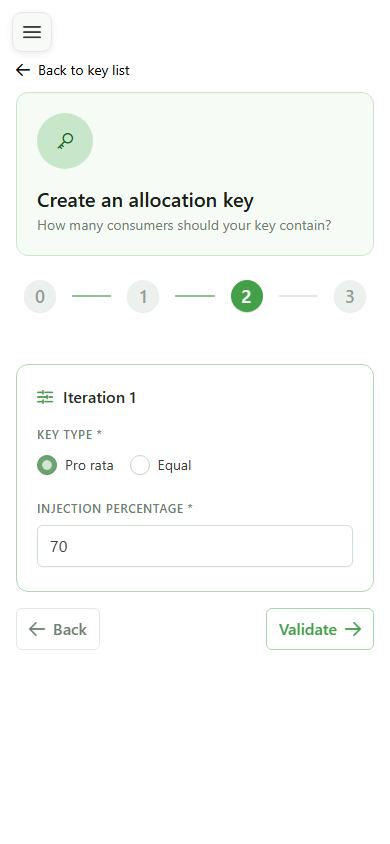
7 Pick prorata mode
Step 3/4 — Iterations
Select "Prorata" for this first iteration: the energy will be split automatically between consumers based on their actual consumption.
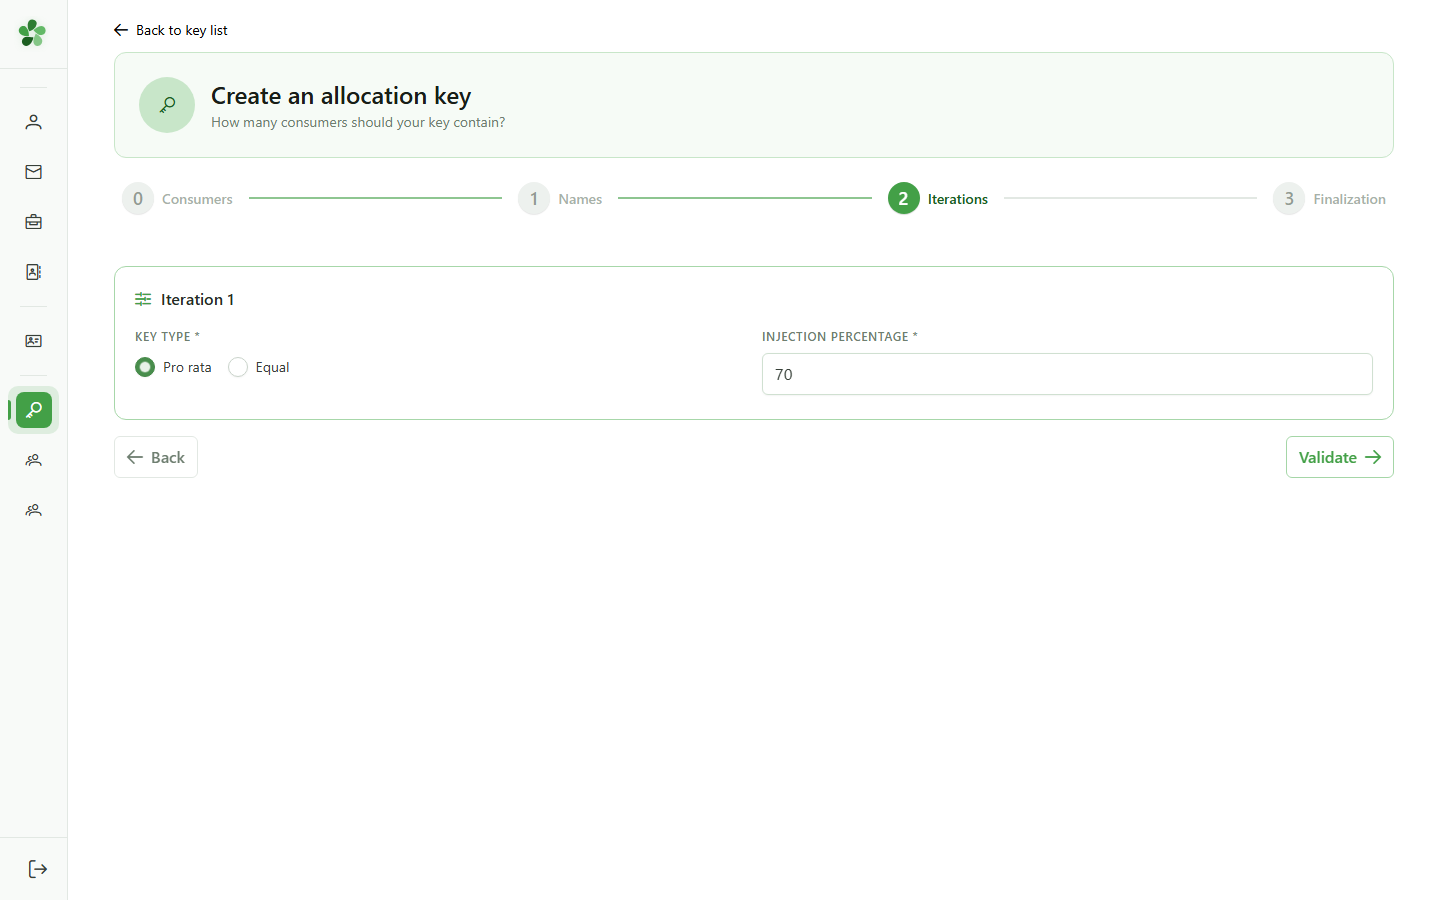
8 Allocate 70%
Step 3/4 — Iterations
Type 70 in the weight field — this iteration will receive 70% of the available energy. The total must reach 100% to validate the step.
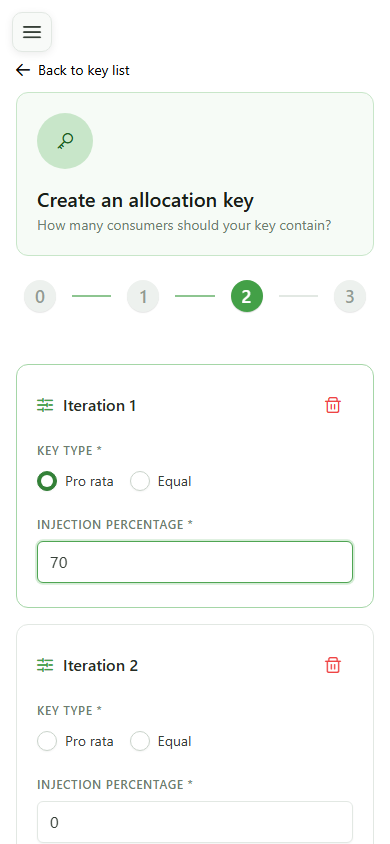
9 Next iteration generated
Step 3/4 — Iterations
The wizard sees the total is still below 100% and spawns a second iteration to configure. It will keep adding rows until the sum is reached.
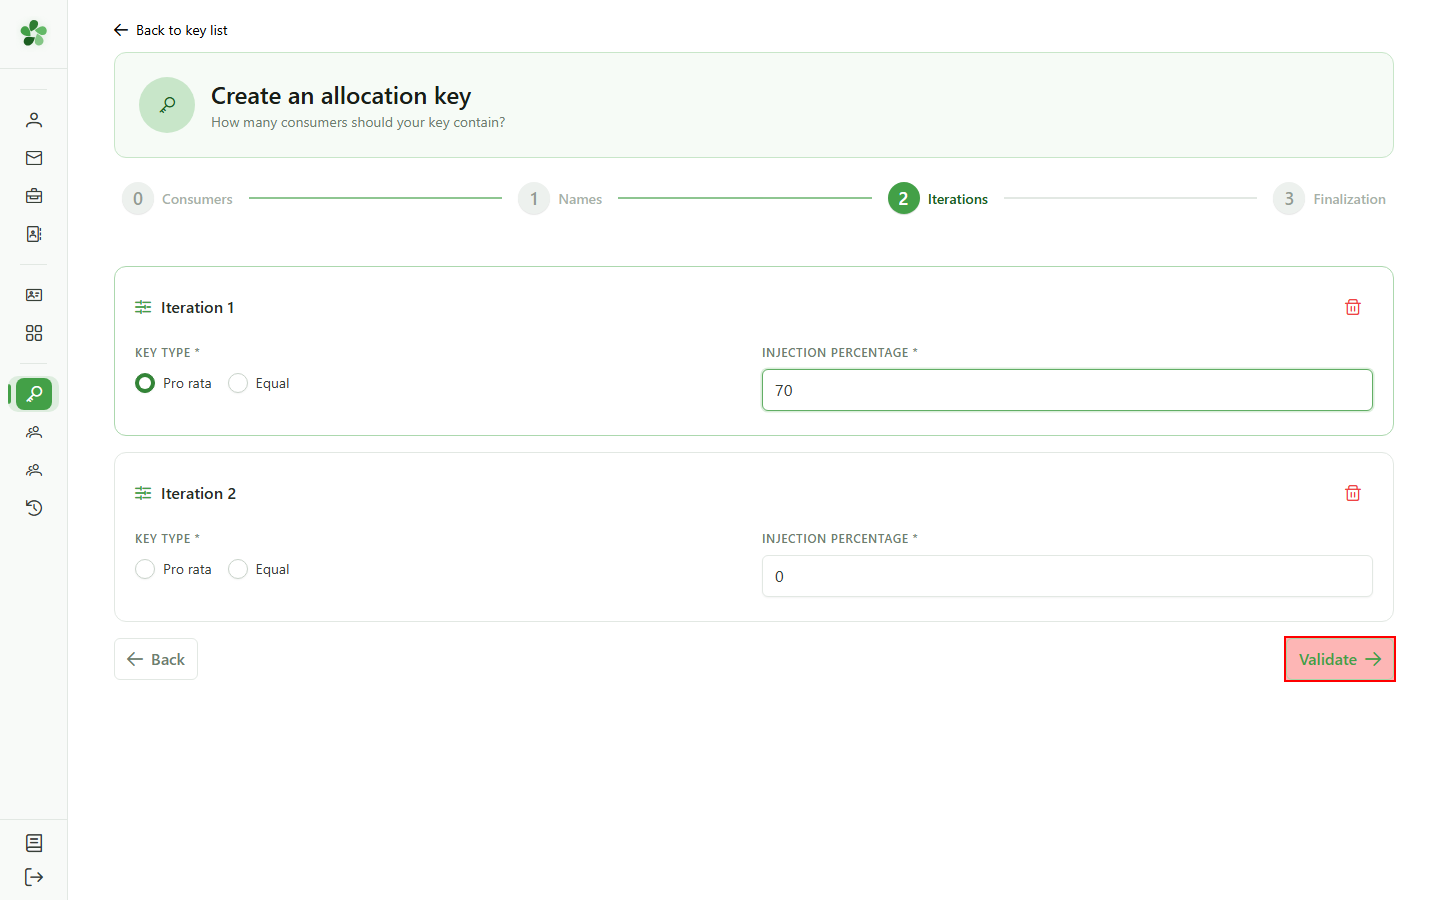
10 Prorata mode (iter. 2)
Step 3/4 — Iterations
Pick "Prorata" again for the second iteration so it uses the same automatic split logic.
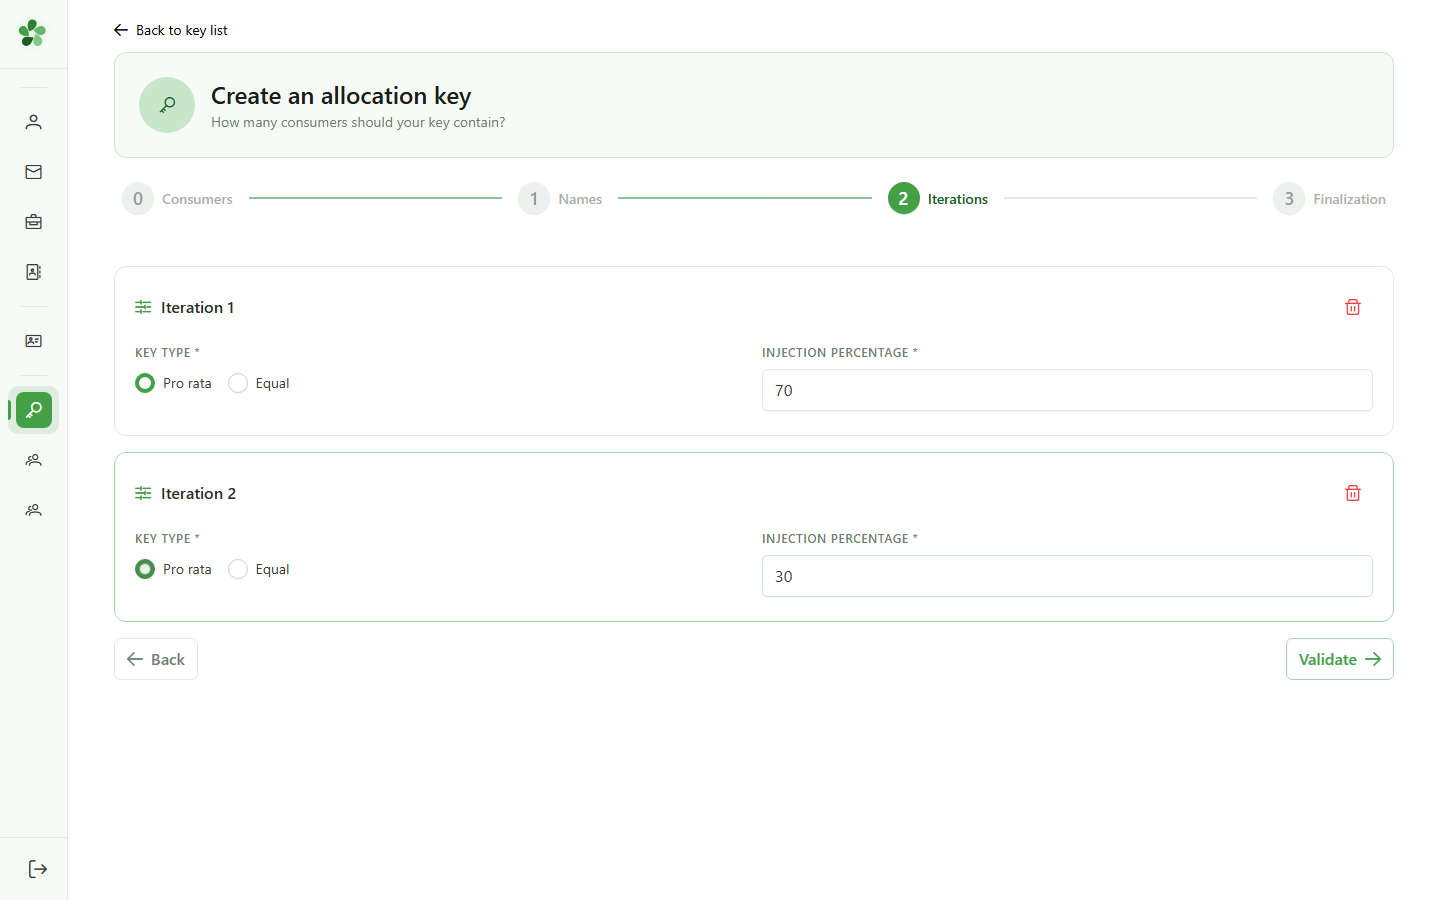
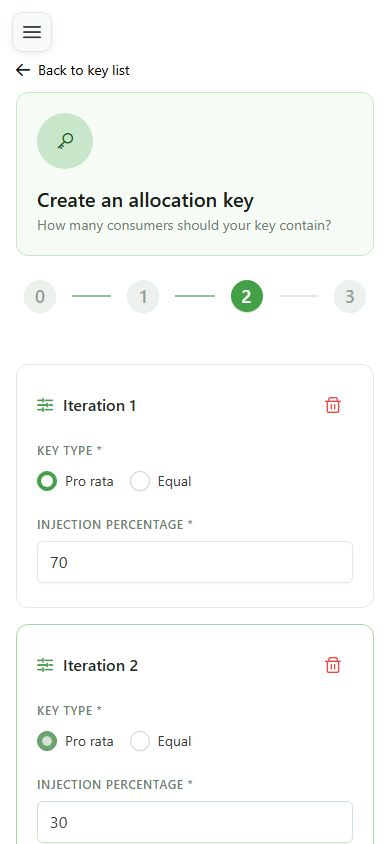
11 Allocate 30%
Step 3/4 — Iterations
Type 30 for this second iteration — combined with the earlier 70%, the total now reaches 100% and unlocks the finalisation step.
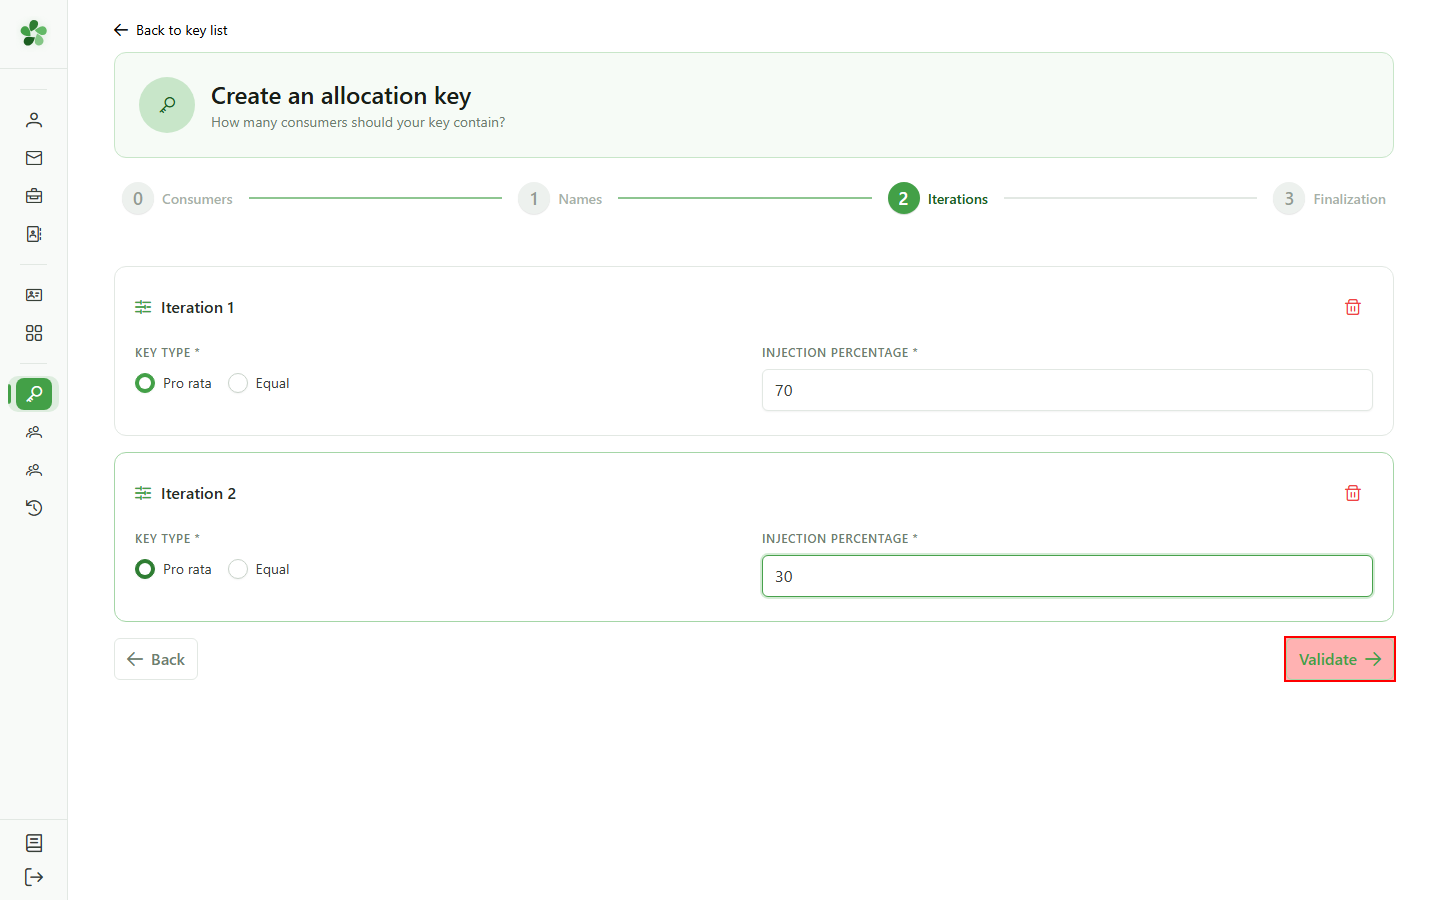
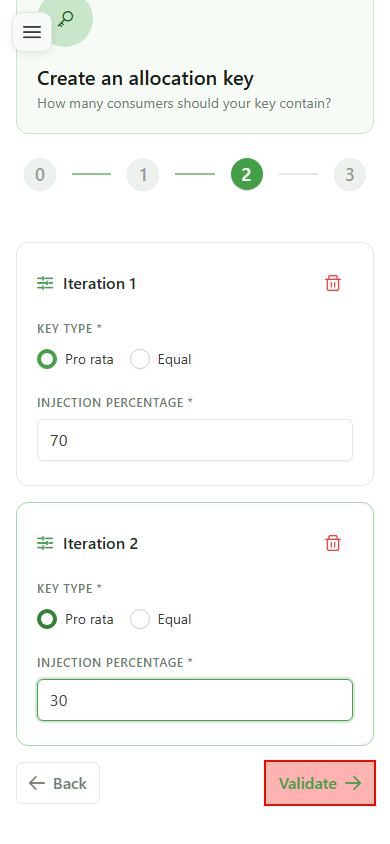
12 Confirm iterations
Step 3/4 — Iterations
Click "Validate": the total reaches 100% and the wizard opens the final finalisation step.
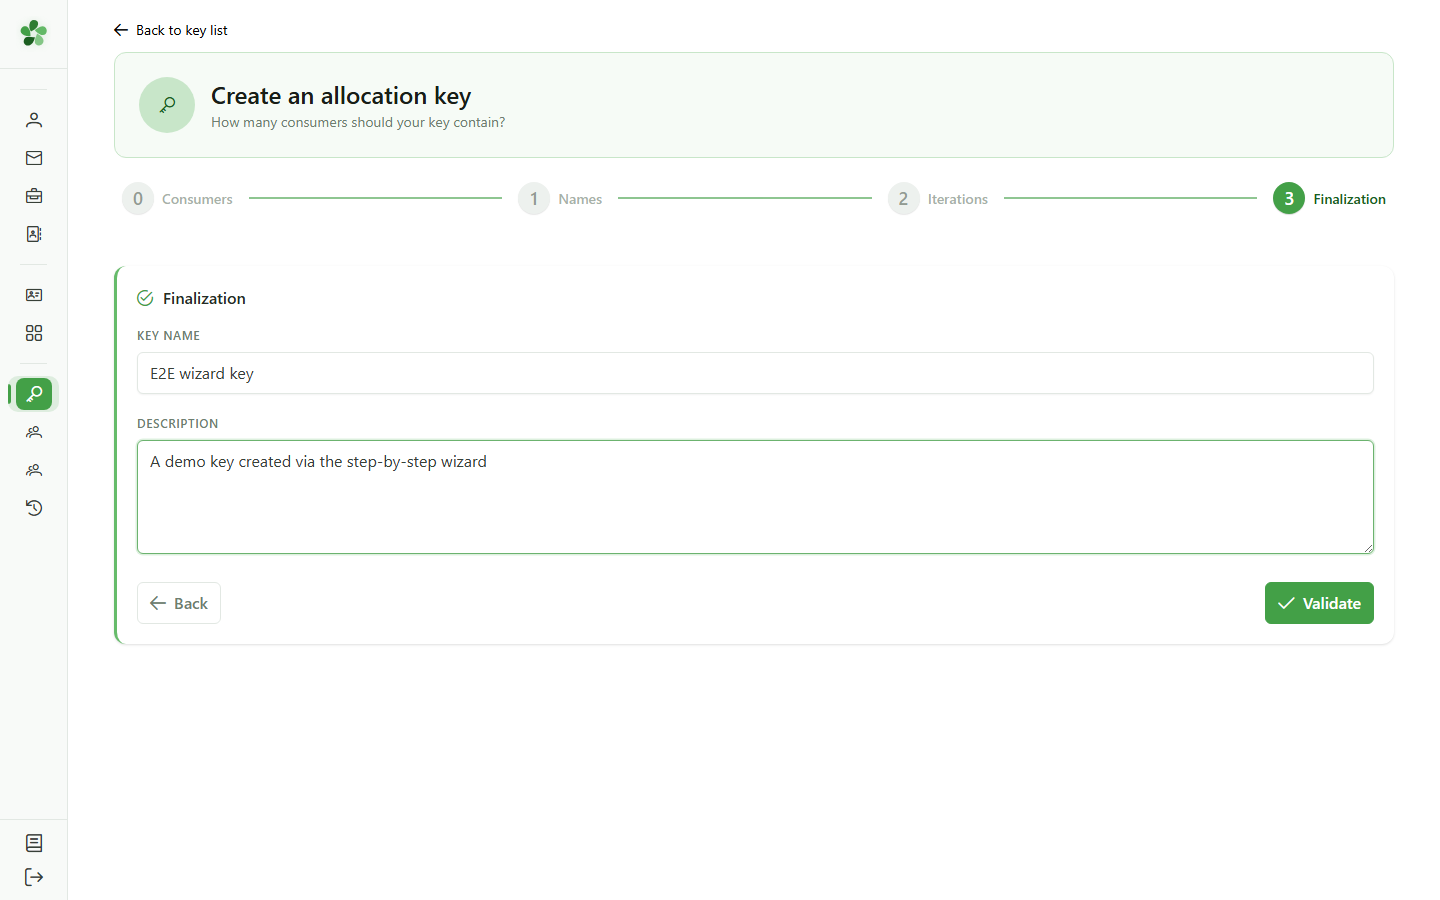
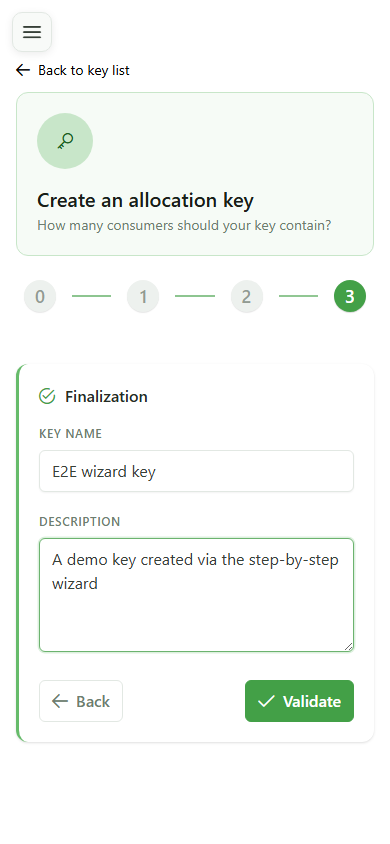
13 Name the key
Step 4/4 — Finalisation
Give the new allocation key a name and a description. This metadata appears in the key list and makes the key easier to reuse.
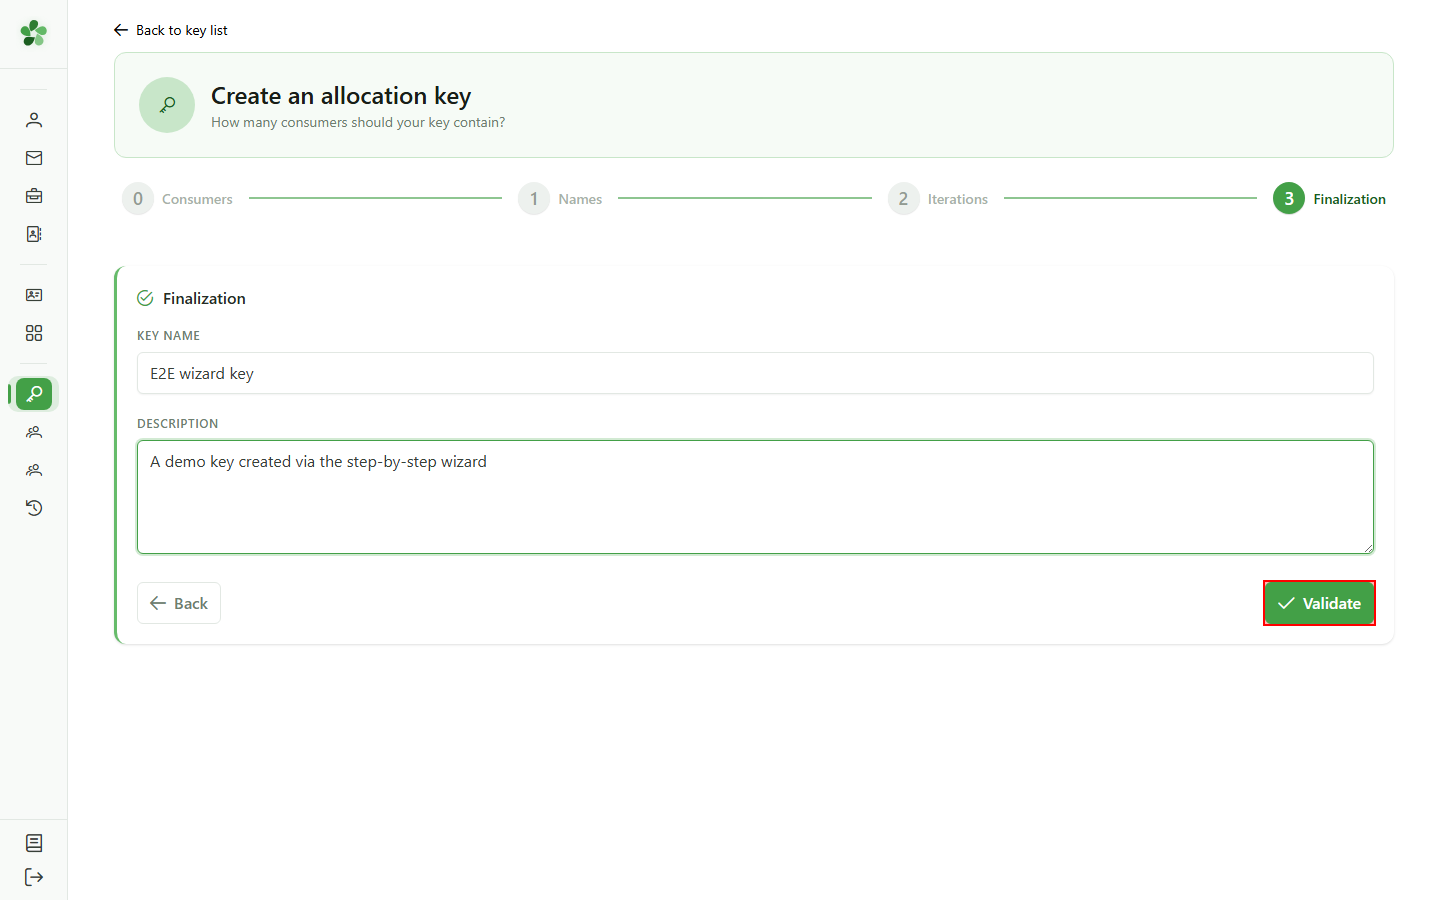
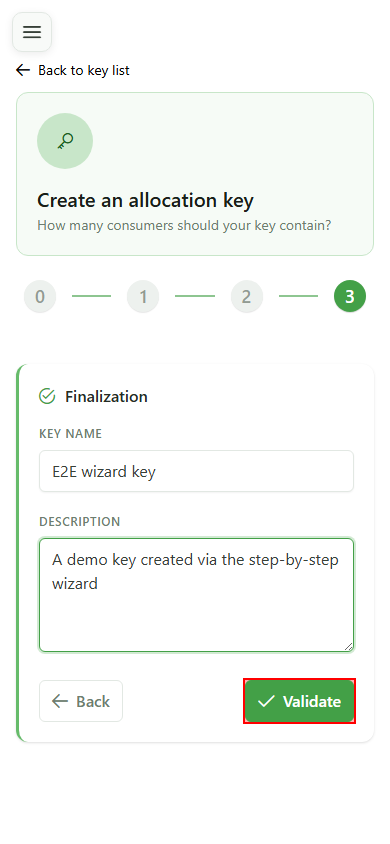
14 Submit the wizard
Step 4/4 — Finalisation
Submit the wizard to materialise the full grid: a review page opens so you can re-read the configuration before persisting it.
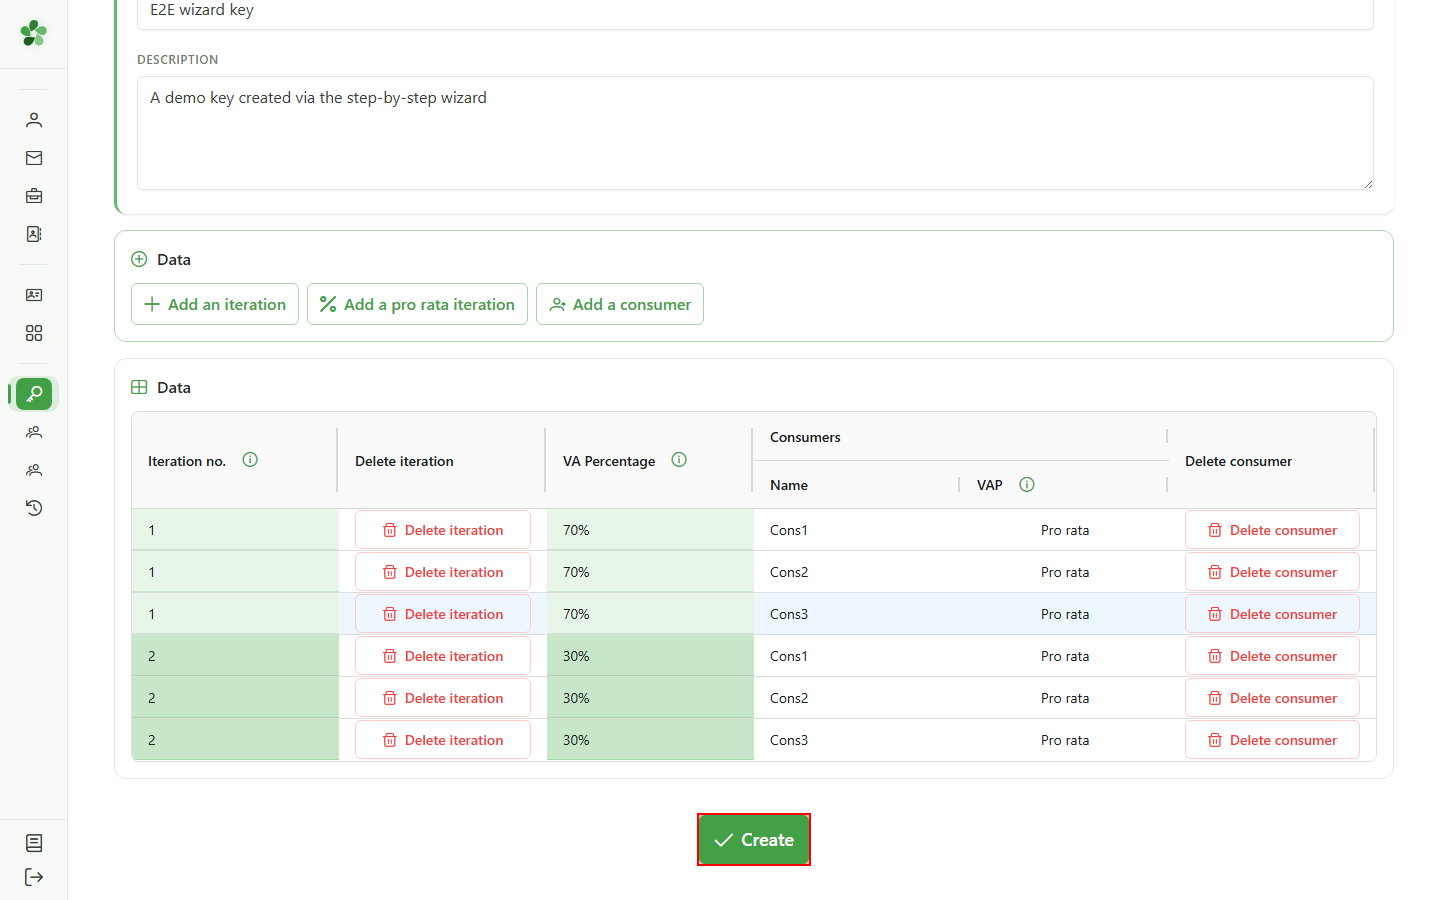
15 Save the key
Final review
Click "Create" to save the key. The grid pre-filled by the wizard is sent to the CRM as-is.
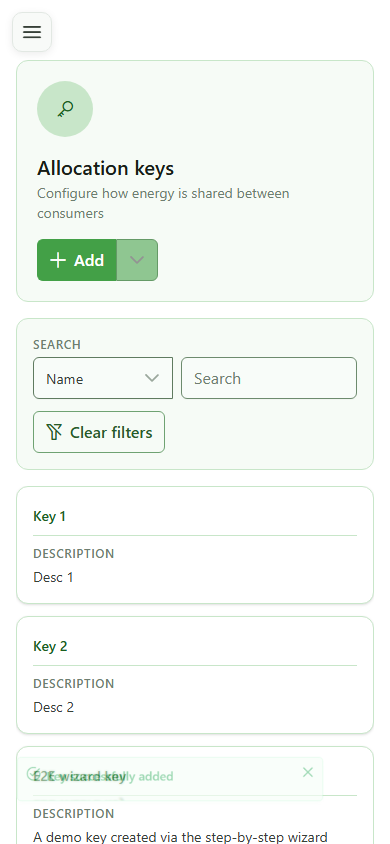
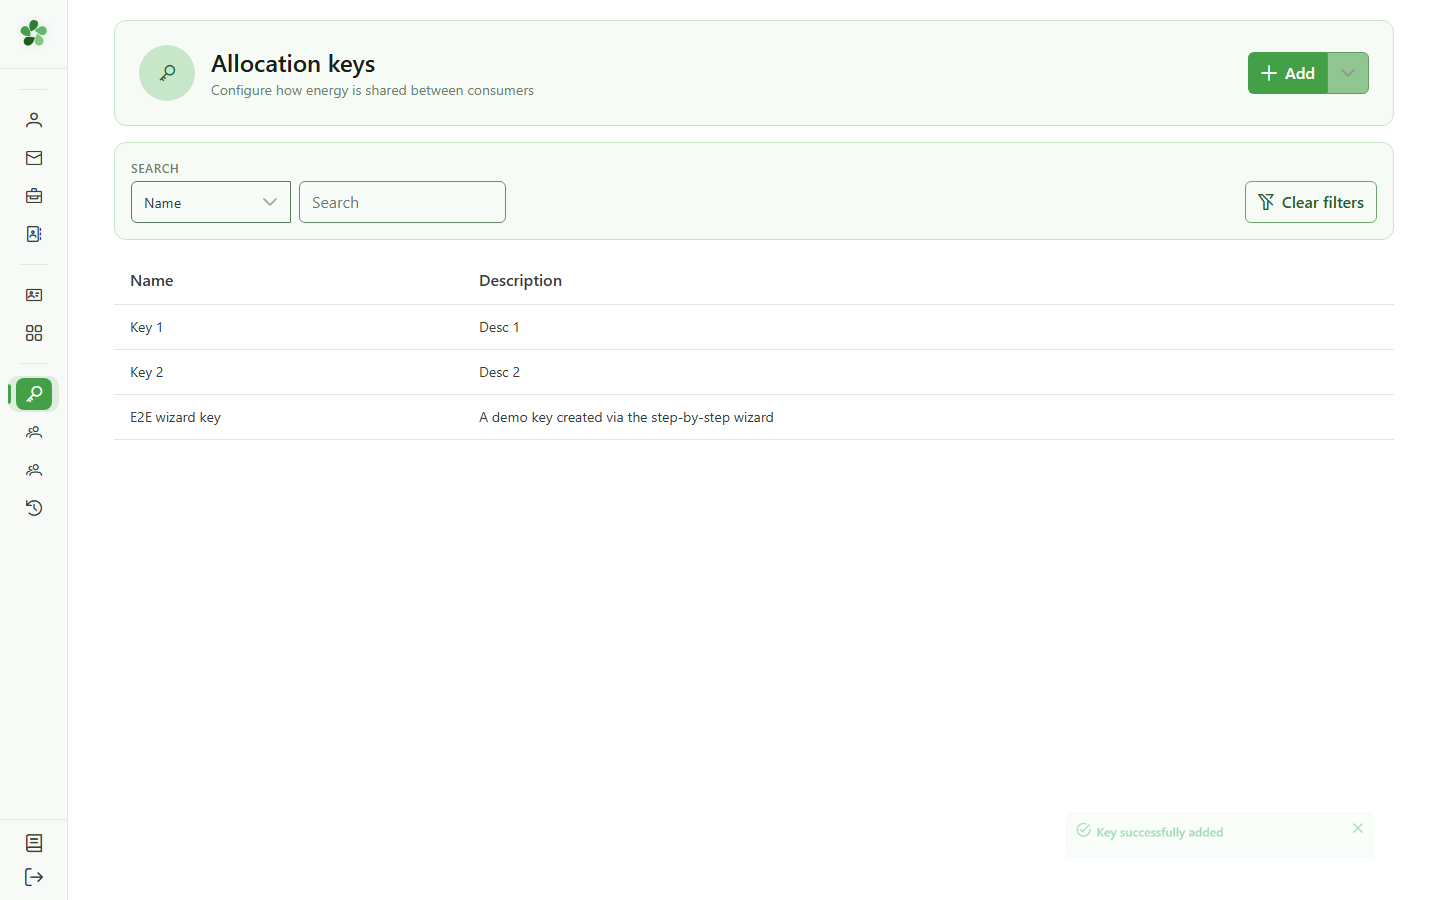
16 Key created
Confirmation
The new "E2E wizard key" shows up in the community's allocation keys list, ready to be associated with a sharing operation.
Create an allocation key (wizard)
Guide utilisateur
User guide
1 Open the create menu
Creating a key
Click the dropdown arrow next to "Add" to reveal the available creation modes — the free grid or the step-by-step wizard.
2 Launch the wizard
Creating a key
Select "Add standard key" to start the step-by-step wizard, which walks you through the configuration in four steps.
3 Number of consumers
Step 1/4 — Consumers
Indicate how many consumers will share the energy. This count drives the size of every iteration the wizard creates — three here.

4 Confirm the step
Step 1/4 — Consumers
Click "Validate" to confirm the consumer count and proceed to the next step.
5 Name the consumers
Step 2/4 — Names
Enter a name for each of the three consumers (Cons1, Cons2, Cons3). These names carry over to every subsequent iteration.
6 Confirm the names
Step 2/4 — Names
Click "Validate" to lock in the consumer names and move on to configuring the iterations.
7 Pick prorata mode
Step 3/4 — Iterations
Select "Prorata" for this first iteration: the energy will be split automatically between consumers based on their actual consumption.
8 Allocate 70%
Step 3/4 — Iterations
Type 70 in the weight field — this iteration will receive 70% of the available energy. The total must reach 100% to validate the step.

9 Next iteration generated
Step 3/4 — Iterations
The wizard sees the total is still below 100% and spawns a second iteration to configure. It will keep adding rows until the sum is reached.
10 Prorata mode (iter. 2)
Step 3/4 — Iterations
Pick "Prorata" again for the second iteration so it uses the same automatic split logic.
11 Allocate 30%
Step 3/4 — Iterations
Type 30 for this second iteration — combined with the earlier 70%, the total now reaches 100% and unlocks the finalisation step.
12 Confirm iterations
Step 3/4 — Iterations
Click "Validate": the total reaches 100% and the wizard opens the final finalisation step.

13 Name the key
Step 4/4 — Finalisation
Give the new allocation key a name and a description. This metadata appears in the key list and makes the key easier to reuse.
14 Submit the wizard
Step 4/4 — Finalisation
Submit the wizard to materialise the full grid: a review page opens so you can re-read the configuration before persisting it.
15 Save the key
Final review
Click "Create" to save the key. The grid pre-filled by the wizard is sent to the CRM as-is.

16 Key created
Confirmation
The new "E2E wizard key" shows up in the community's allocation keys list, ready to be associated with a sharing operation.