Create a member
Guide utilisateur
User guide
1 Open my communities
Navigation
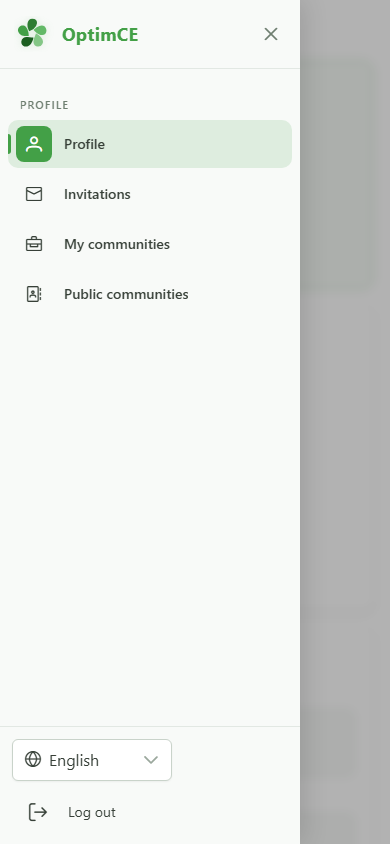
In the sidebar's profile menu, click "My communities" to see the list of communities you belong to.
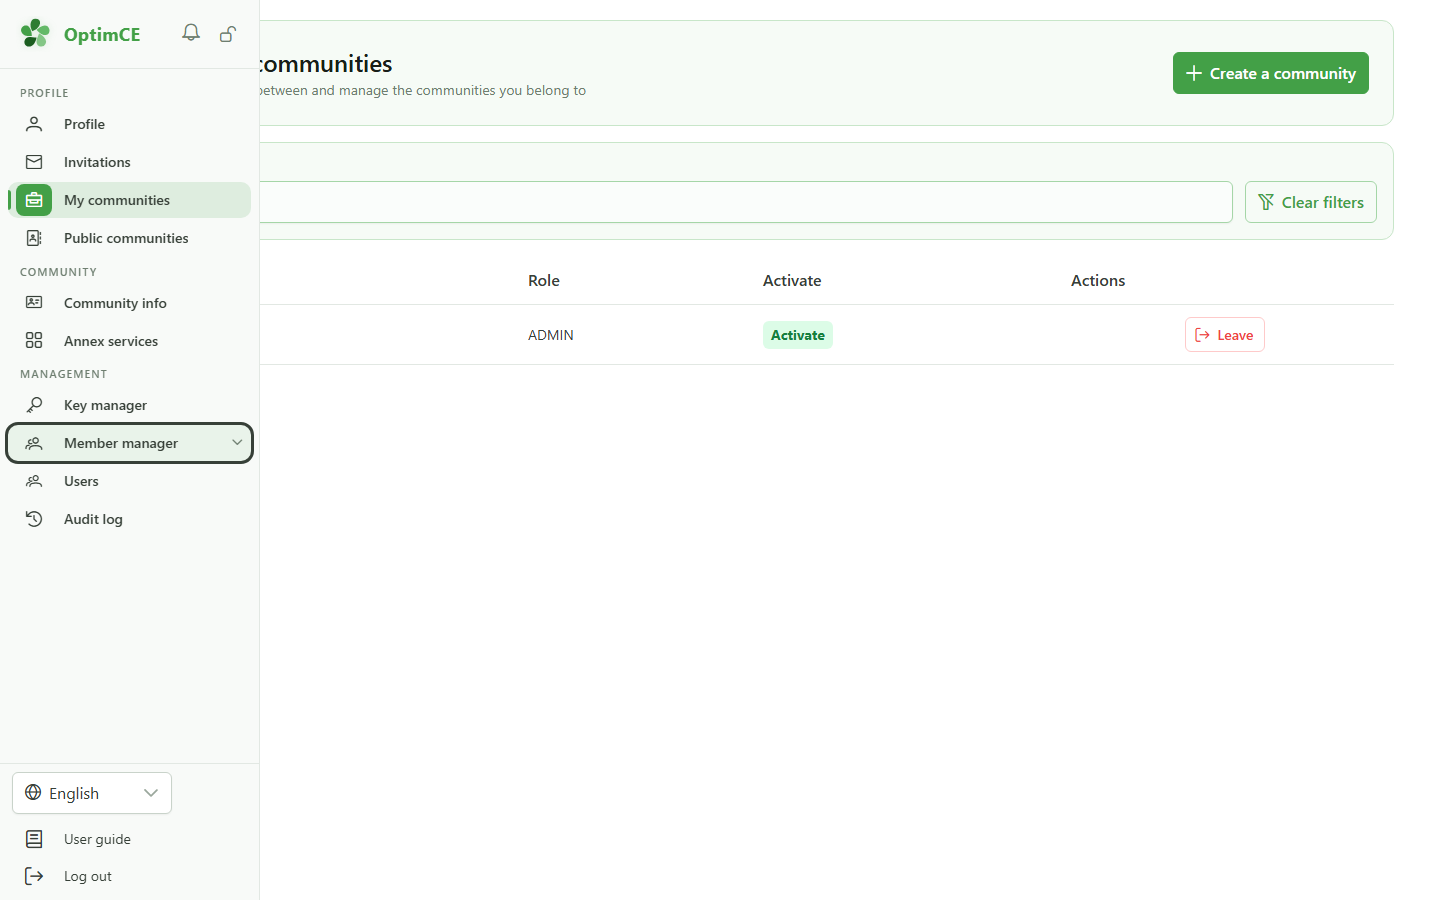
2 Open the Members group
Navigation
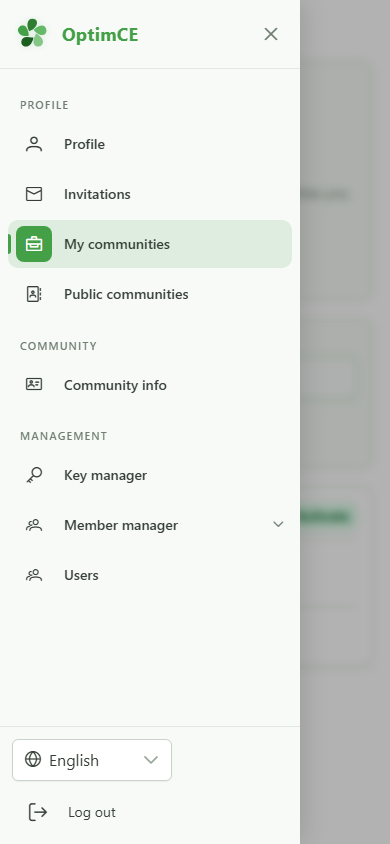
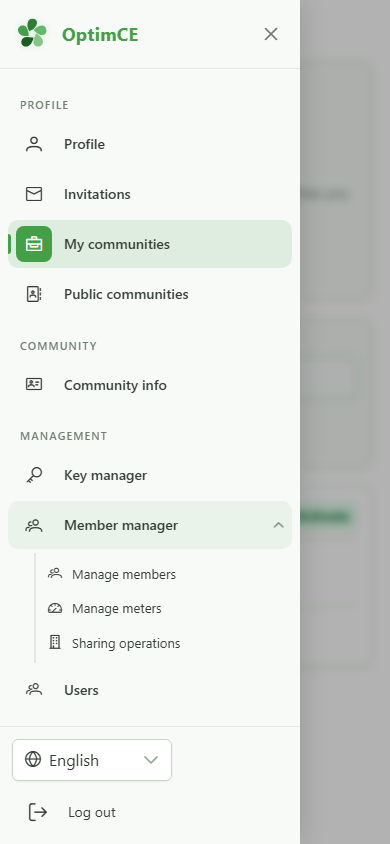
In the "Management" section, click "Members" to reveal the submenu (members, meters, sharing operations).
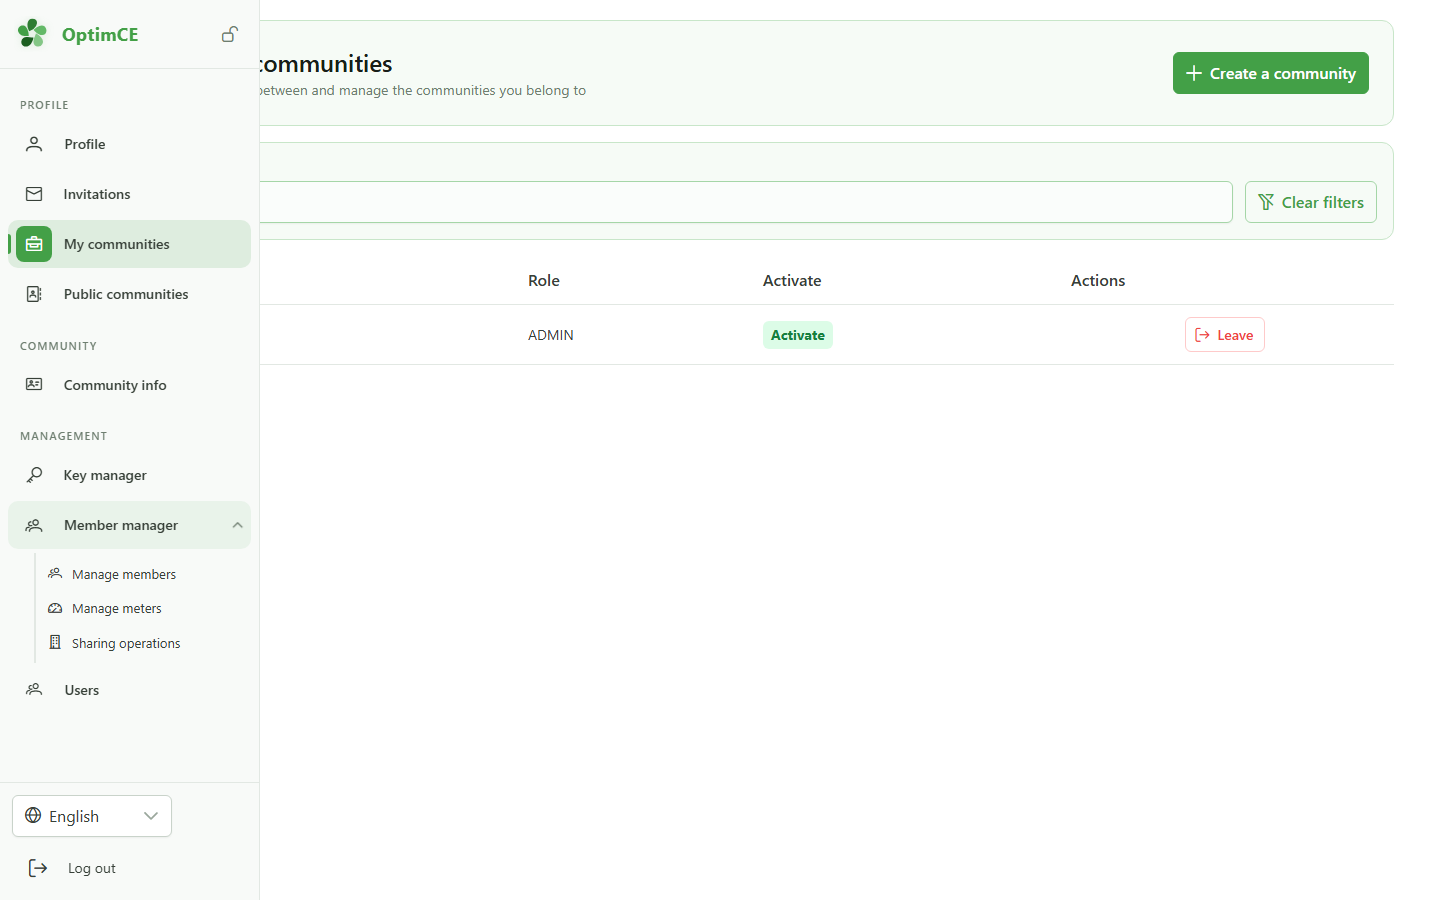
3 Open the members list
Navigation
In the submenu, click "Members" — this is the starting point for adding a new person to the community.
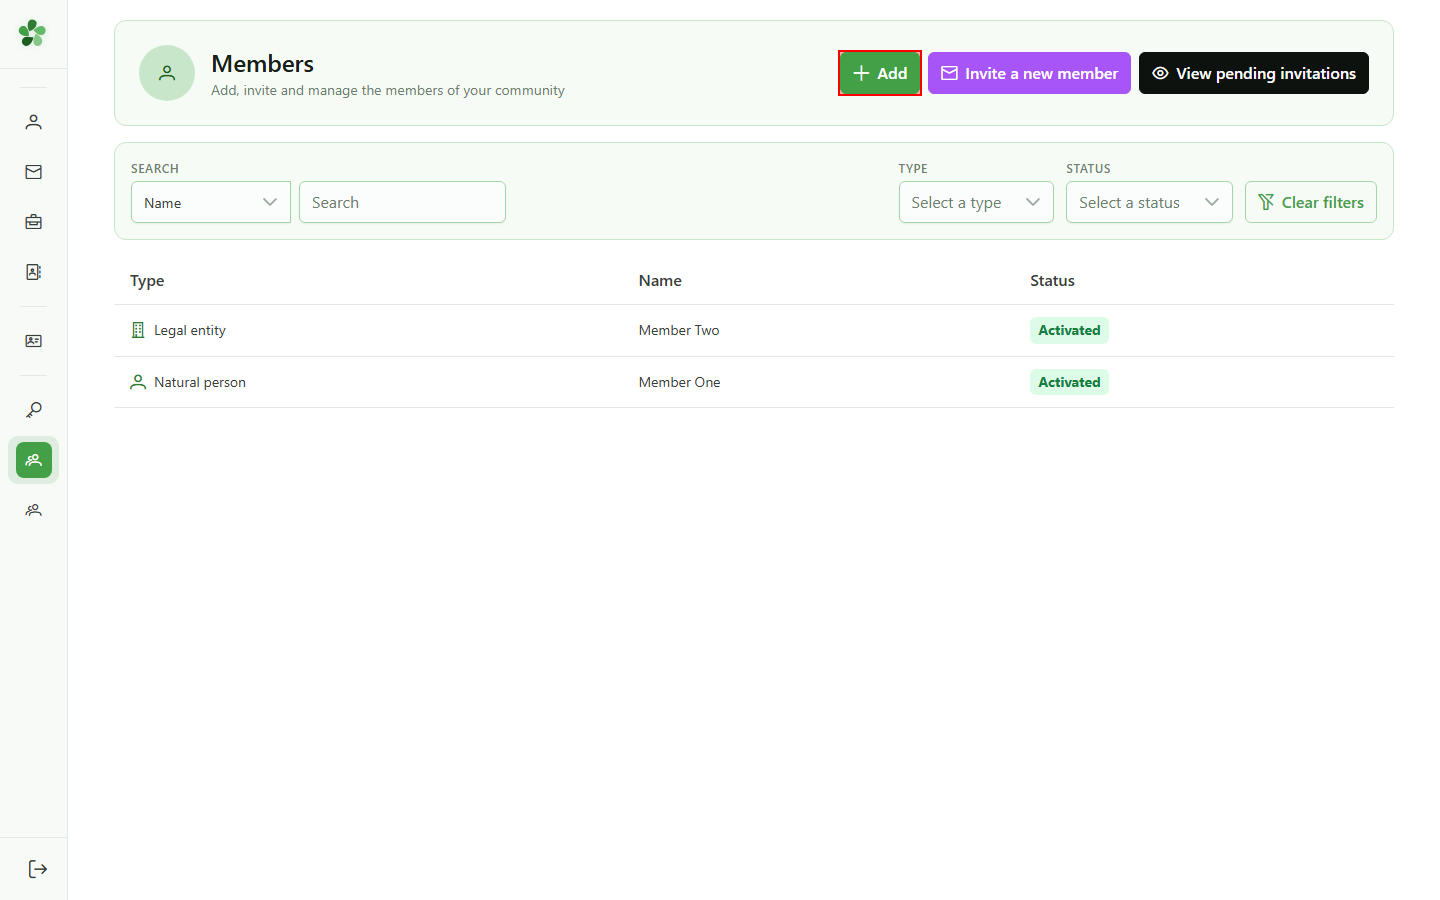
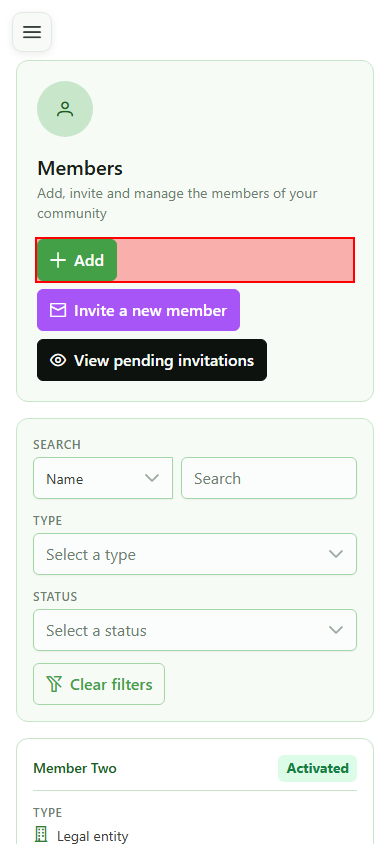
4 Start creating a member
Adding a member
Click "Add member" at the top of the list to open the four-step creation wizard.
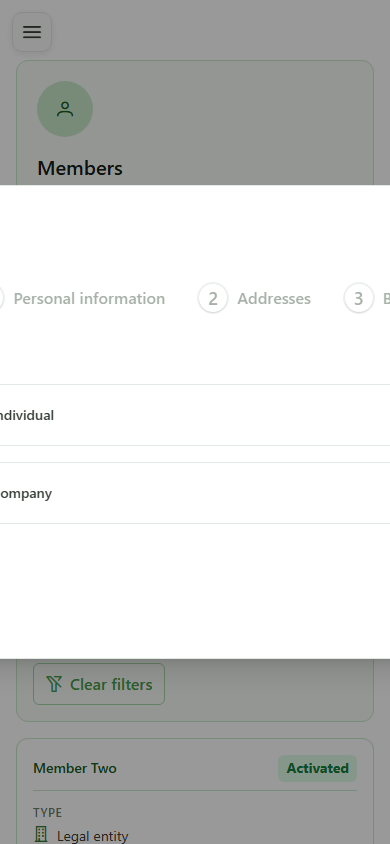
5 Pick the member type
Step 1 — Type
Select "Individual" to create a personal member. The "Company" option is reserved for legal entities and asks for different fields later.

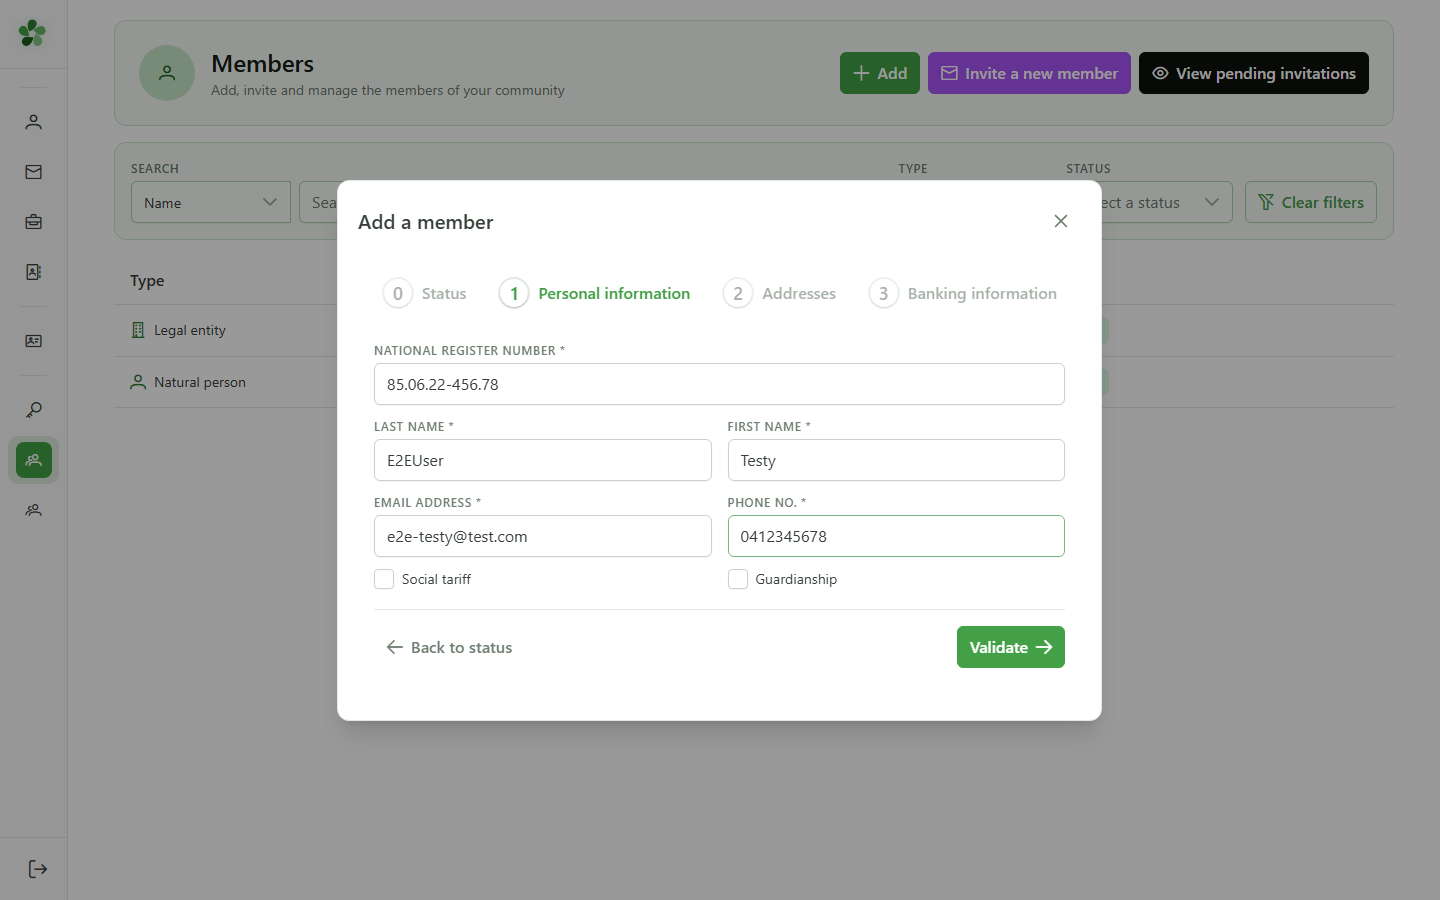
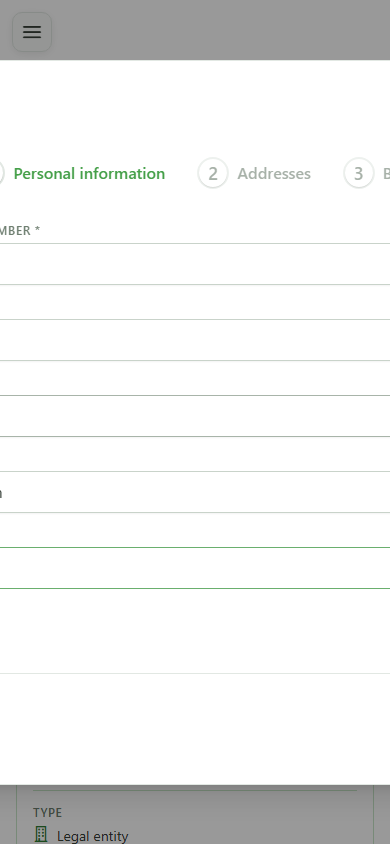
6 Fill in the personal information
Step 2 — Identity
Enter the national number, last name, first name, email address and phone number of the new member. All these fields are required to move past this step.
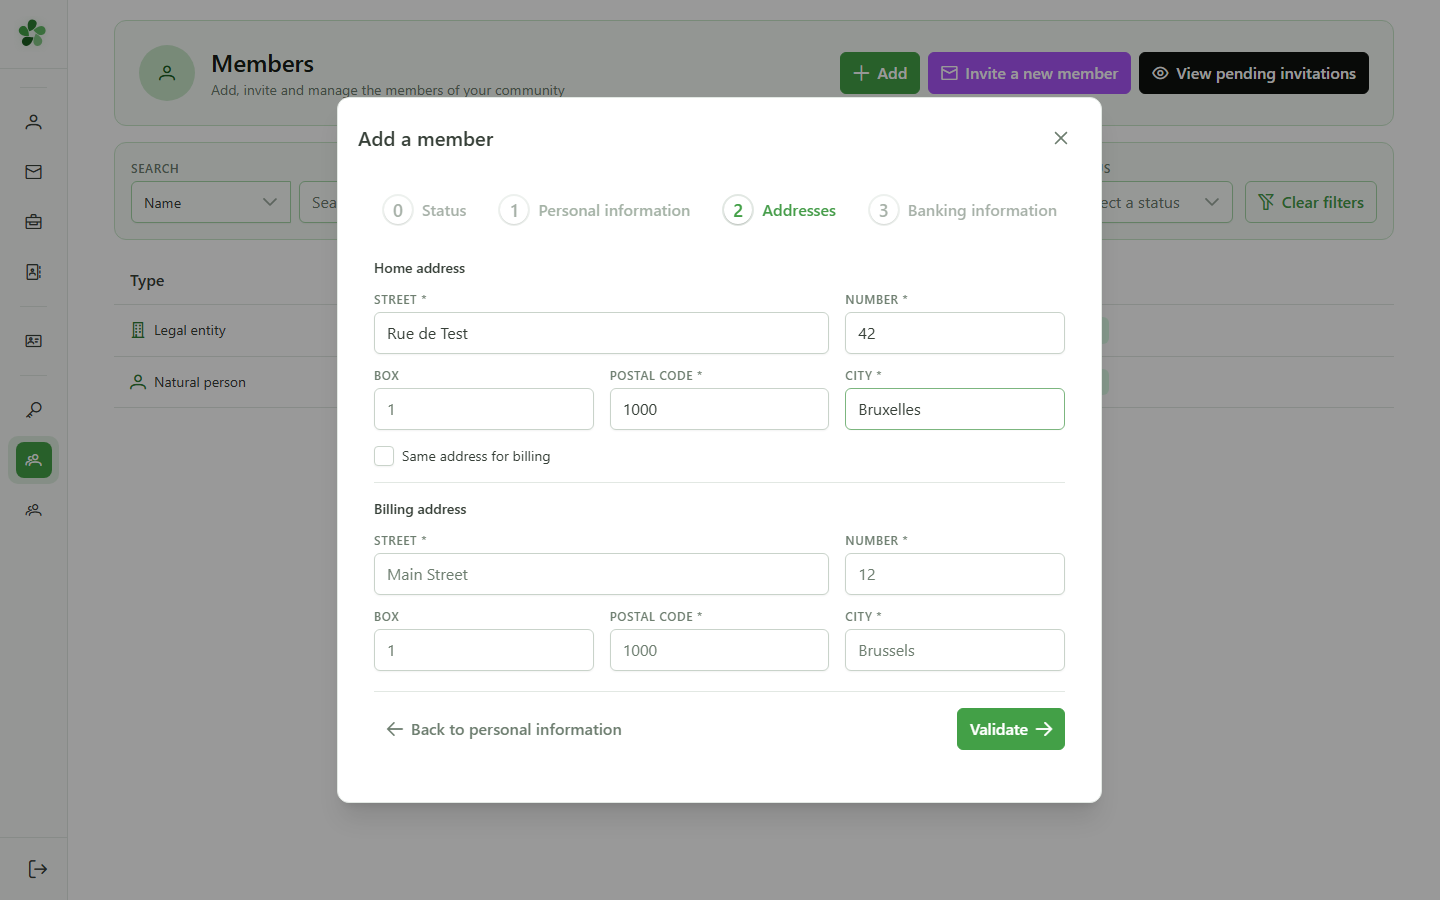
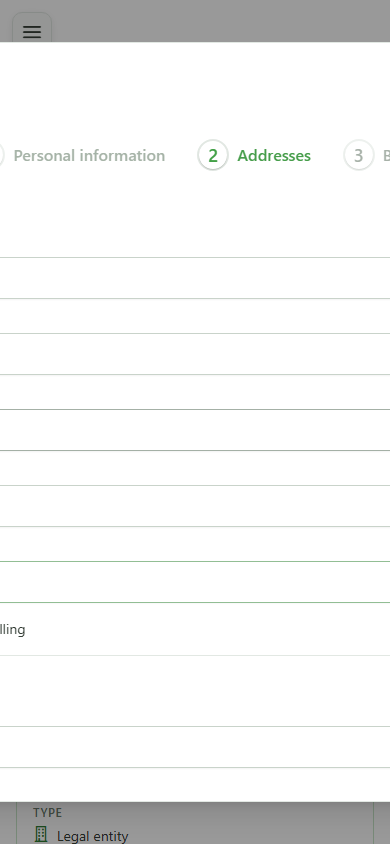
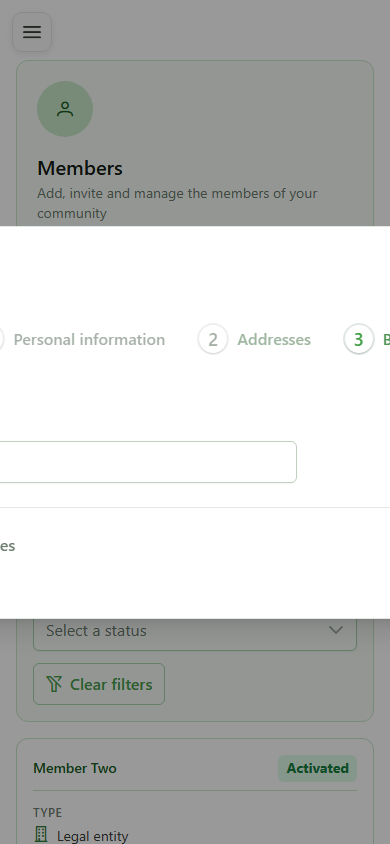
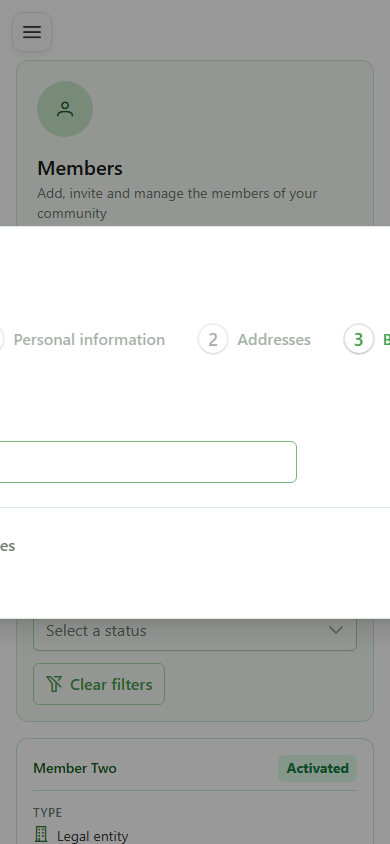
7 Enter the address
Step 3 — Address
Fill in the home address: street, number, postcode and city. If the billing address is identical, tick the "Same address" checkbox right after to reuse it automatically.
8 Enter the banking details
Step 4 — Banking
Enter the member's IBAN — it is used for refunds tied to sharing operations. The format is validated as you type.

9 Submit the new member
Confirmation
Click "Submit" to send the form to the CRM. The member is created immediately and attached to the active community.

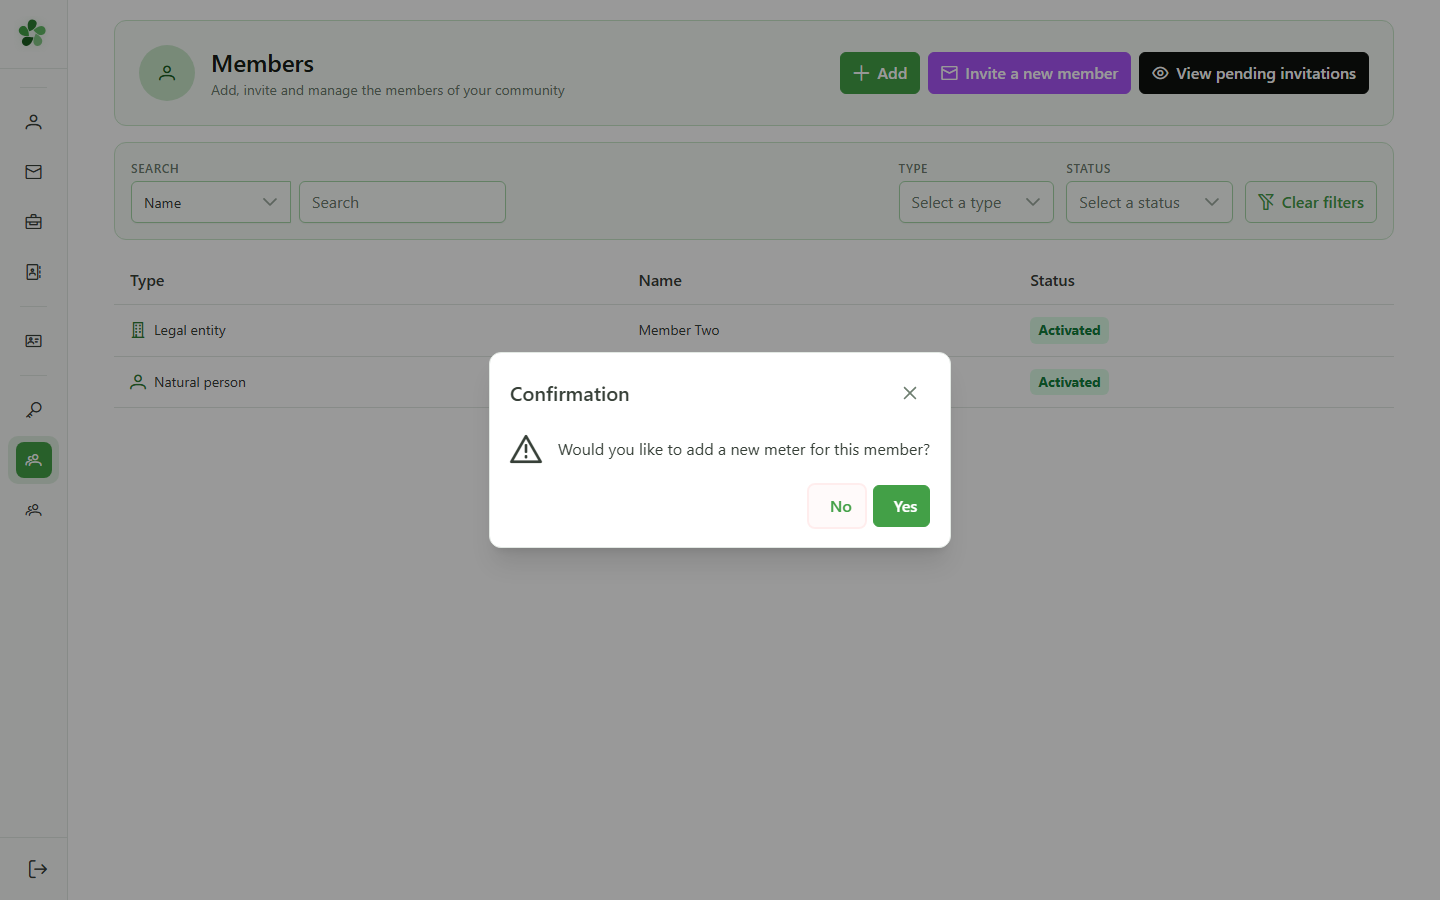
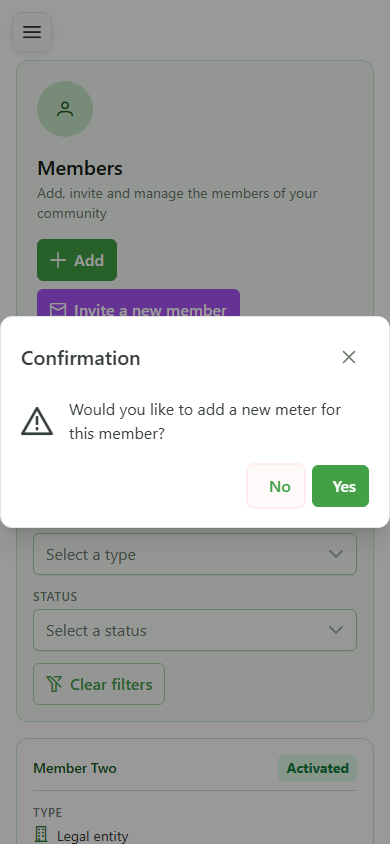
10 Skip adding a meter
Confirmation dialog
A dialog offers to chain into meter creation. Pick "No" to stop here — you can always add a meter later from the member's detail page.
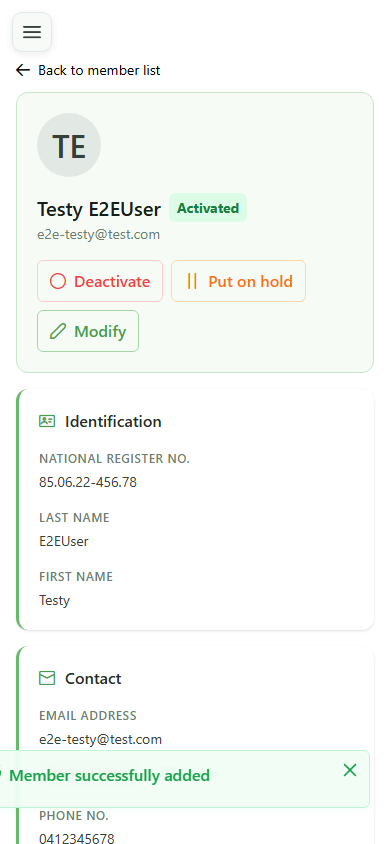
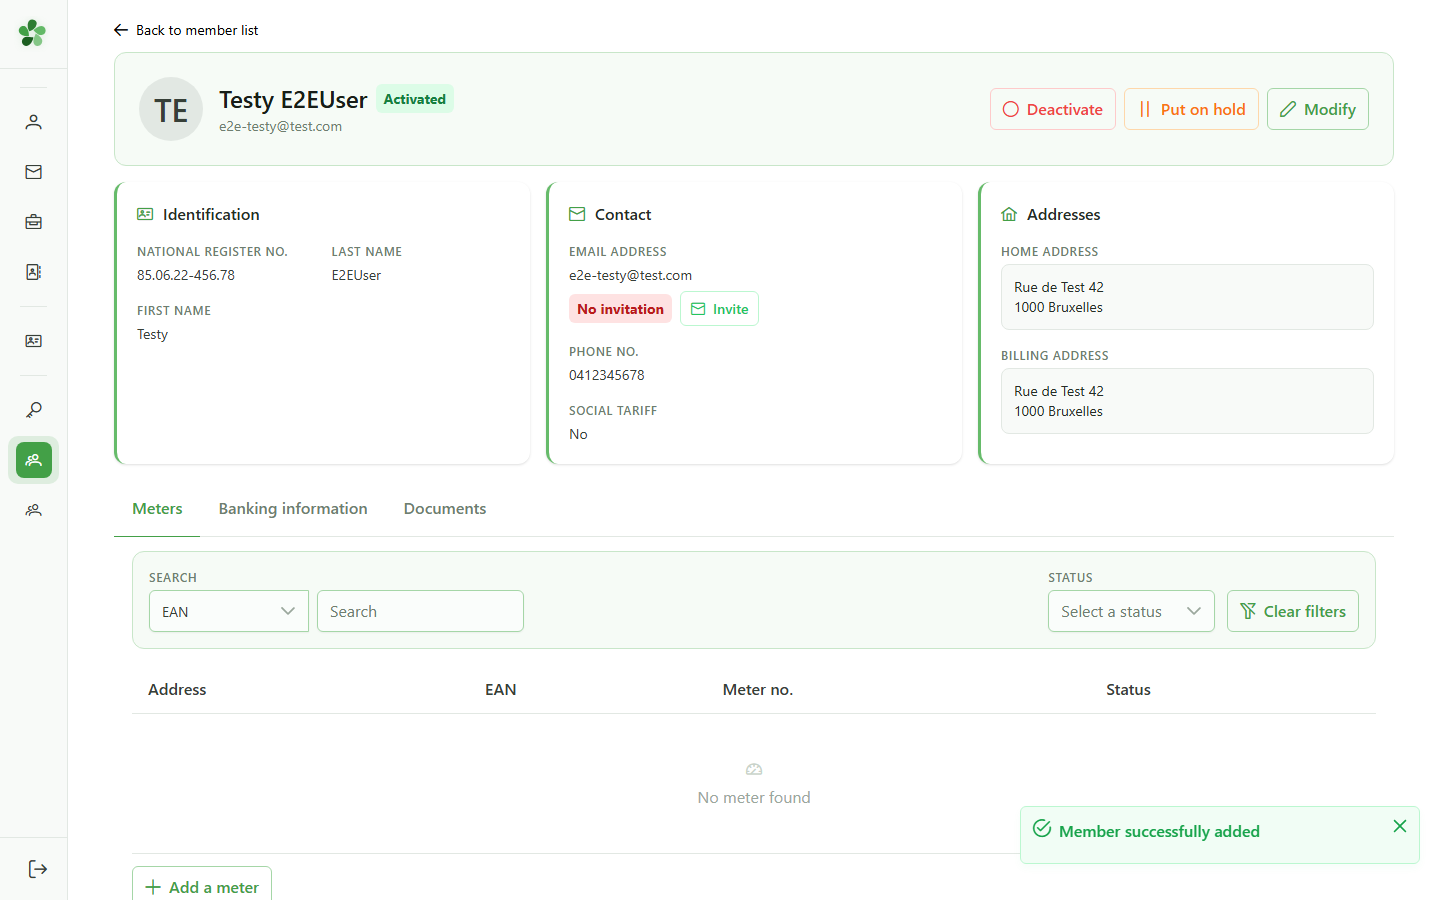
11 Member created
Confirmation
The new member's detail page is now visible: their full name shows in the header and every field you entered is rendered. The member is ready to use in sharing operations.
Create a member
Guide utilisateur
User guide
1 Open my communities
Navigation
Tap the menu icon to open the navigation drawer, then "My communities" to see the list of communities you belong to.
2 Open the Members group
Navigation
In the drawer, under "Management", tap "Members" to reveal the submenu (members, meters, sharing operations).
3 Open the members list
Navigation
In the submenu, tap "Members" — this is the starting point for adding a new person to the community.
4 Start creating a member
Adding a member
Click "Add member" at the top of the list to open the four-step creation wizard.
5 Pick the member type
Step 1 — Type
Select "Individual" to create a personal member. The "Company" option is reserved for legal entities and asks for different fields later.
6 Fill in the personal information
Step 2 — Identity
Enter the national number, last name, first name, email address and phone number of the new member. All these fields are required to move past this step.
7 Enter the address
Step 3 — Address
Fill in the home address: street, number, postcode and city. If the billing address is identical, tick the "Same address" checkbox right after to reuse it automatically.
8 Enter the banking details
Step 4 — Banking
Enter the member's IBAN — it is used for refunds tied to sharing operations. The format is validated as you type.
9 Submit the new member
Confirmation
Click "Submit" to send the form to the CRM. The member is created immediately and attached to the active community.
10 Skip adding a meter
Confirmation dialog
A dialog offers to chain into meter creation. Pick "No" to stop here — you can always add a meter later from the member's detail page.
11 Member created
Confirmation
The new member's detail page is now visible: their full name shows in the header and every field you entered is rendered. The member is ready to use in sharing operations.