Bill a sharing operation, from tariff to payment
Guide utilisateur
User guide
1 Open billing
Navigation
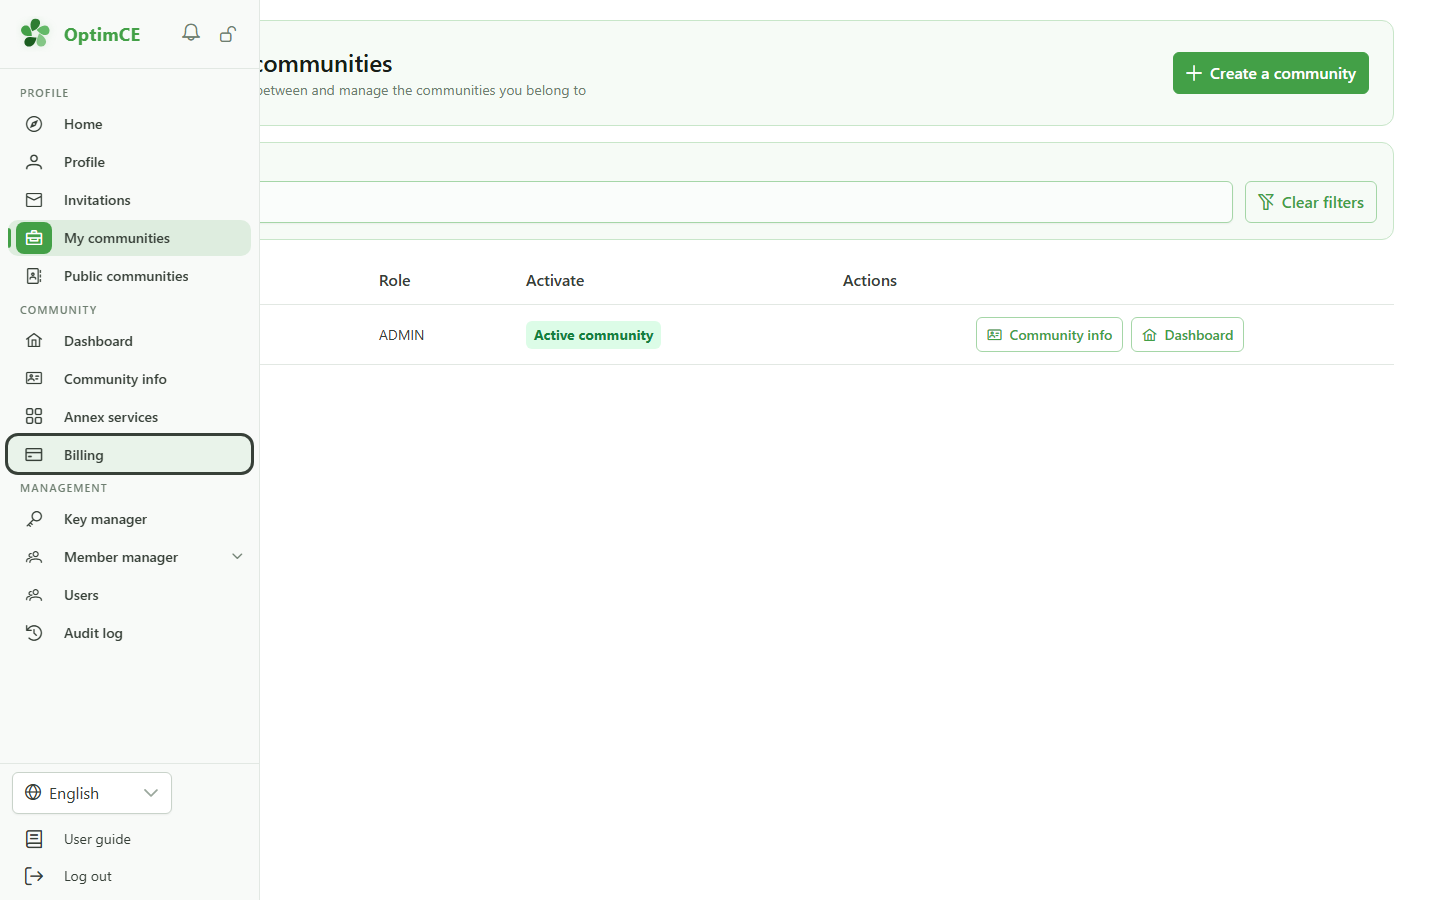
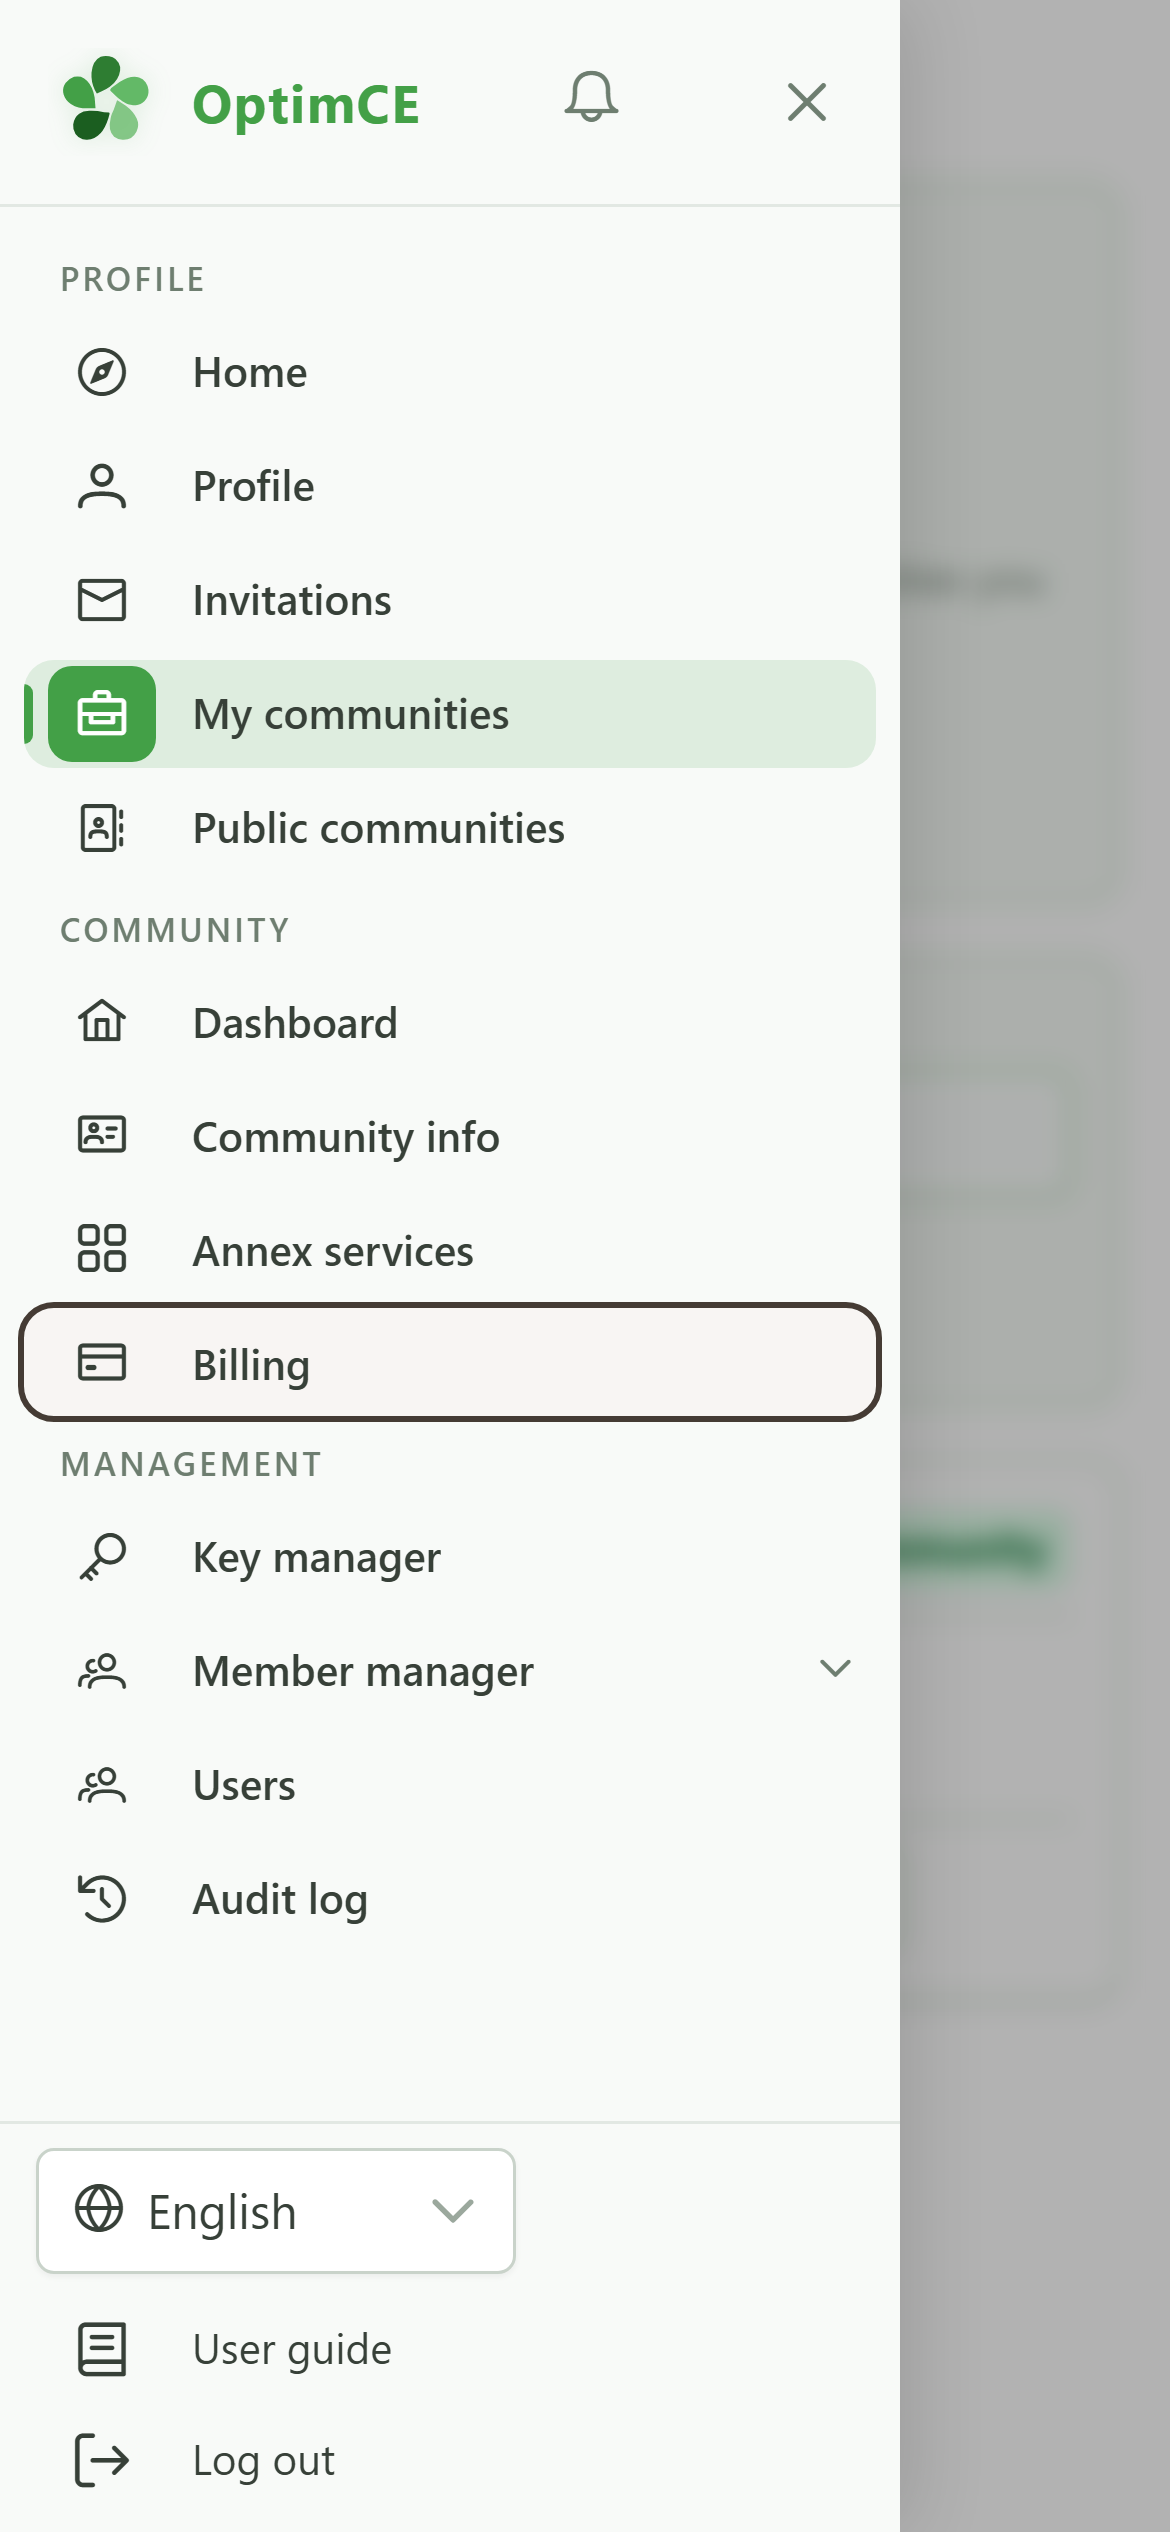
In the sidebar's "Community" section, click "Billing" to open the community's billing module.
2 The billing module
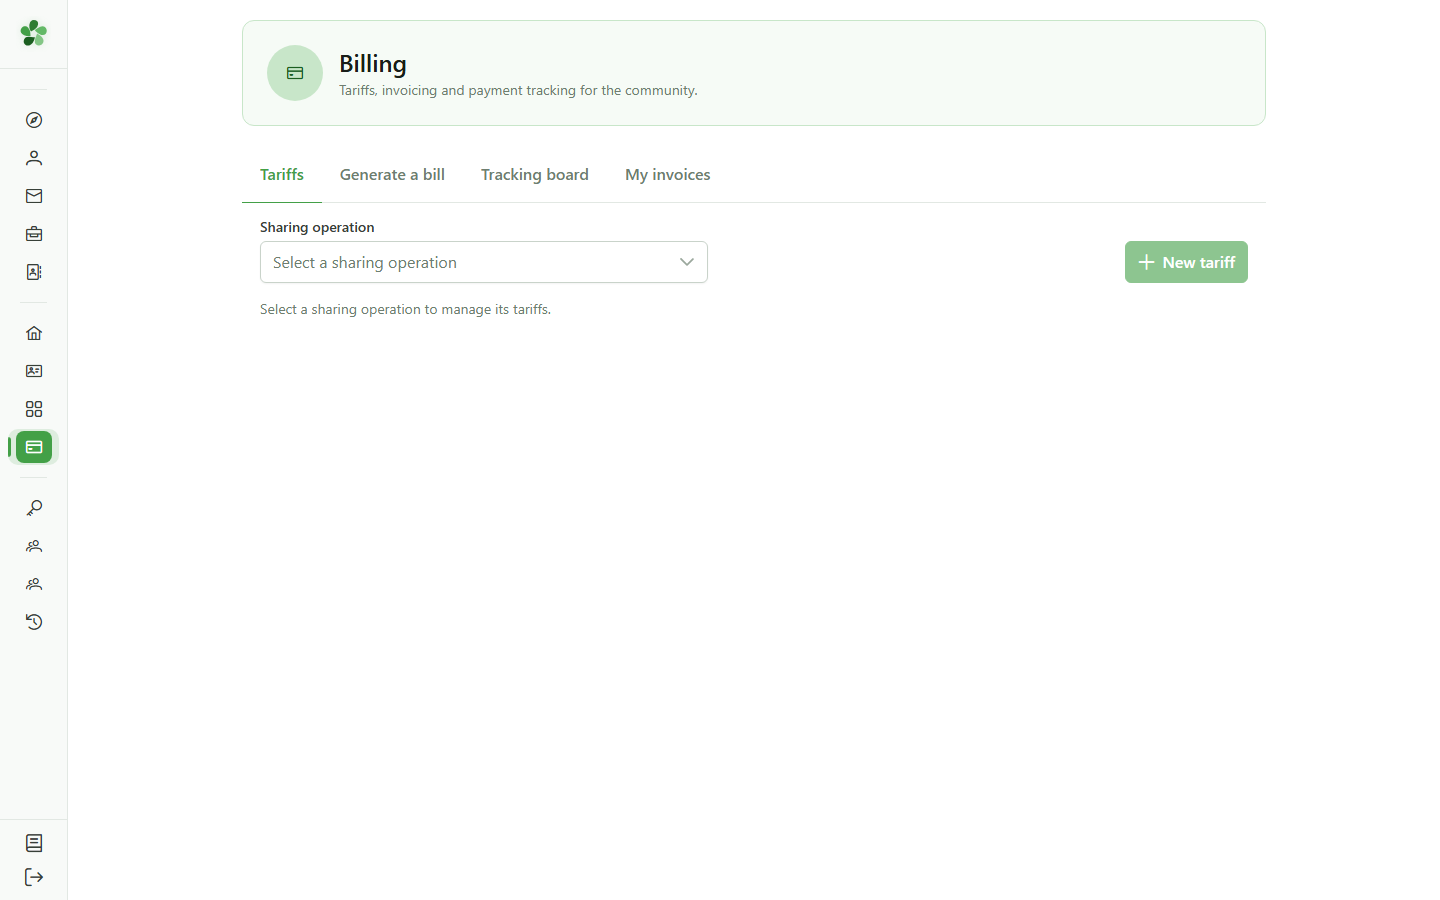
Billing
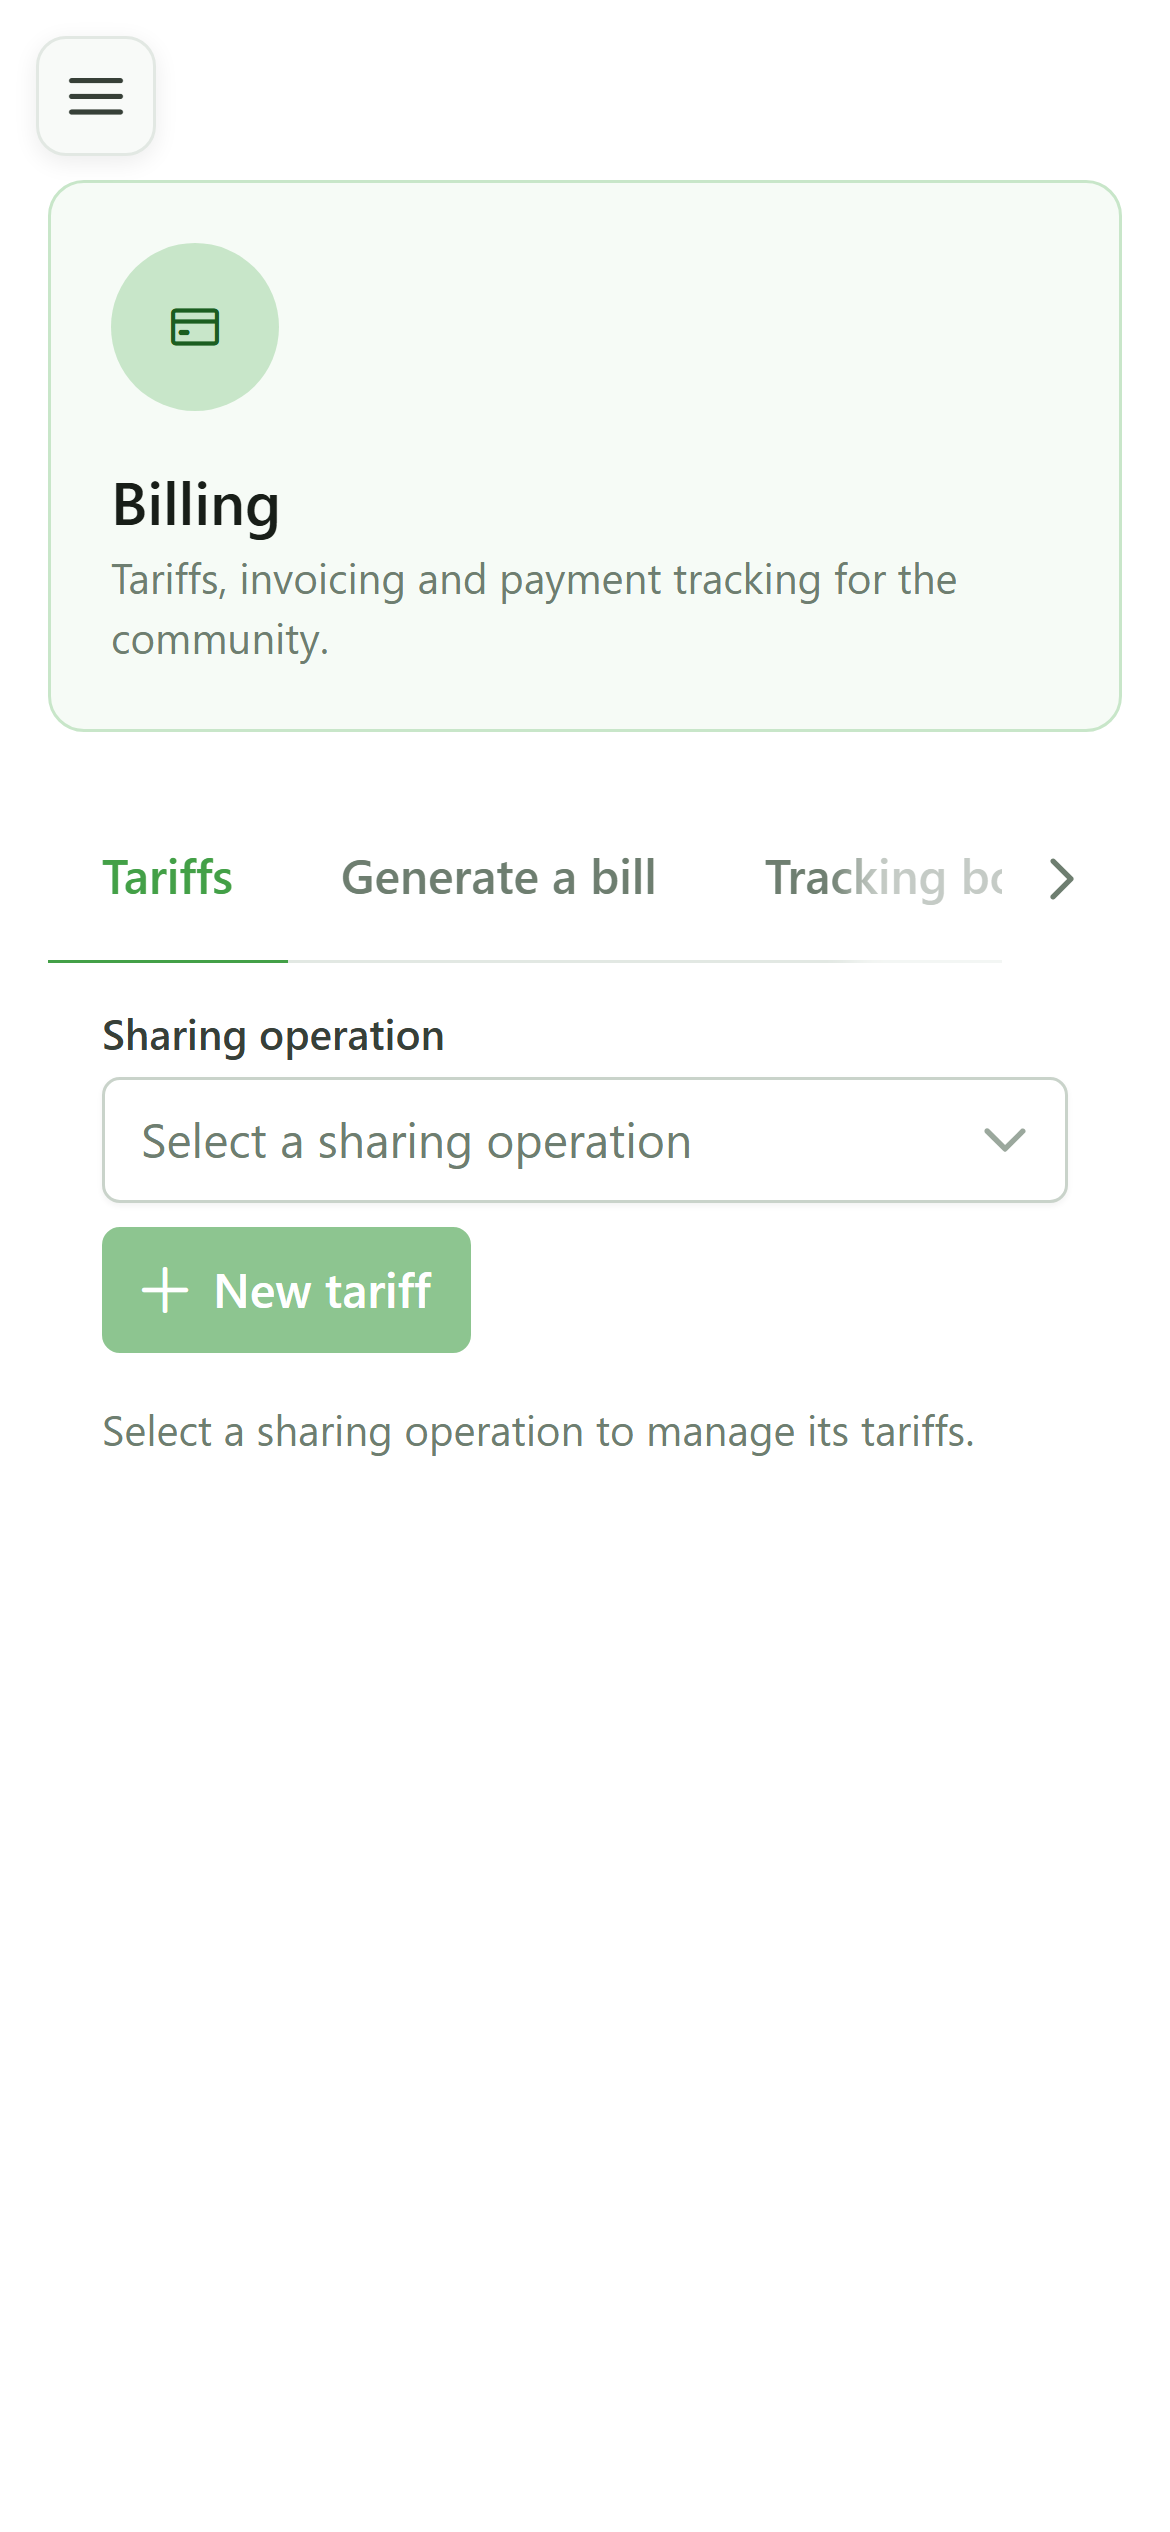
The module opens on the "Tariffs" tab. This is where you set the price of the shared energy before generating invoices. The "Generate" and "Tracking" tabs come next.
3 Pick the sharing operation
Step 1 — Tariffs
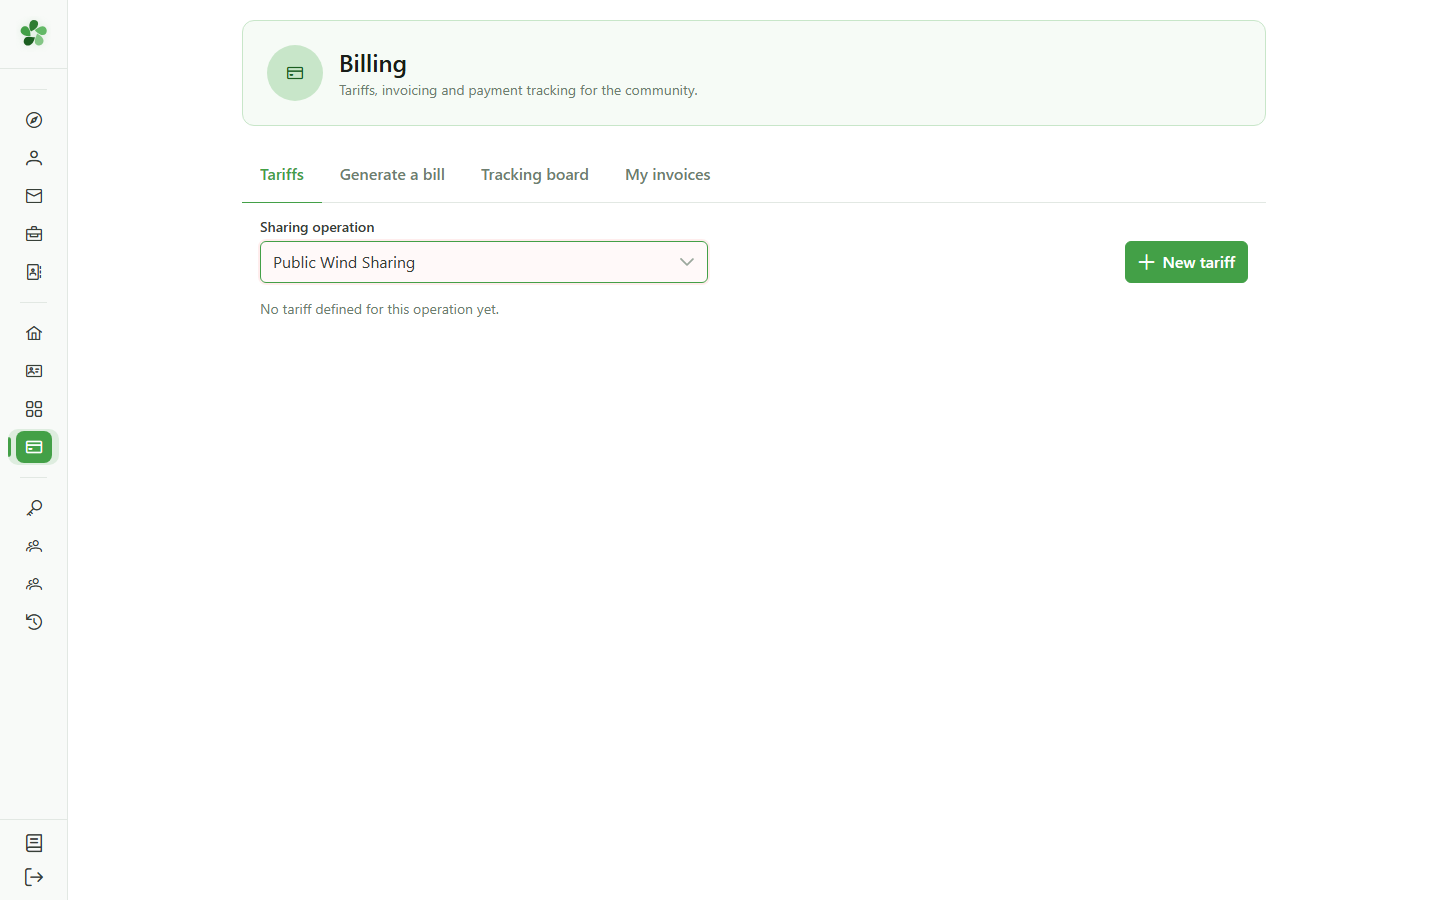
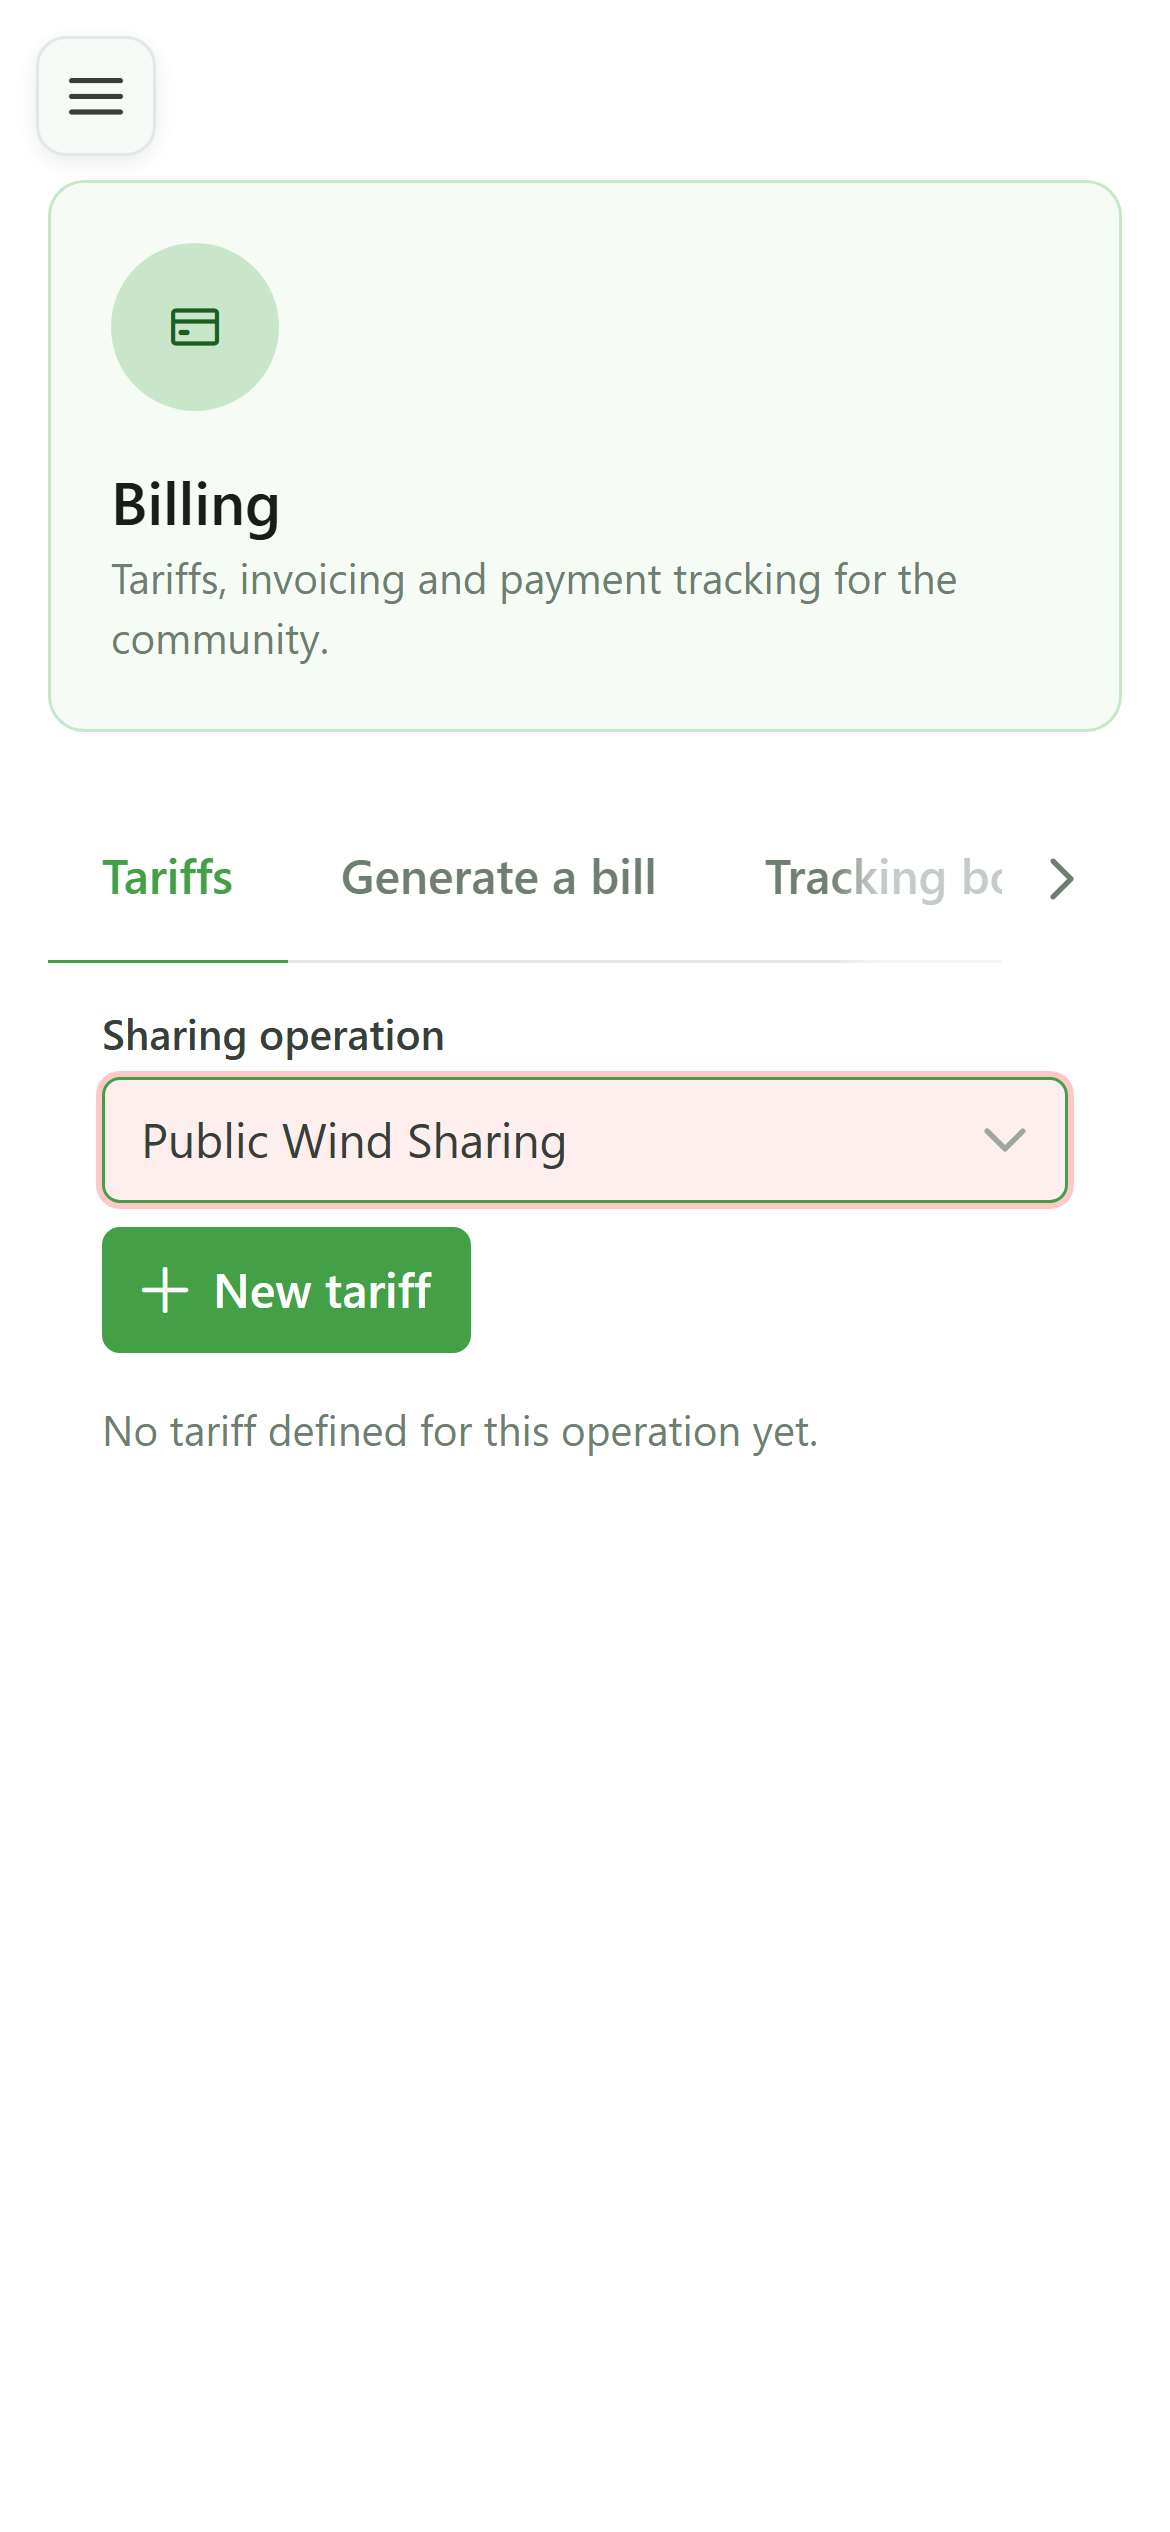
Select the sharing operation to bill — here "Public Wind Sharing". Tariffs and invoices are always scoped to an operation.
4 Add a tariff
Step 1 — Tariffs
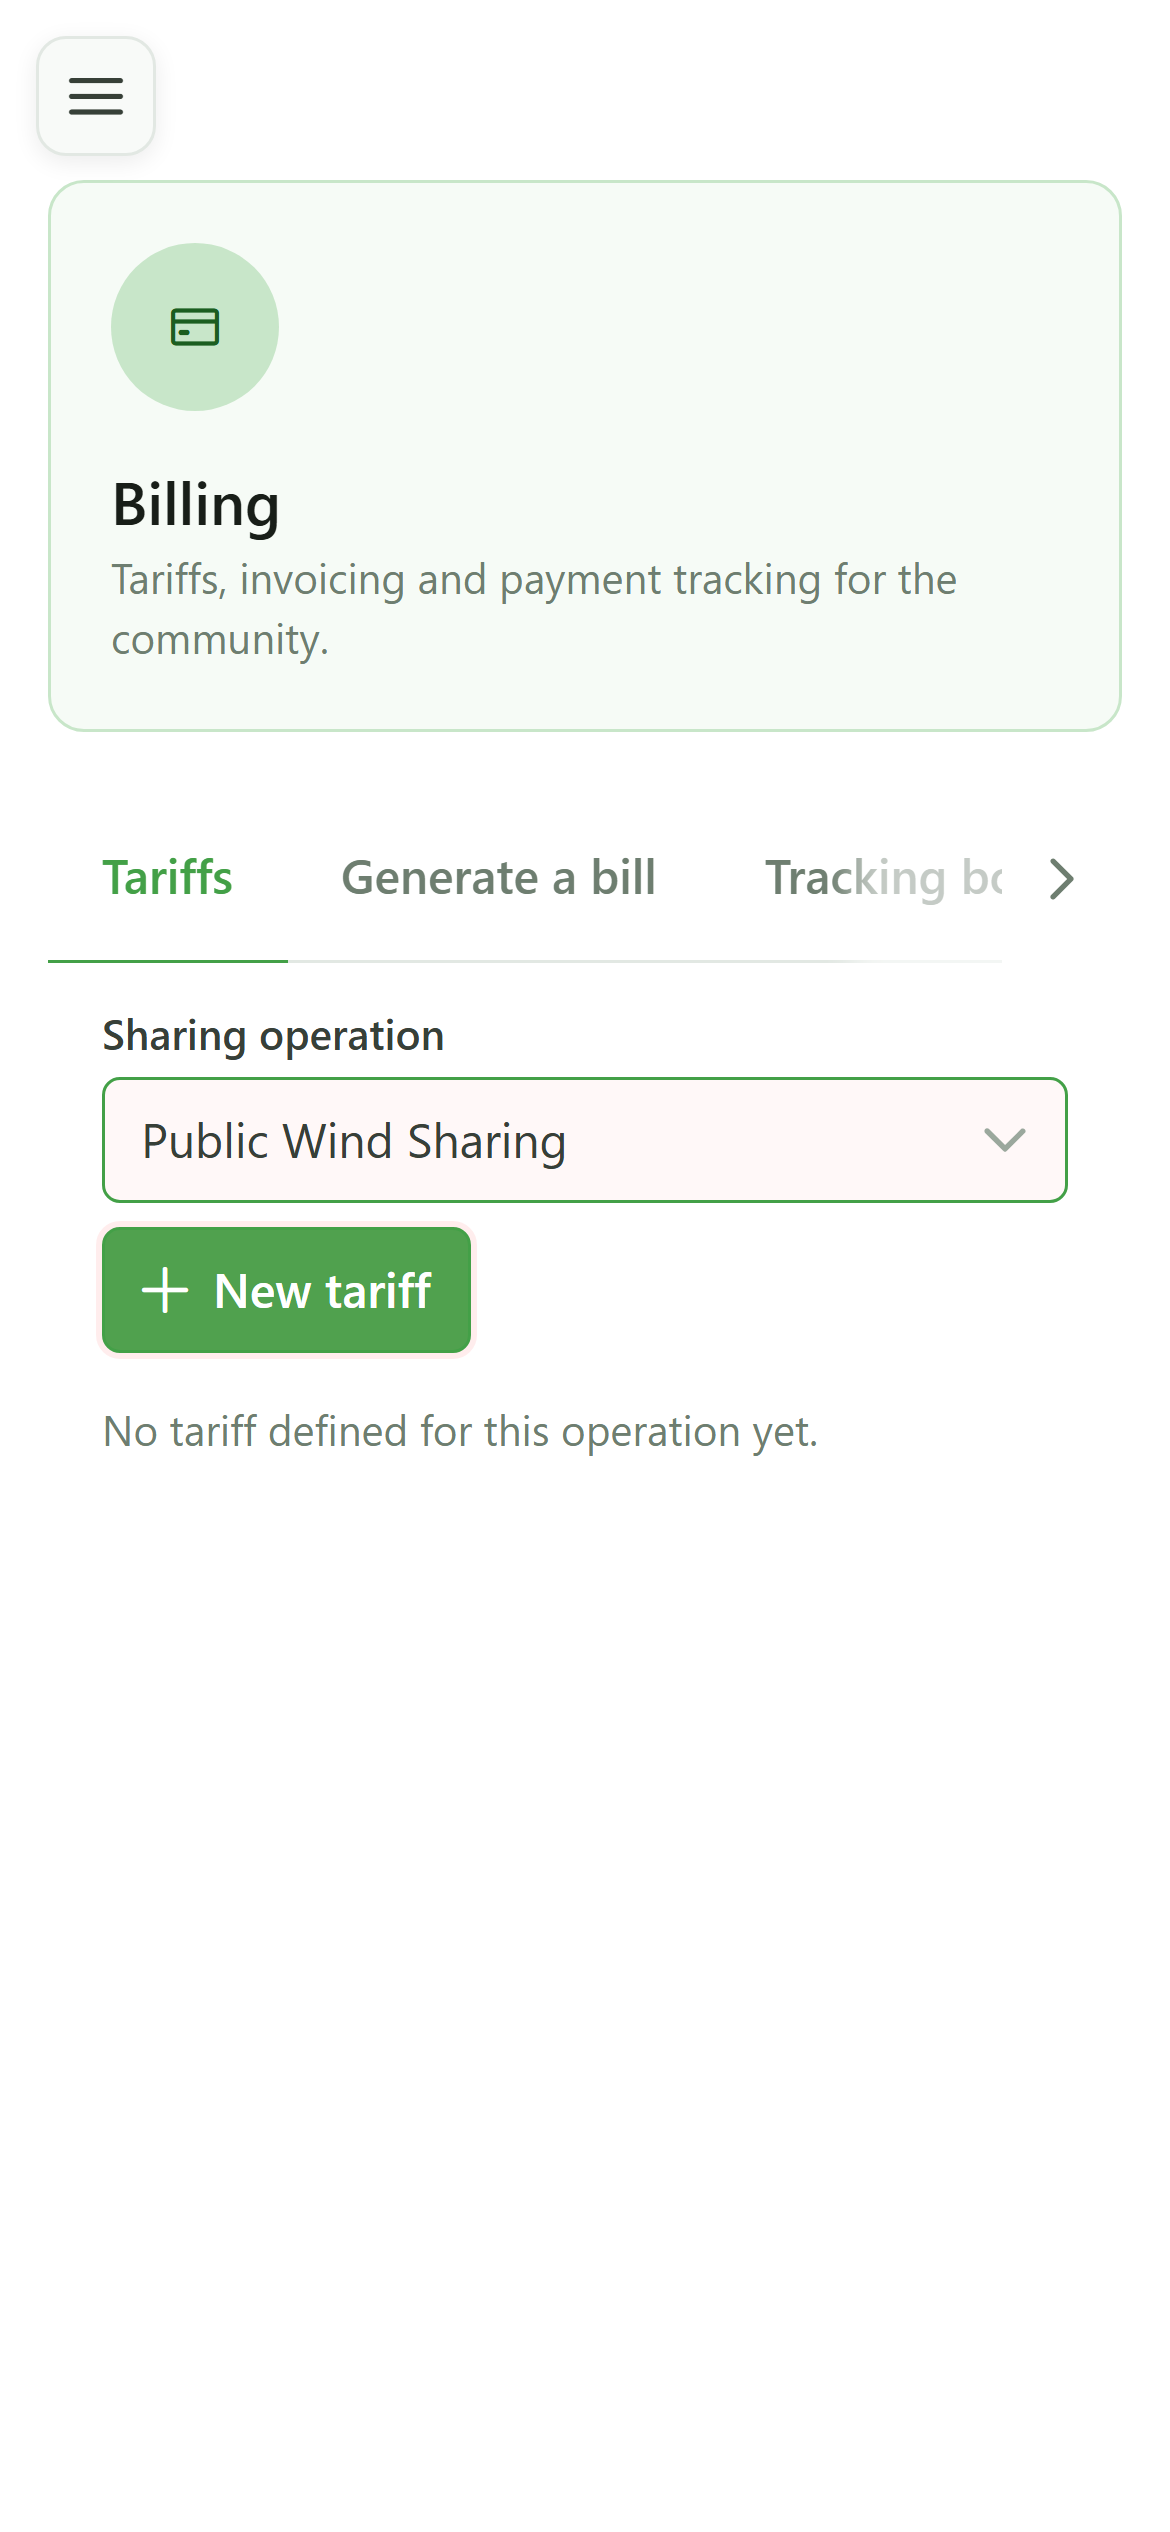
Click "New tariff" to open the creation dialog. By default the tariff covers consumer selling and applies to the whole operation.
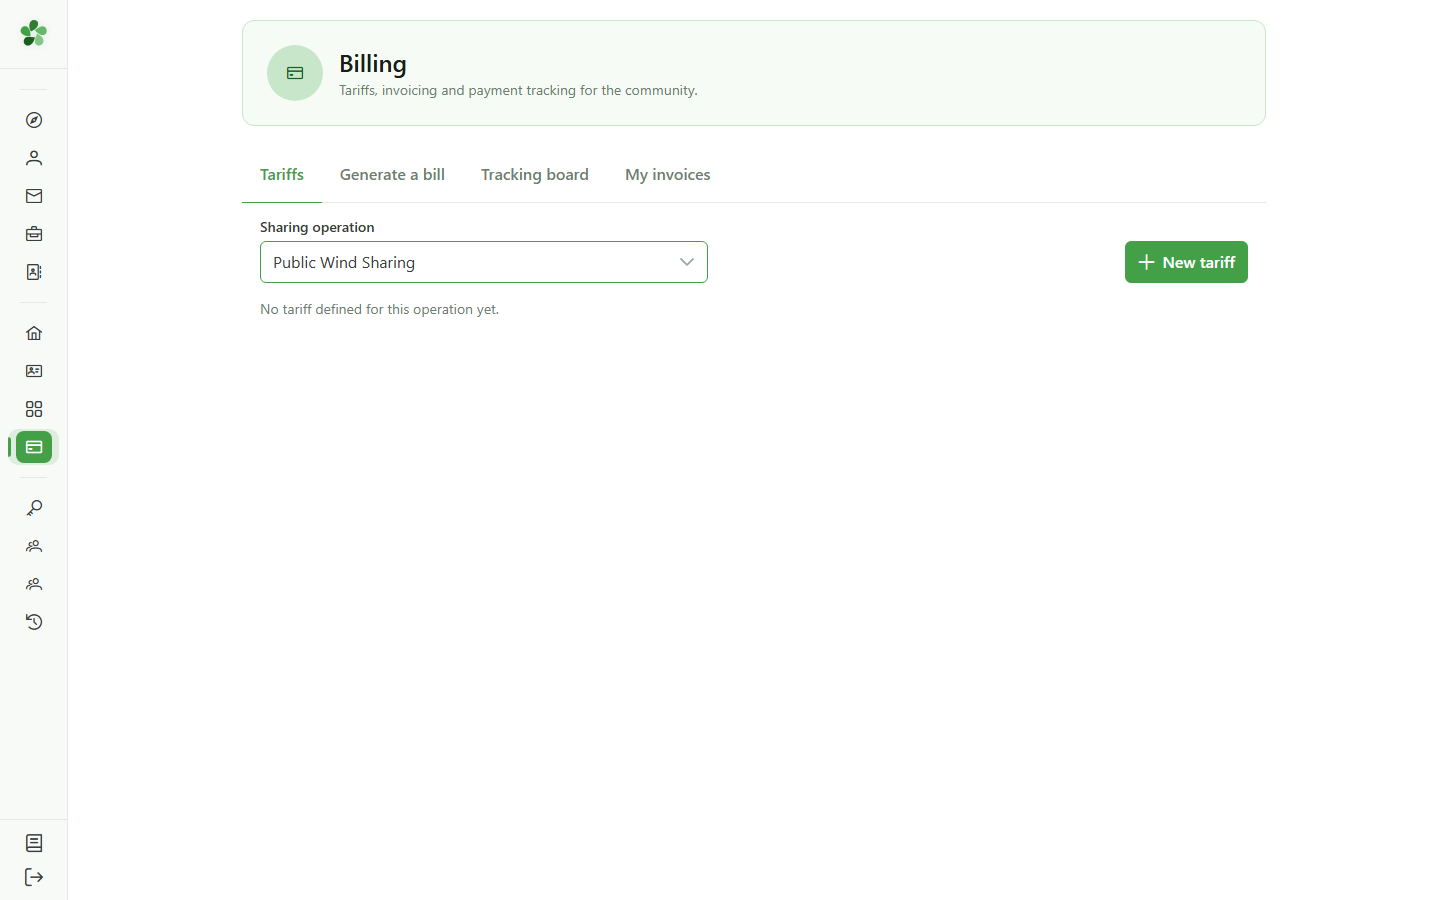
5 Fill in the tariff
Step 1 — Tariffs
Enter the shared-kWh price (0.1200 EUR), the start of validity and a label. The "Consumer selling" kind and "Global" scope are right for billing the whole operation.
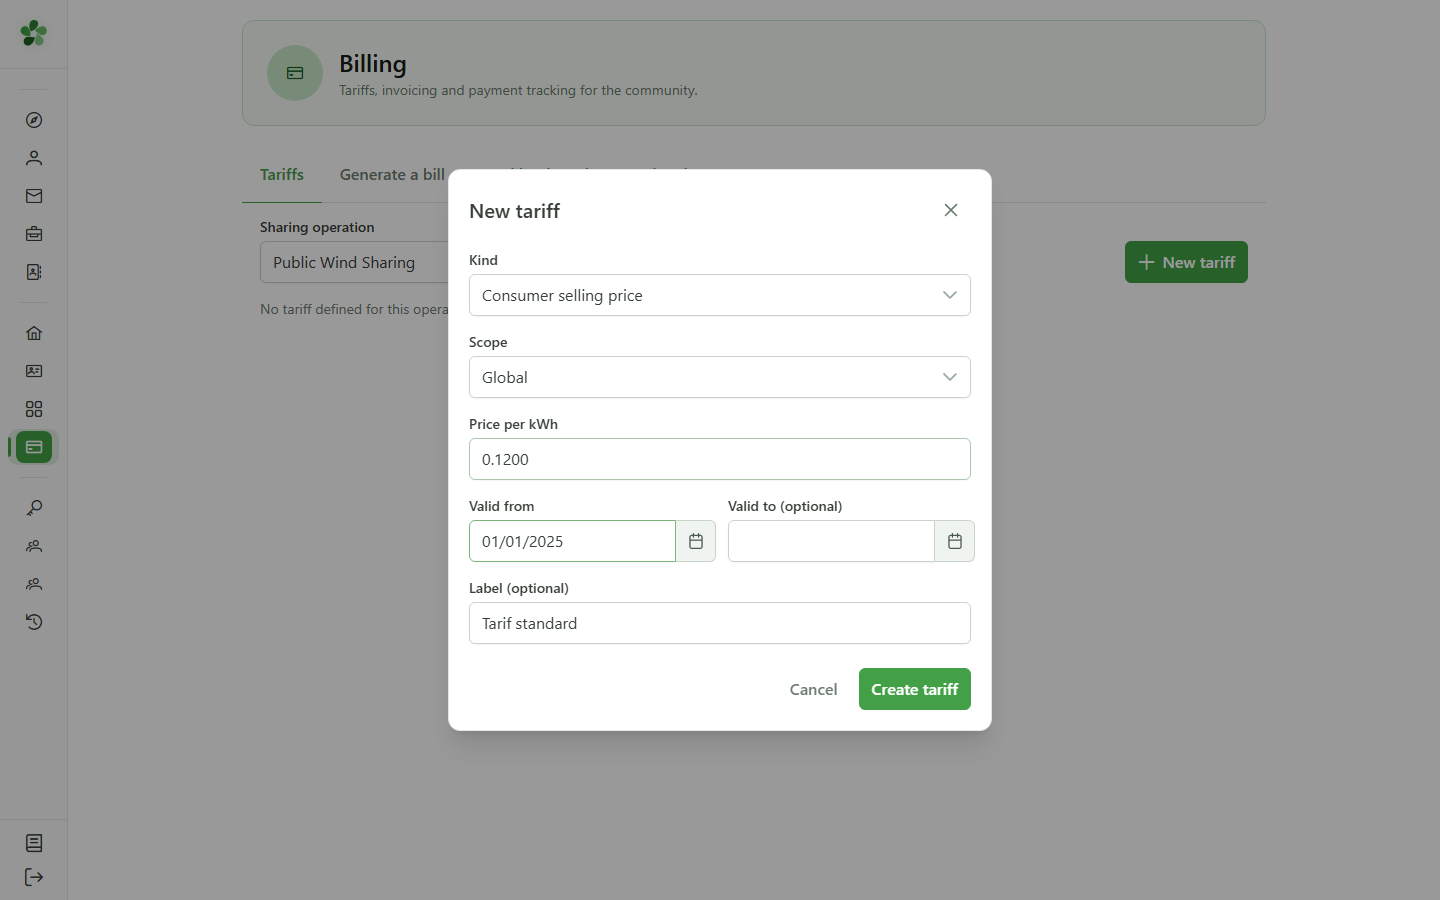
6 Create the tariff
Step 1 — Tariffs
Click "Create tariff". It appears immediately in the list and will be used to compute the invoices.
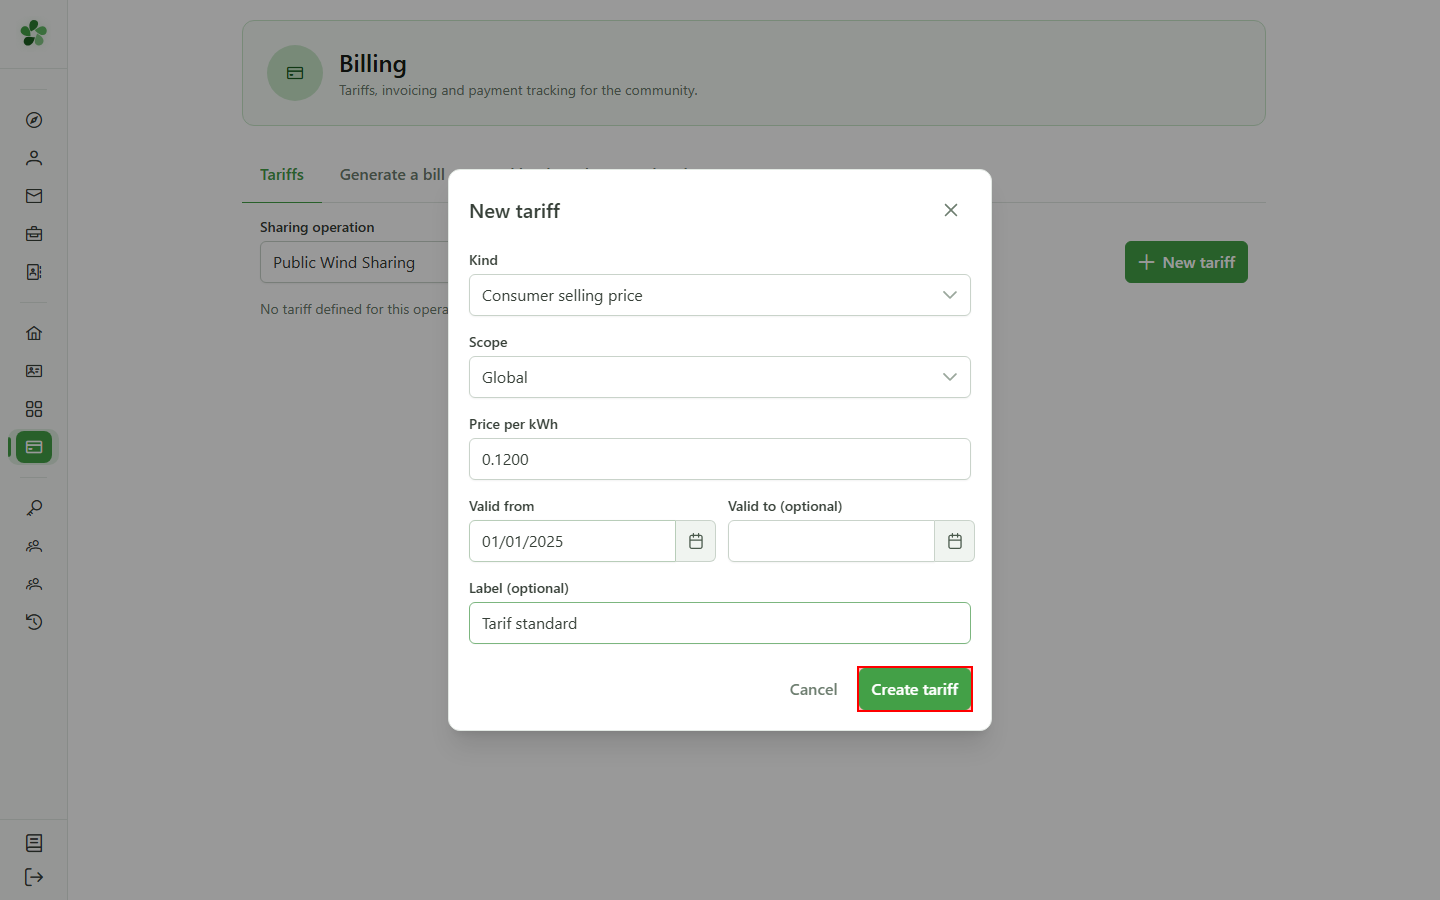
7 Add a buyback tariff
Step 1 — Tariffs
The wind operation has producers: their shared injection must be priced too. Open "New tariff" again to create a buyback tariff.
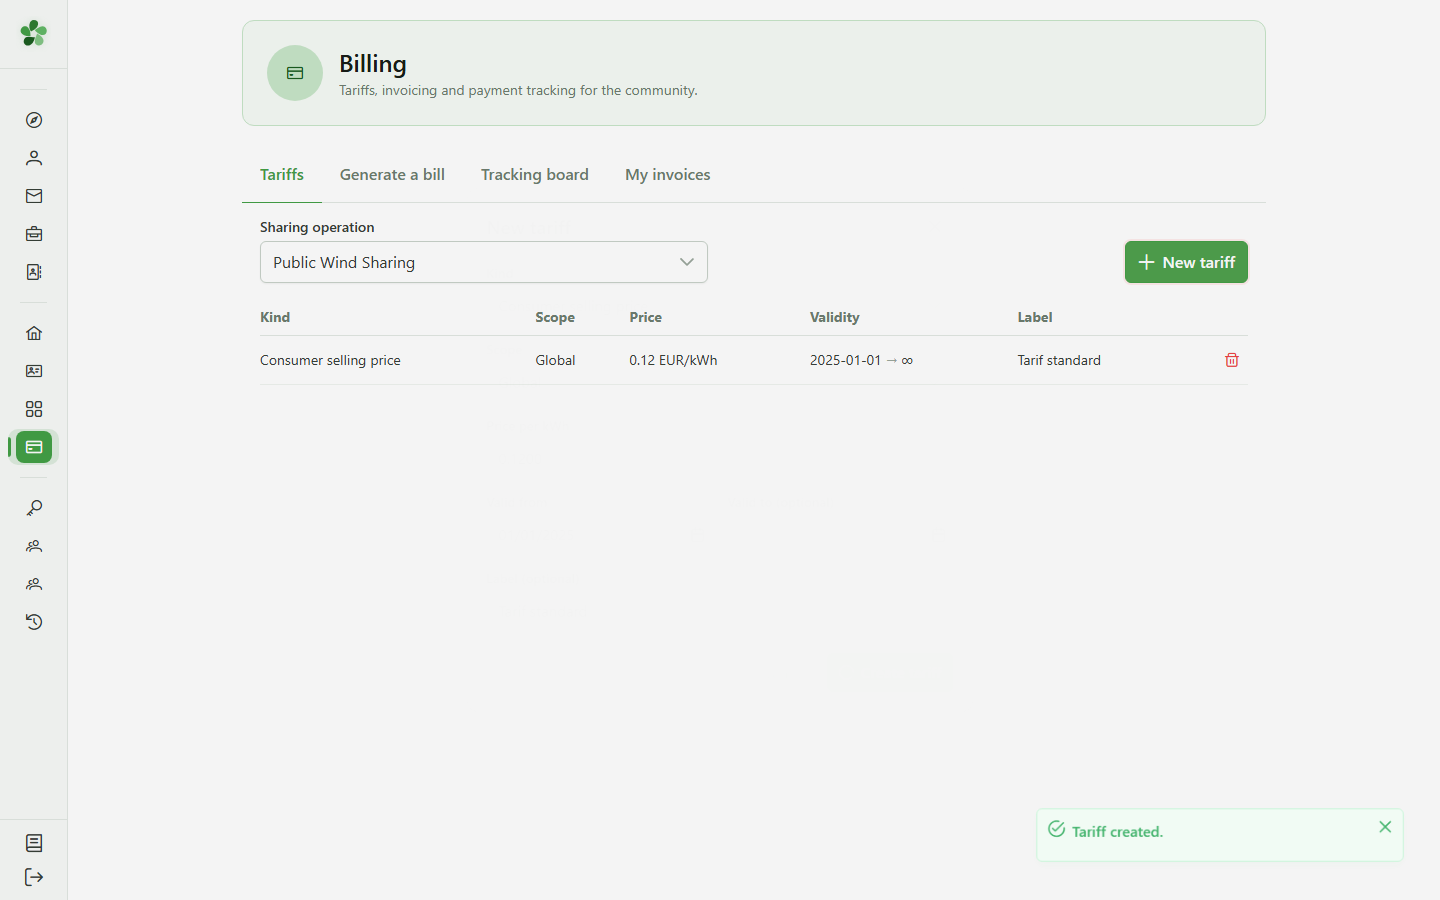
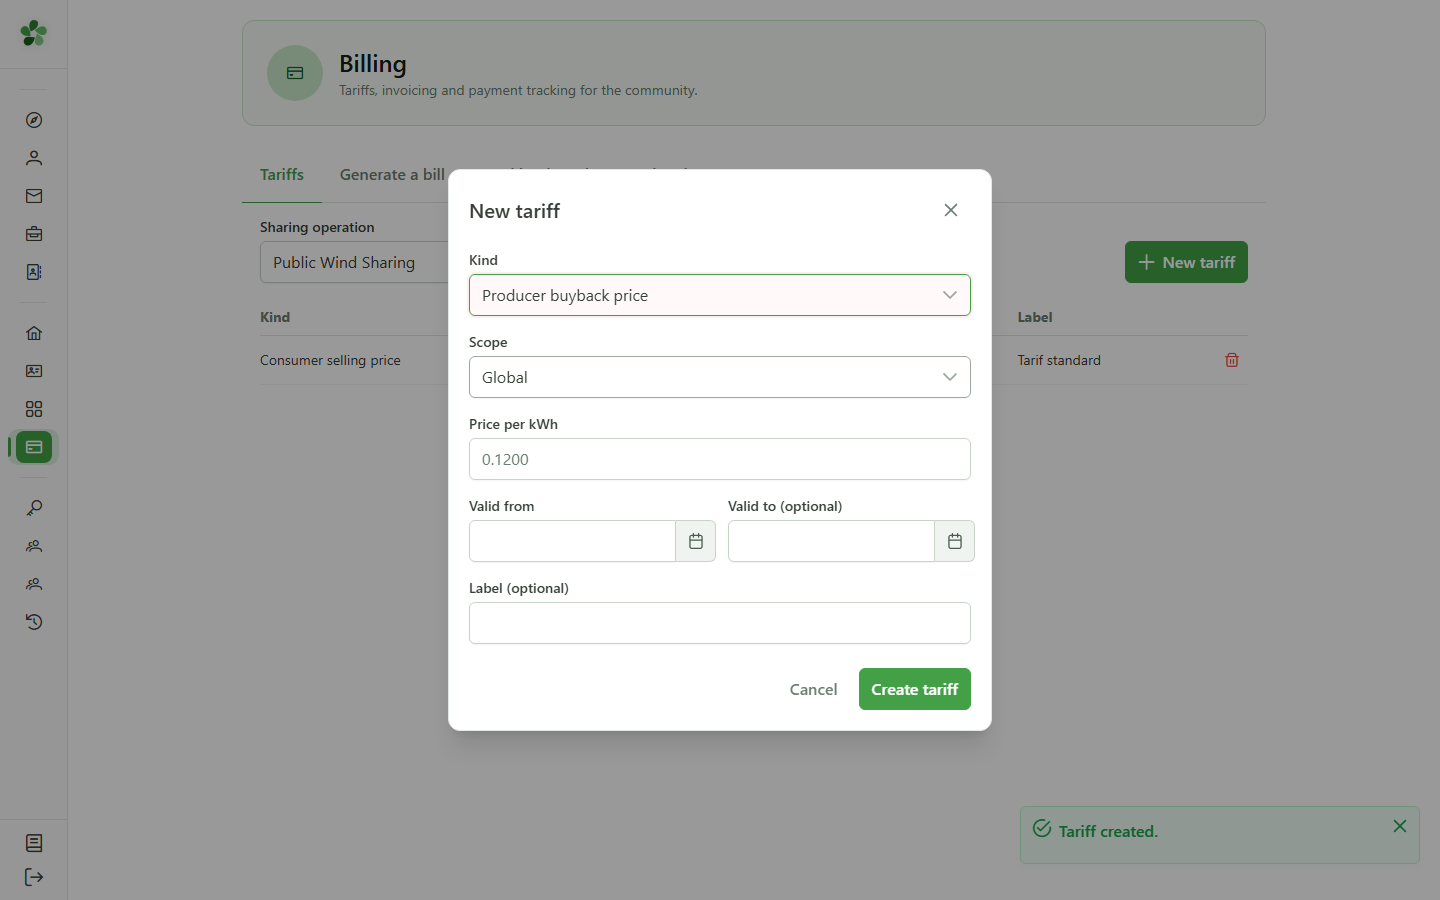
8 Choose the "Producer buyback" kind
Step 1 — Tariffs
Select the "Producer buyback" kind. This tariff pays for the energy producers inject and share with the community.
9 The tariffs are saved
Step 1 — Tariffs
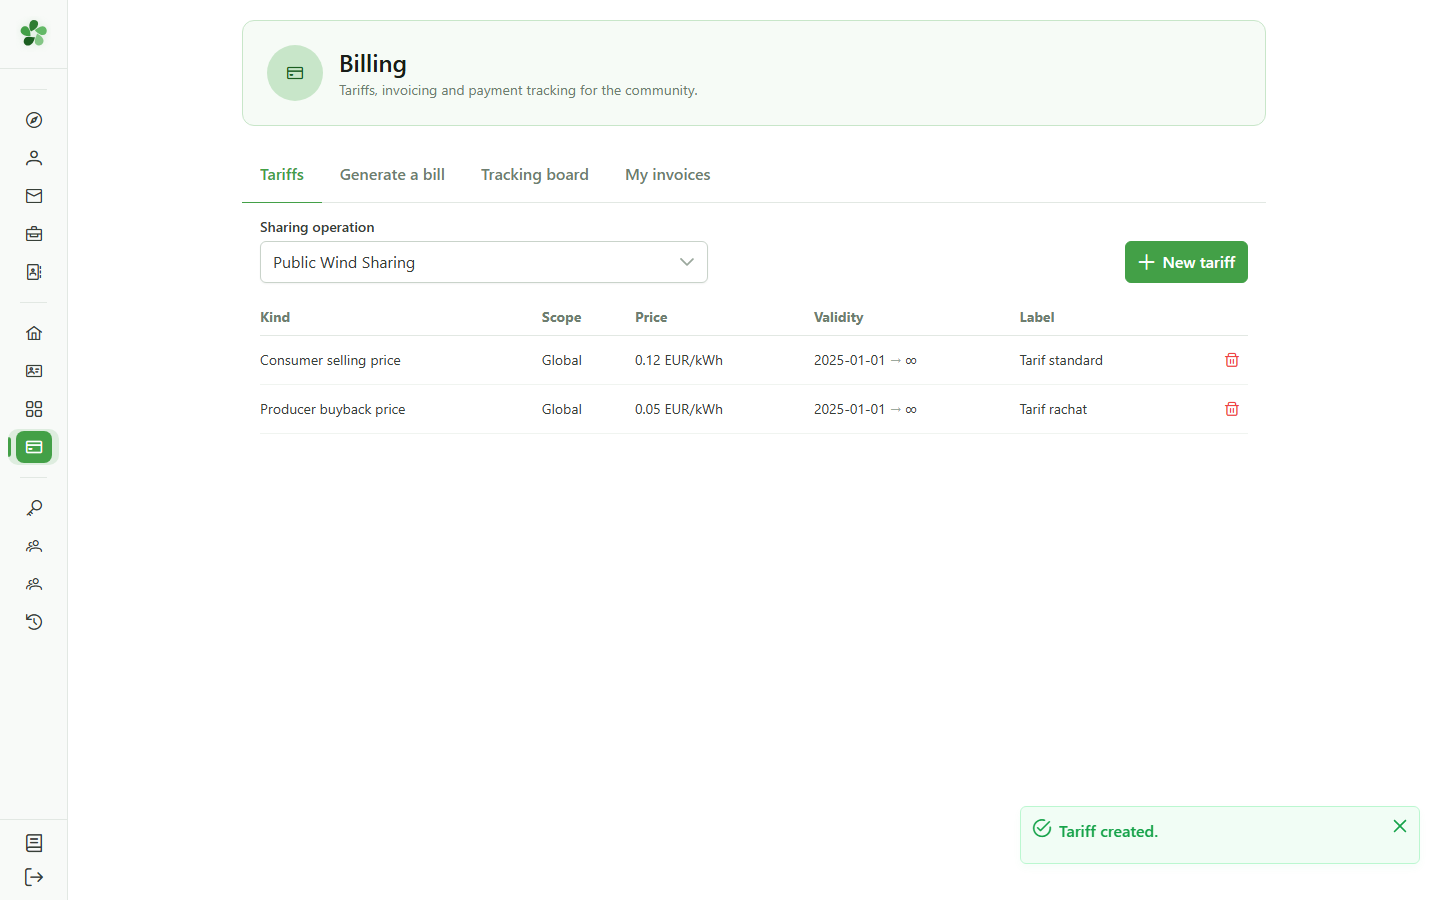
The operation now has a consumer-selling tariff and a producer-buyback tariff. Let's move on to generating the invoices.
10 Go to generation
Step 2 — Generate
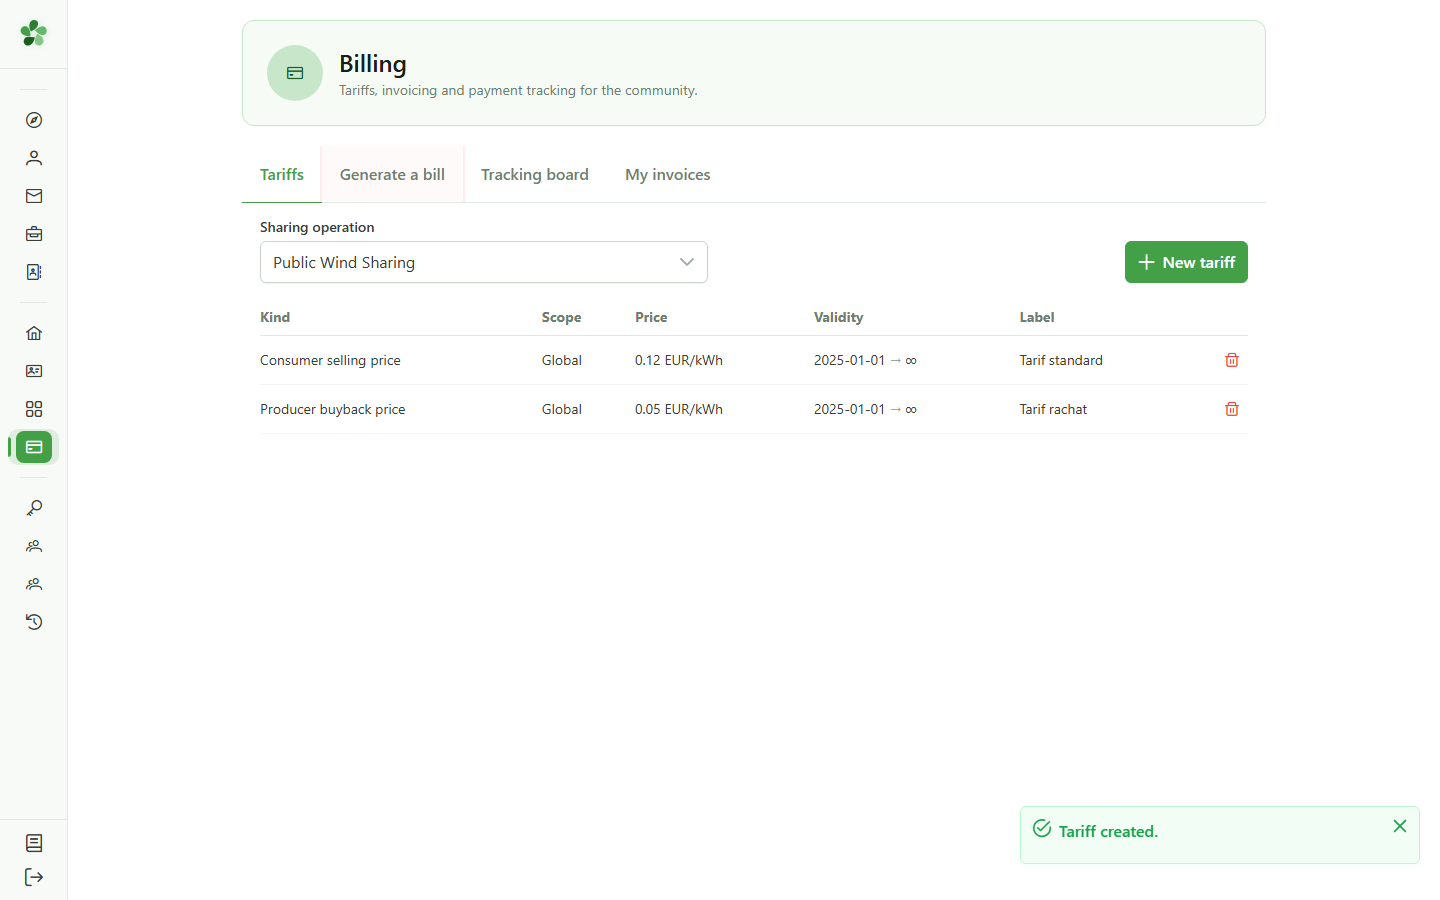
Open the "Generate" tab. This is where you import the consumption data and launch the invoice computation over a period.
11 Pick the operation to bill
Step 2 — Generate
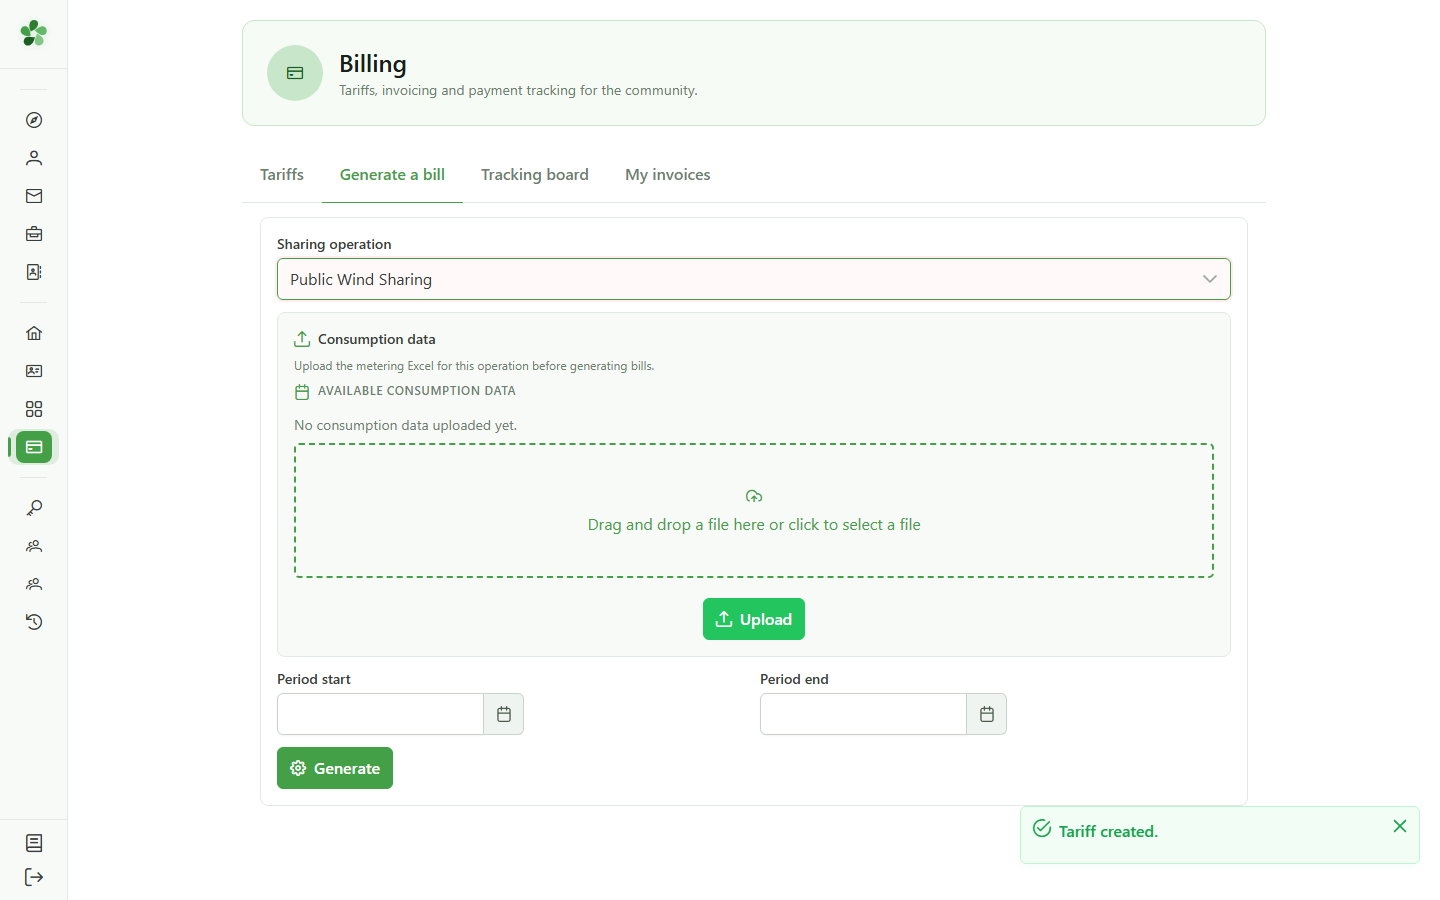
Select "Public Wind Sharing" again. The consumption-import area appears.
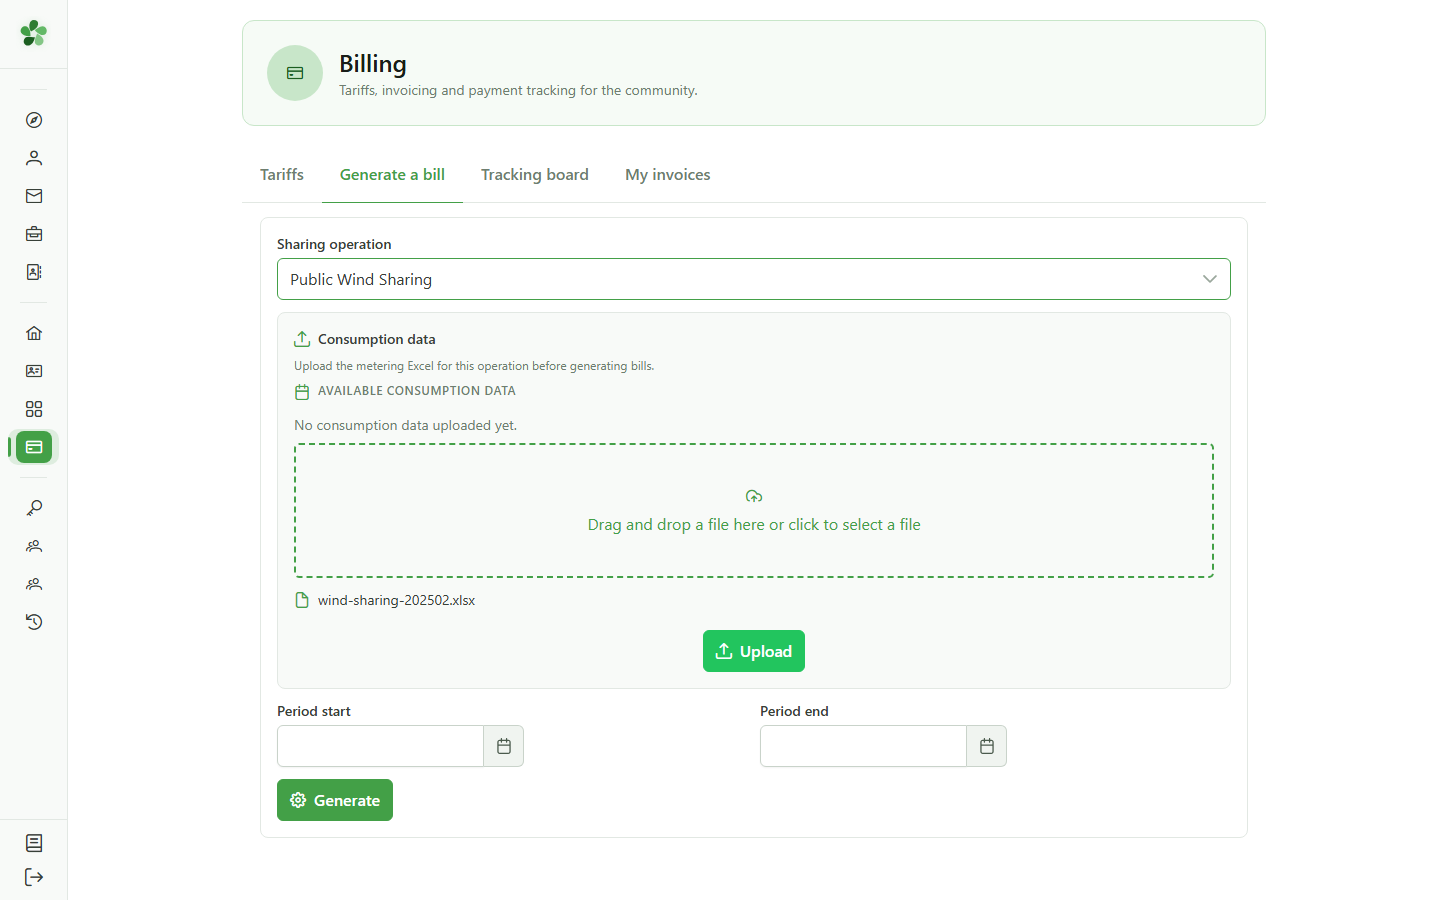
12 Import the RESA metering file
Step 2 — Generate
Drop the operation's RESA file (the month's 15-minute readings) into the import zone. It provides the shared energy that will be billed.
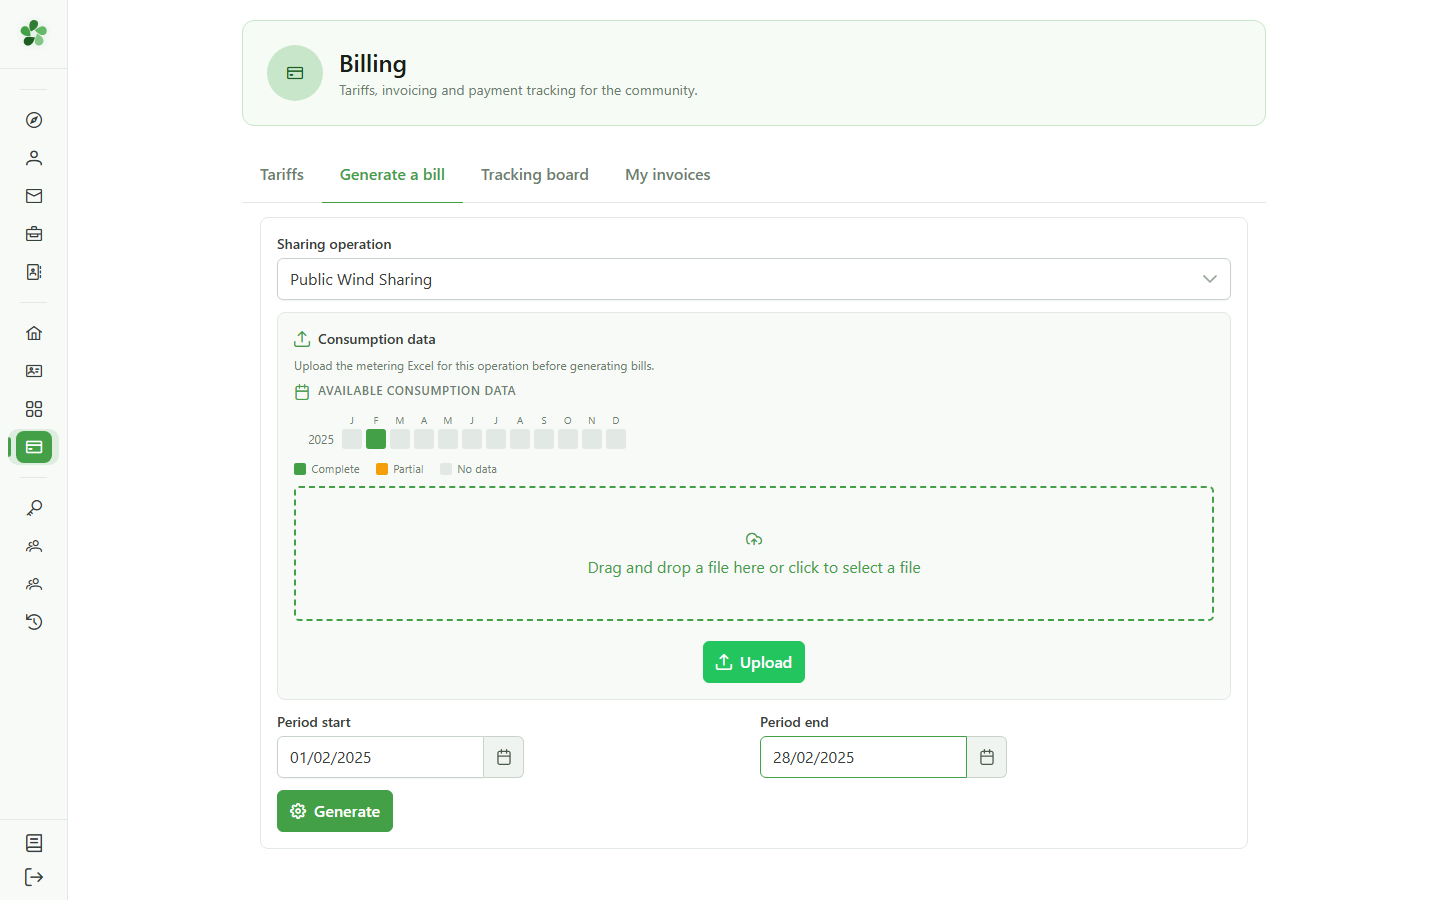
13 Set the period
Step 2 — Generate
Choose the period to bill — here February 2025, the month covered by the imported file. Billing will cover that period's shared energy.
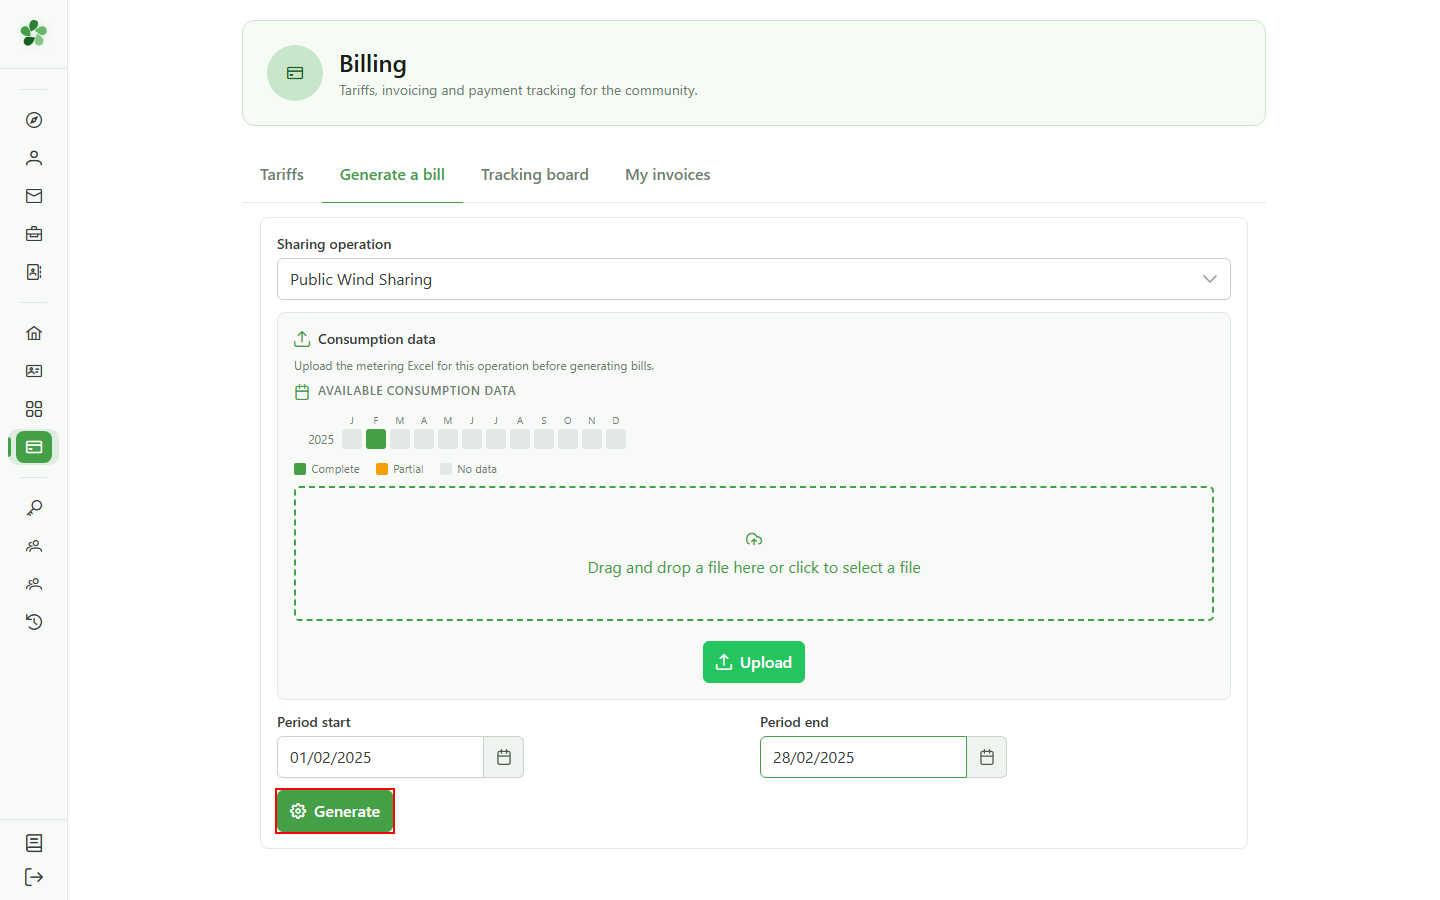
14 Generate the invoices
Step 2 — Generate
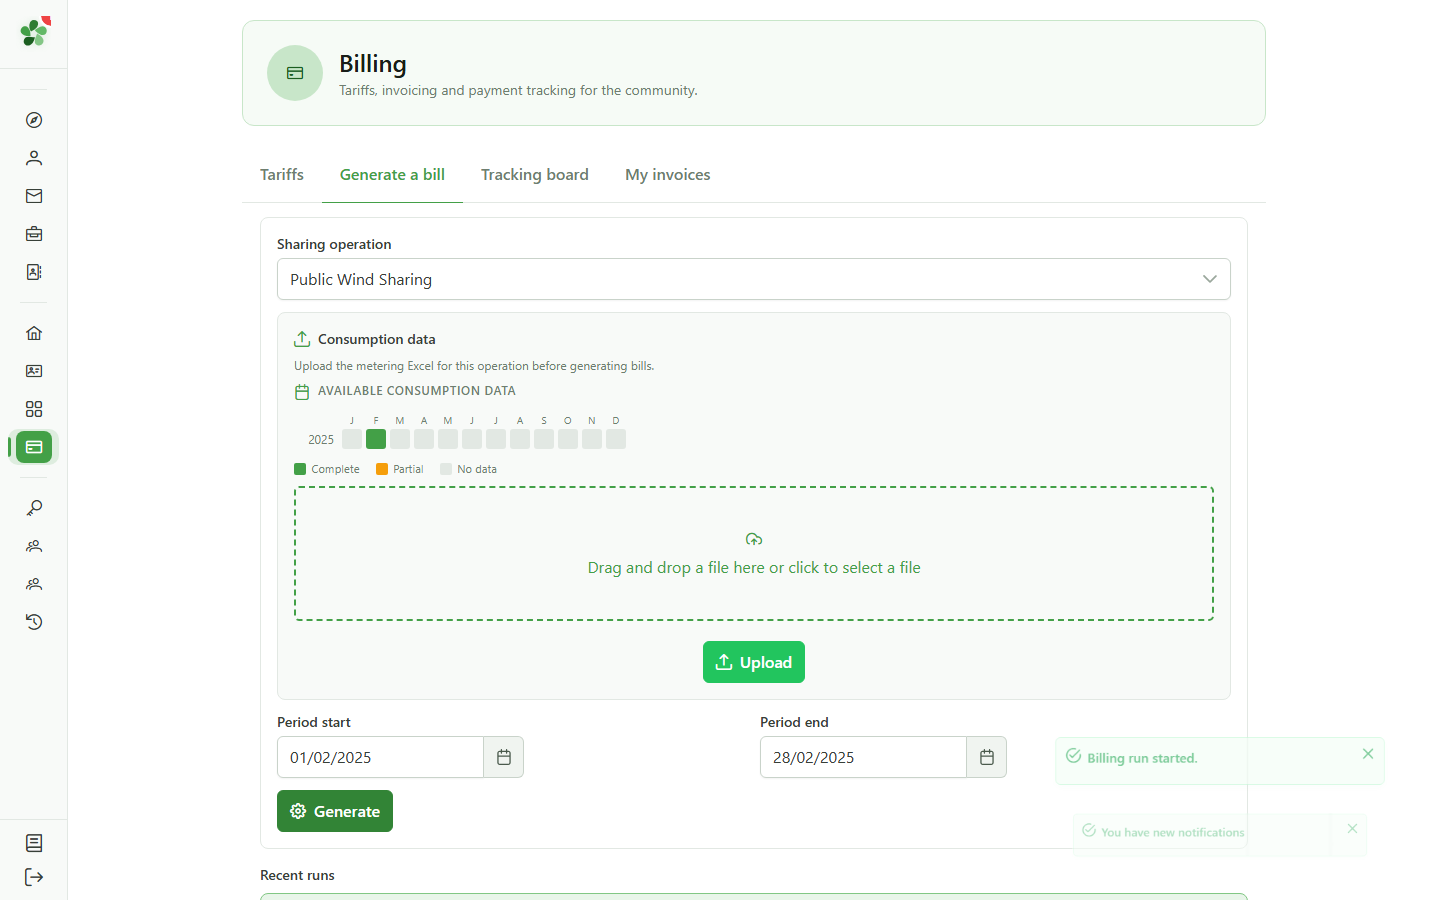
Click "Generate". The computation runs in the background: as soon as it finishes, one invoice per operation member appears.
15 The invoices are generated
Step 2 — Generate
Each operation member now has a "Draft" invoice. It remains to issue it and then record its payment.
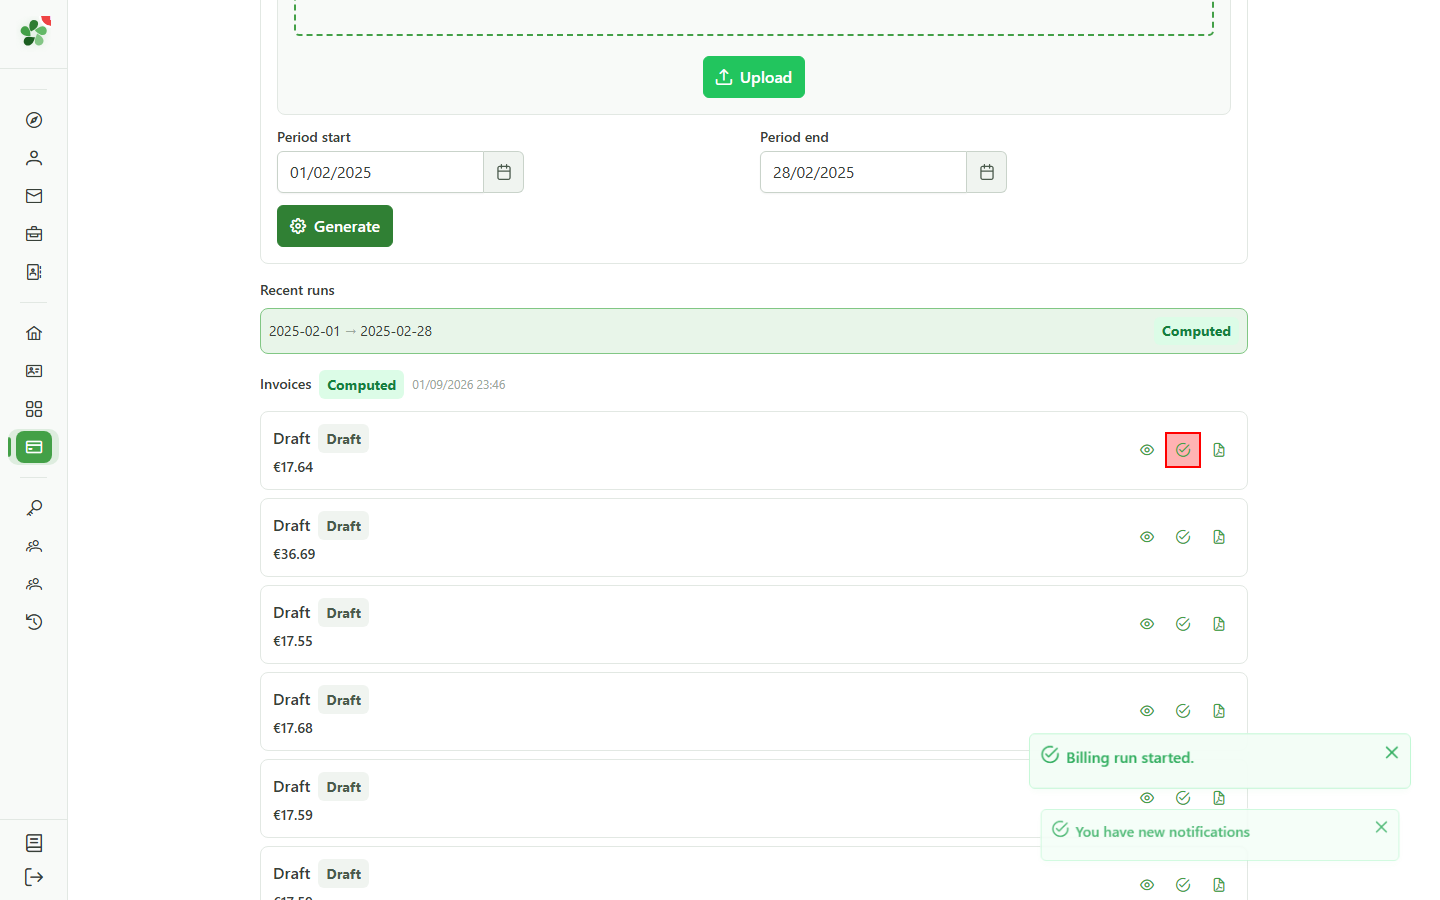
16 Issue the invoice
Step 3 — Issue and collect
Click an invoice's "Issue" icon. It gets a legal number and a structured communication, and its status becomes "Issued".
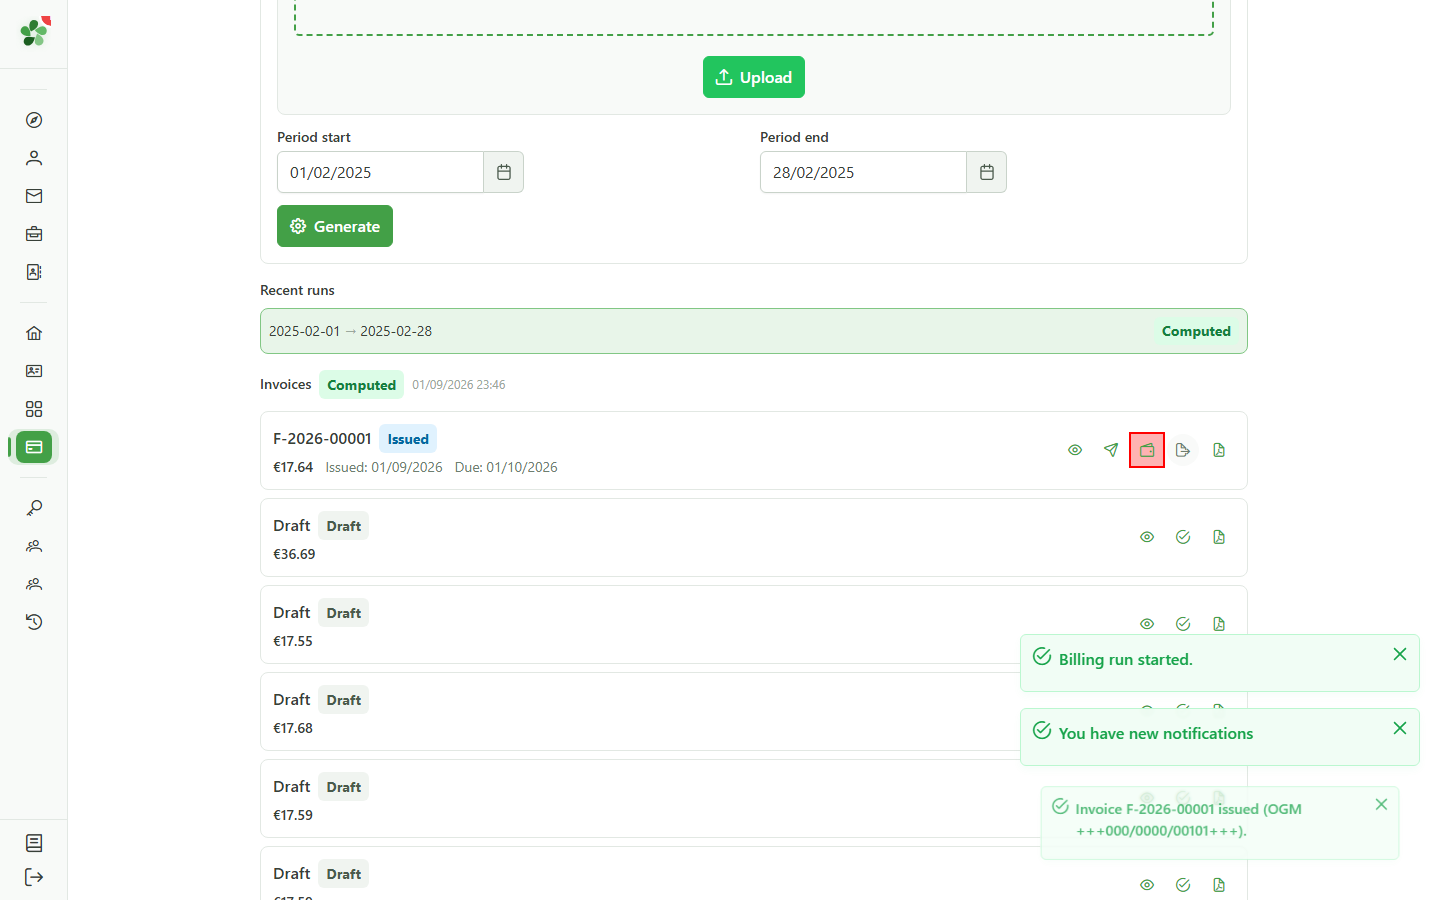
17 Register a payment
Step 3 — Issue and collect
Once the invoice is issued, the "Register a payment" (wallet) icon appears. Click it to open the payment dialog.
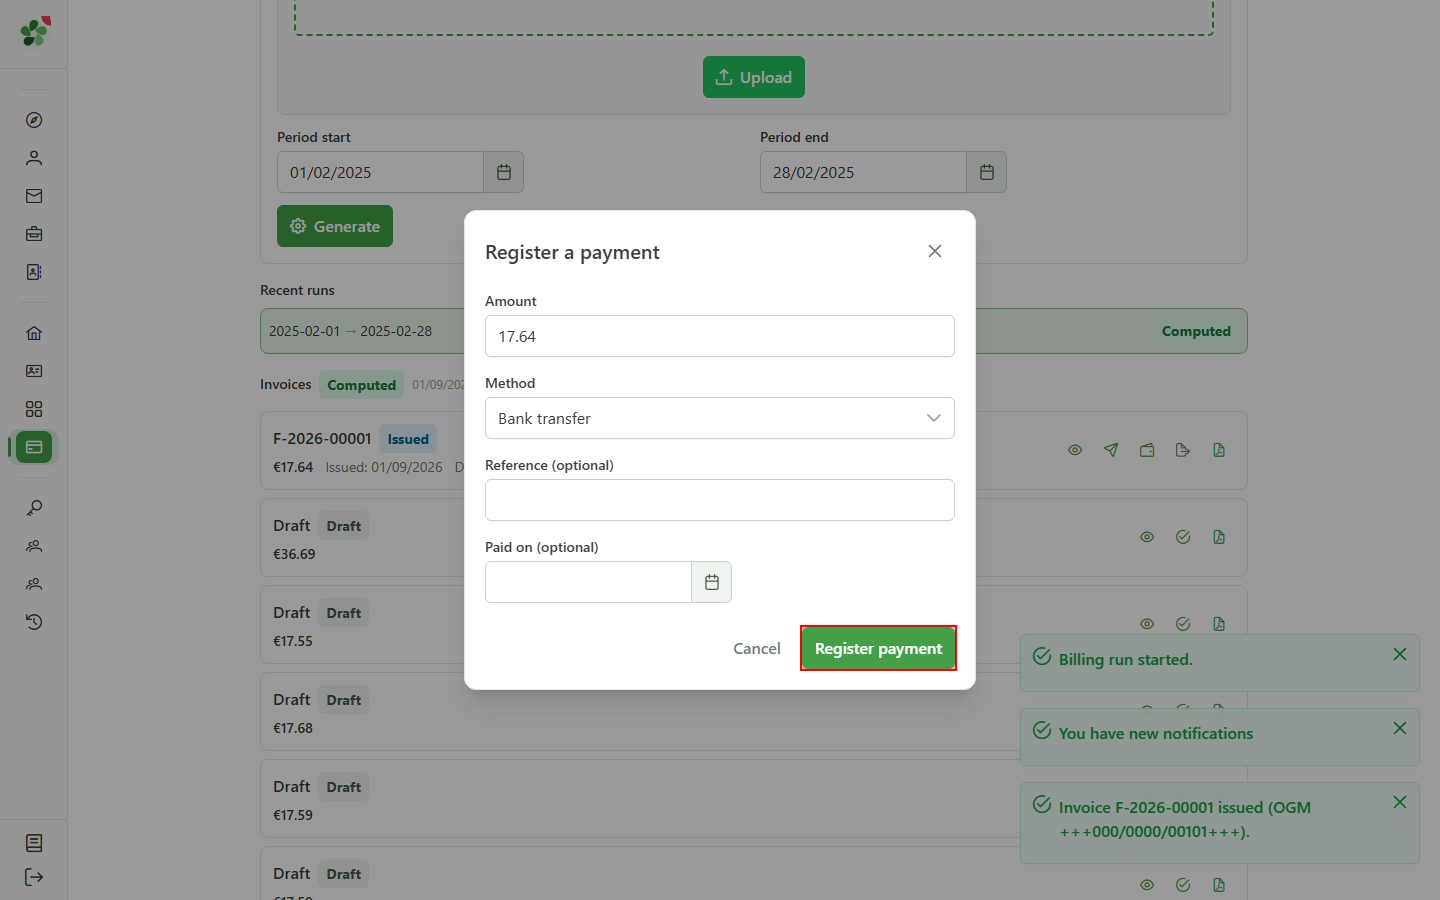
18 Confirm the payment
Step 3 — Issue and collect
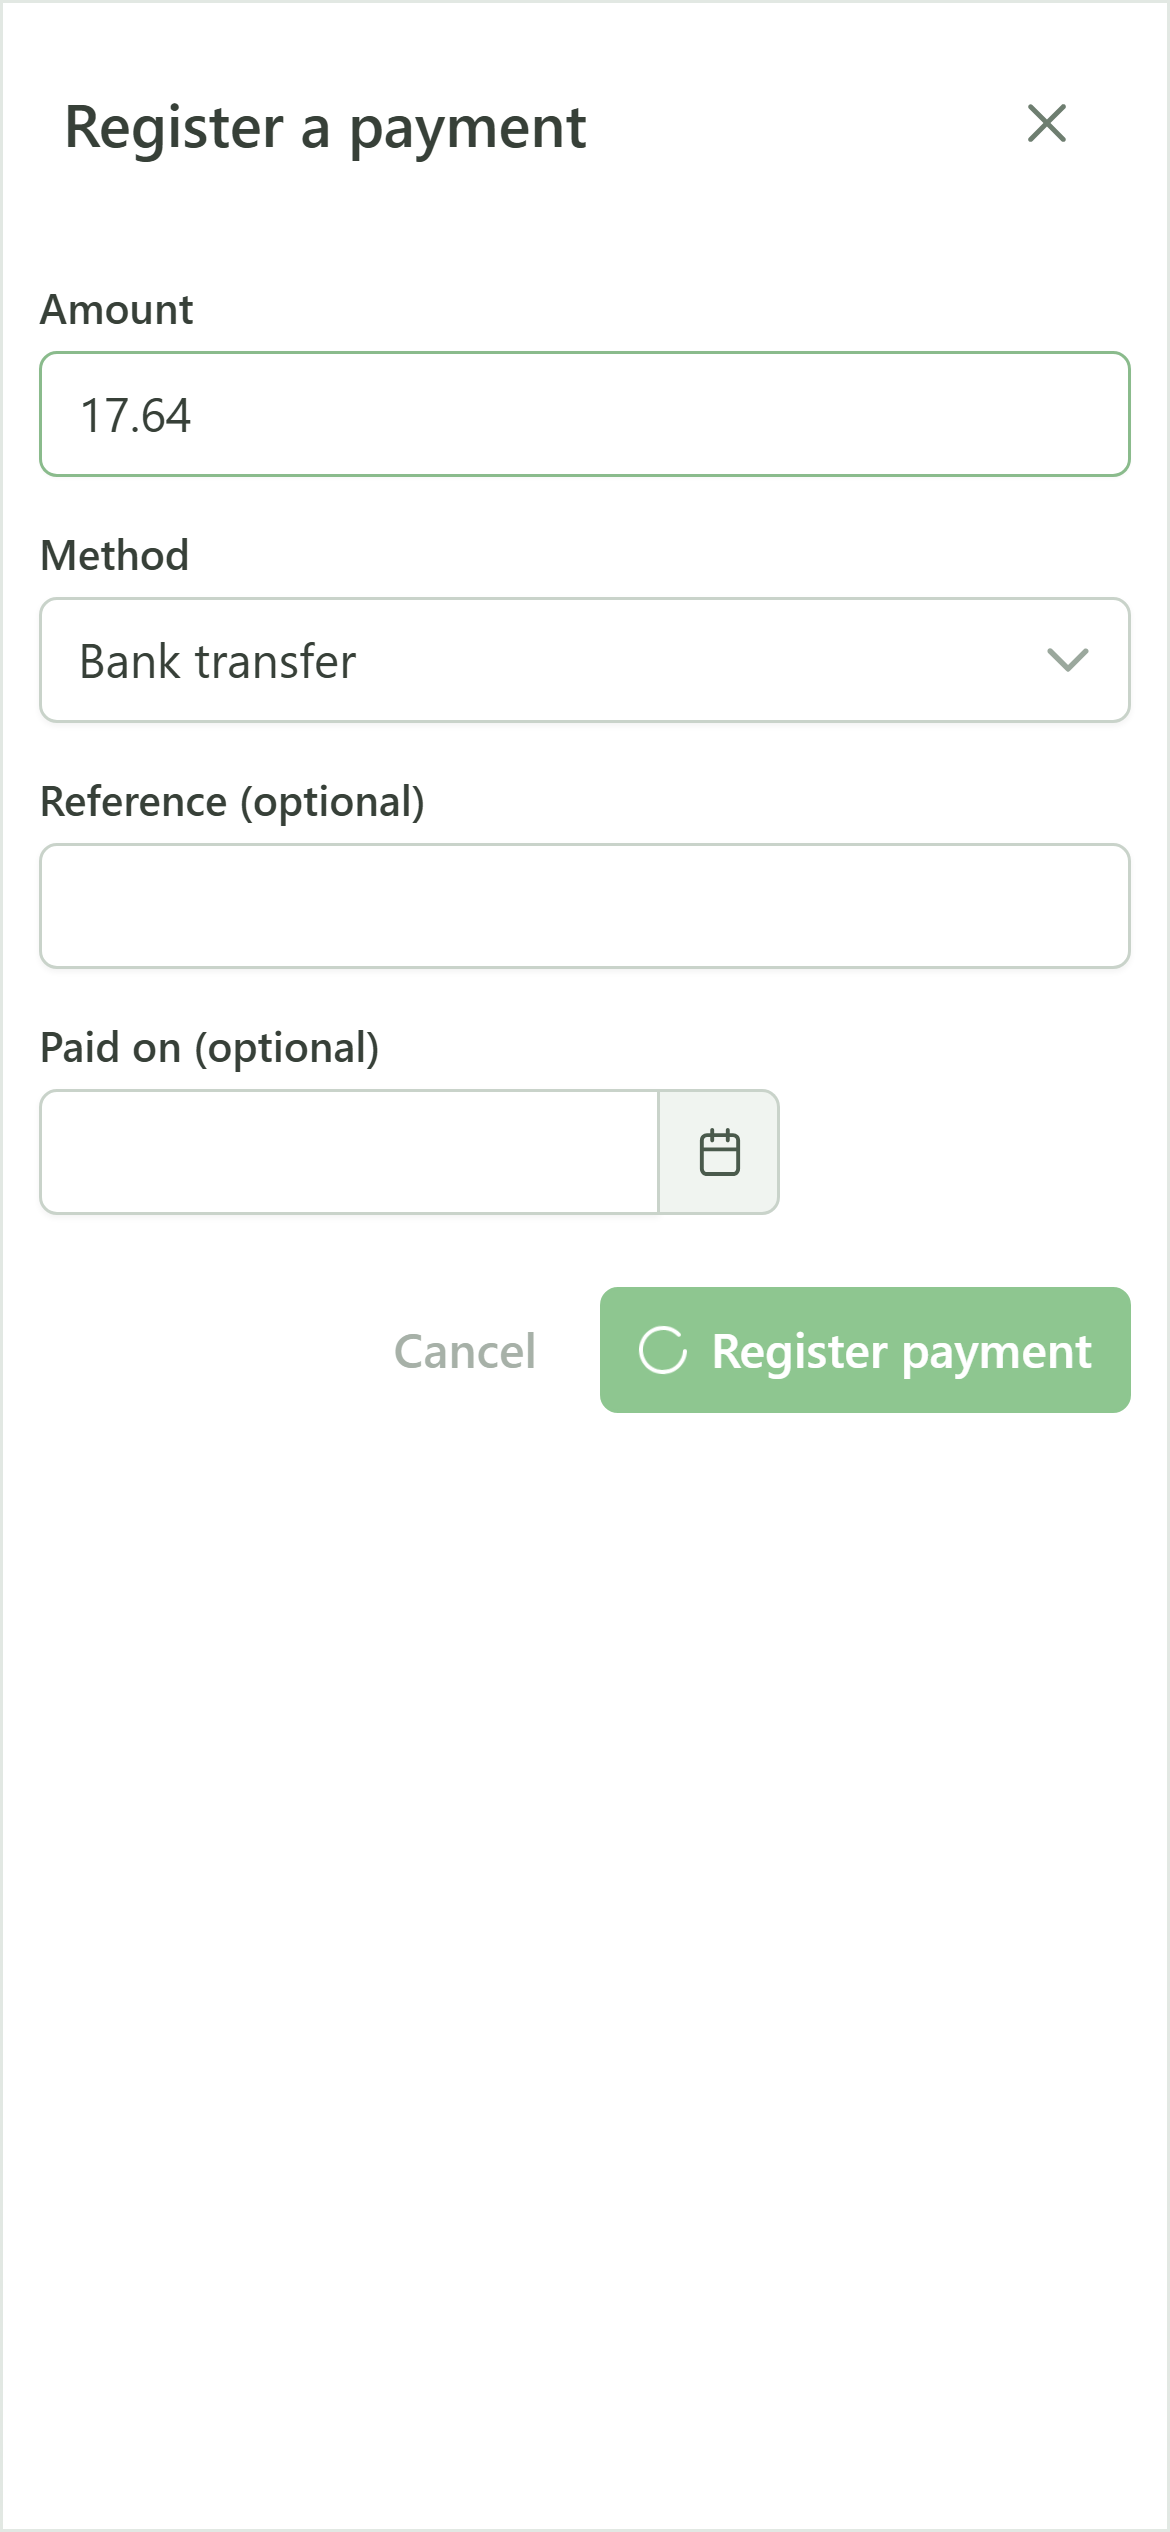
The amount is prefilled with the invoice total and the default method is "Bank transfer". Click "Register payment": the invoice moves to "Paid".
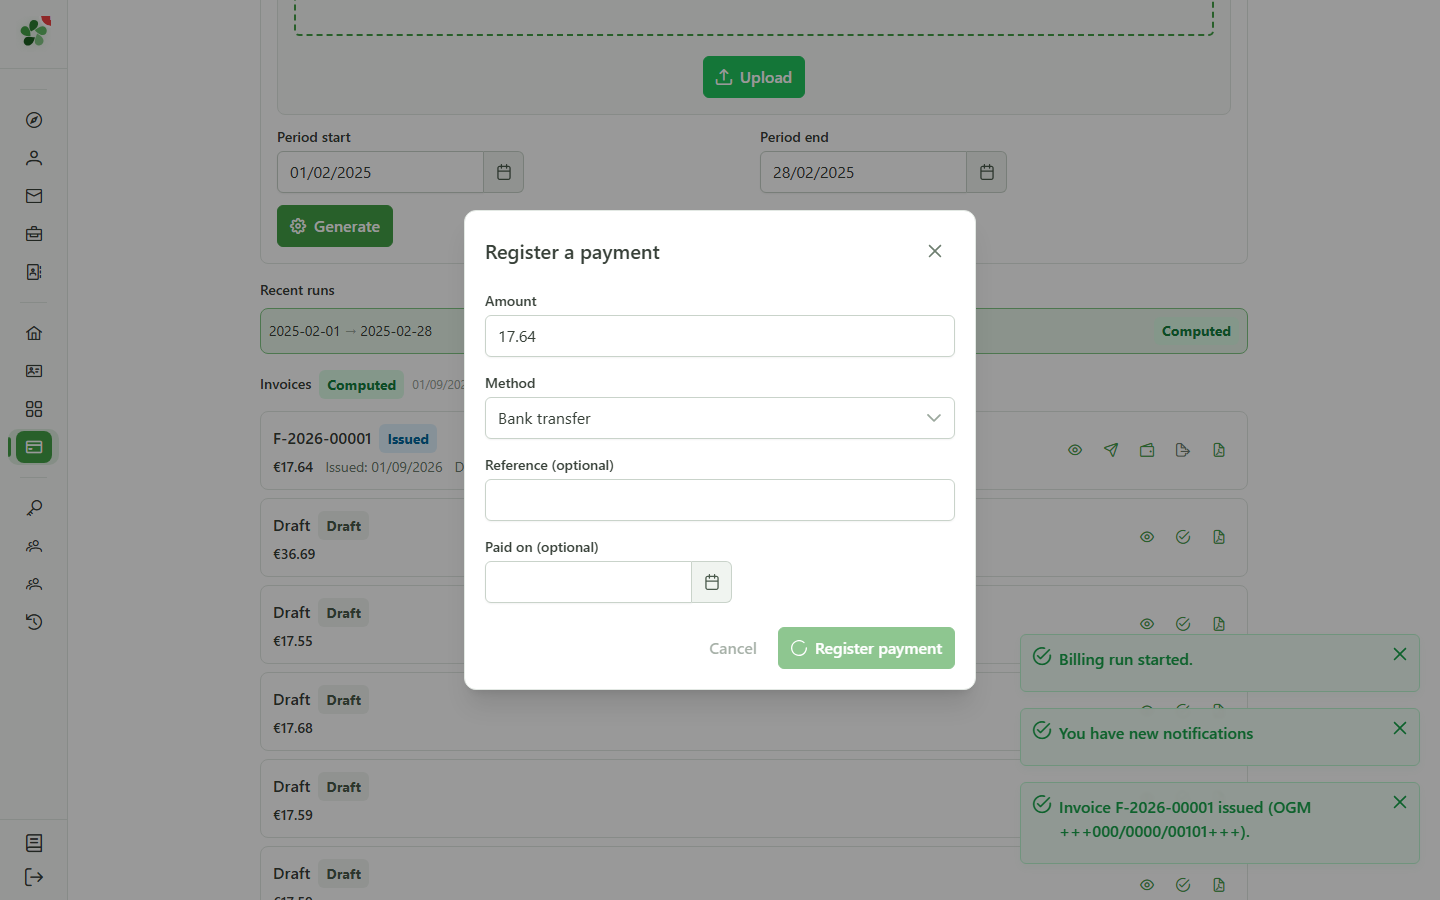
19 The invoice is paid
Billing
The payment is recorded and the invoice now carries the "Paid" status. The full cycle — tariff, generation, issue, payment — is complete.
Bill a sharing operation, from tariff to payment
Guide utilisateur
User guide
1 Open billing
Navigation
Tap the menu icon to open the navigation drawer, then in the "Community" section tap "Billing".
2 The billing module
Billing
The module opens on the "Tariffs" tab. This is where you set the price of the shared energy before generating invoices. The "Generate" and "Tracking" tabs come next.
3 Pick the sharing operation
Step 1 — Tariffs
Select the sharing operation to bill — here "Public Wind Sharing". Tariffs and invoices are always scoped to an operation.
4 Add a tariff
Step 1 — Tariffs
Click "New tariff" to open the creation dialog. By default the tariff covers consumer selling and applies to the whole operation.
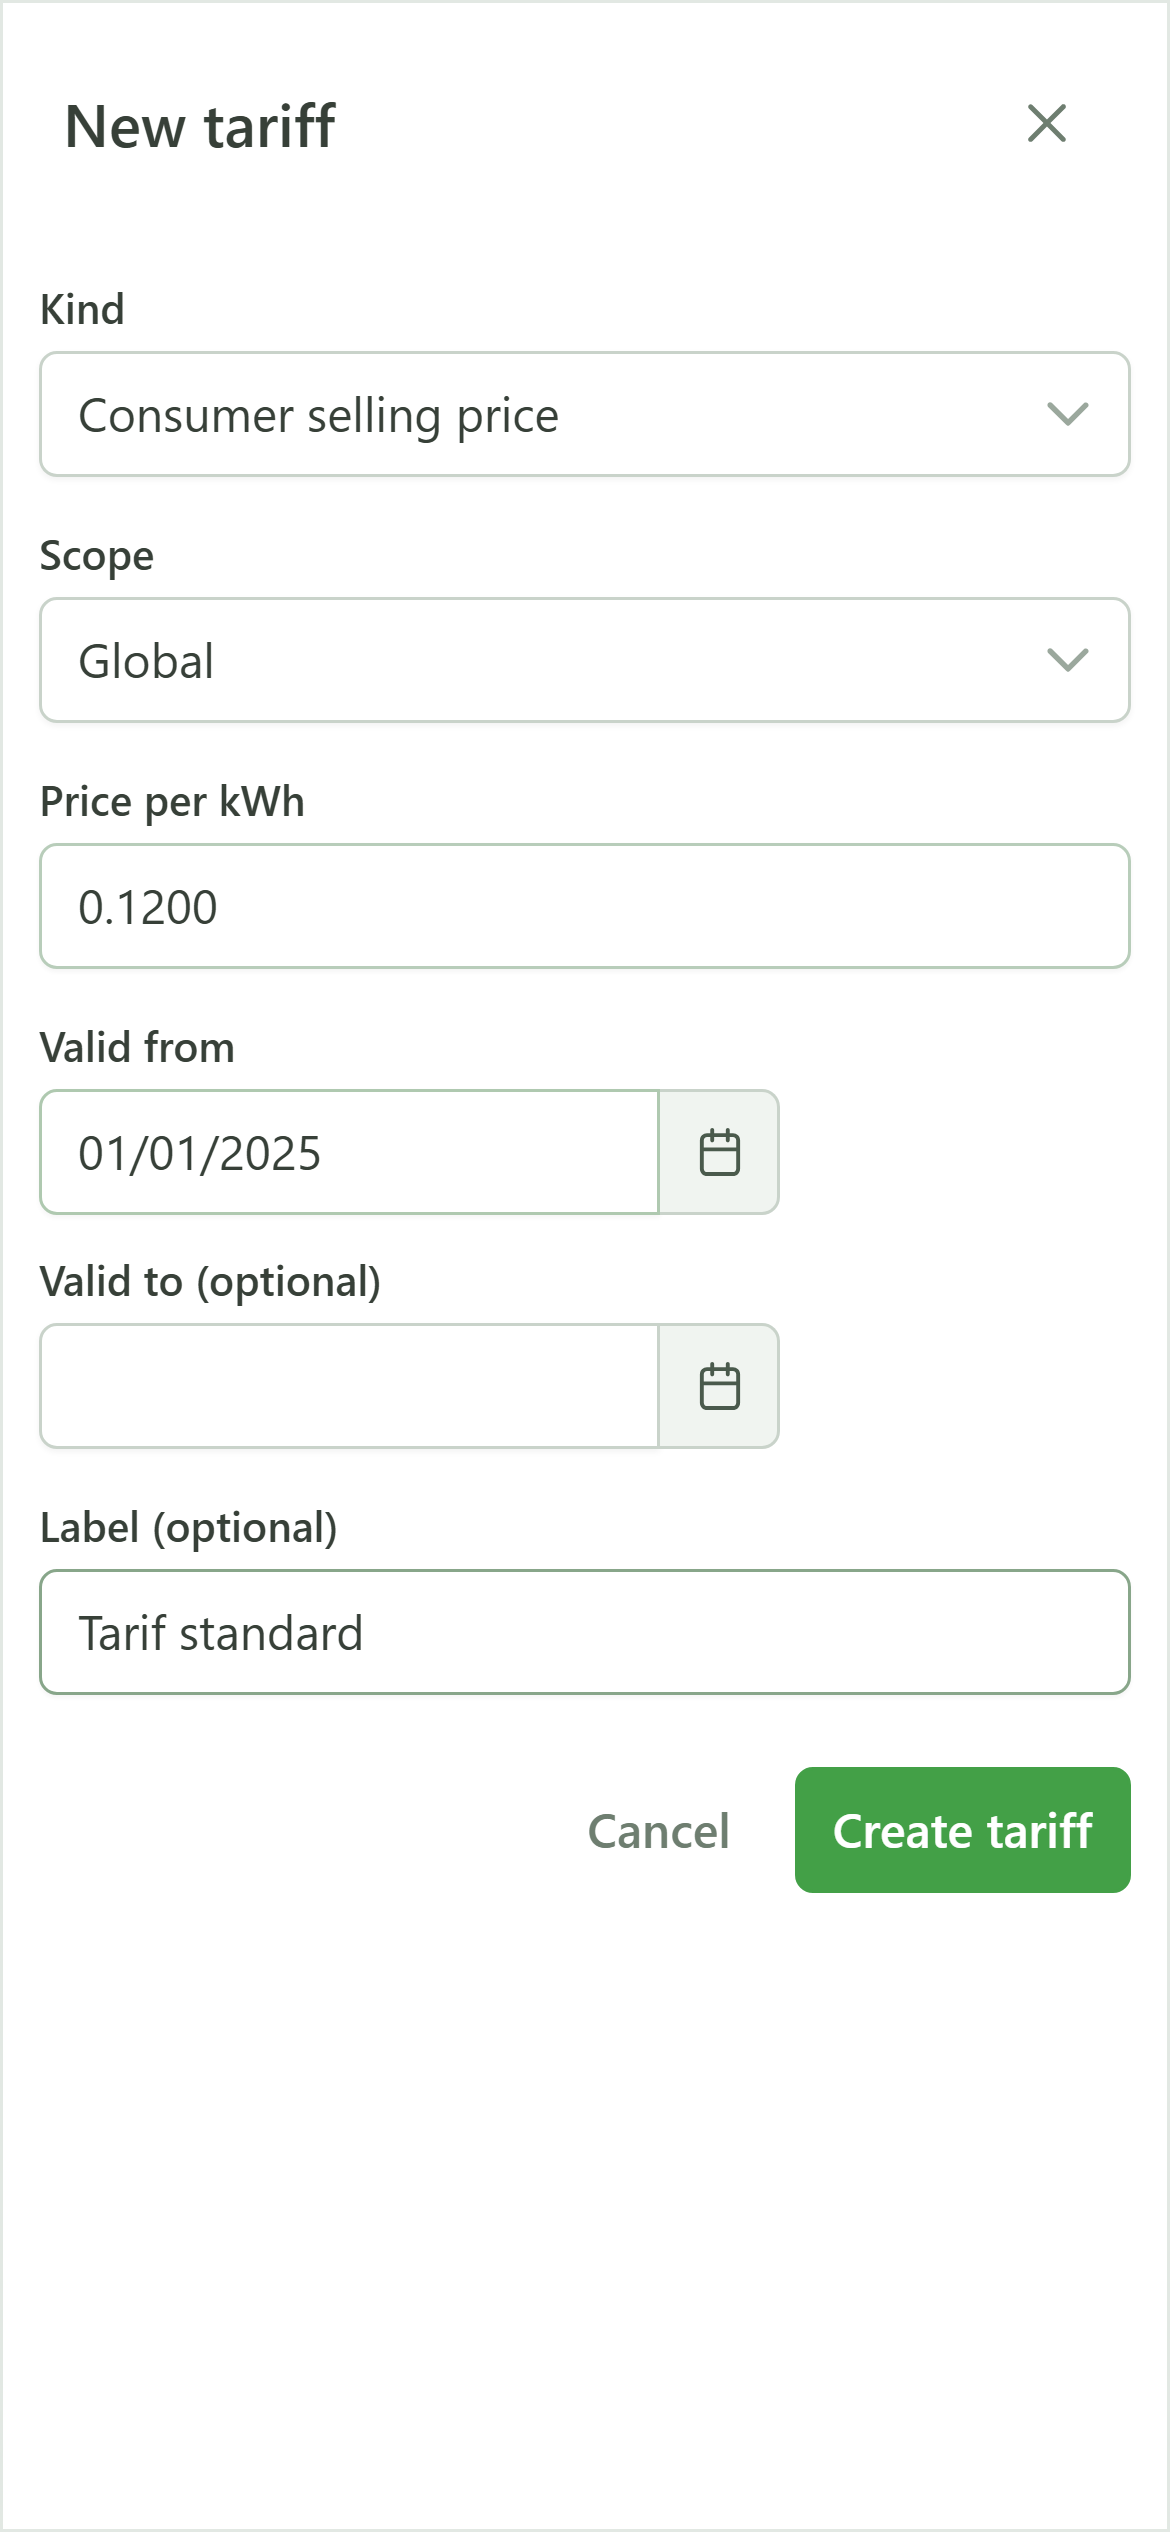
5 Fill in the tariff
Step 1 — Tariffs
Enter the shared-kWh price (0.1200 EUR), the start of validity and a label. The "Consumer selling" kind and "Global" scope are right for billing the whole operation.
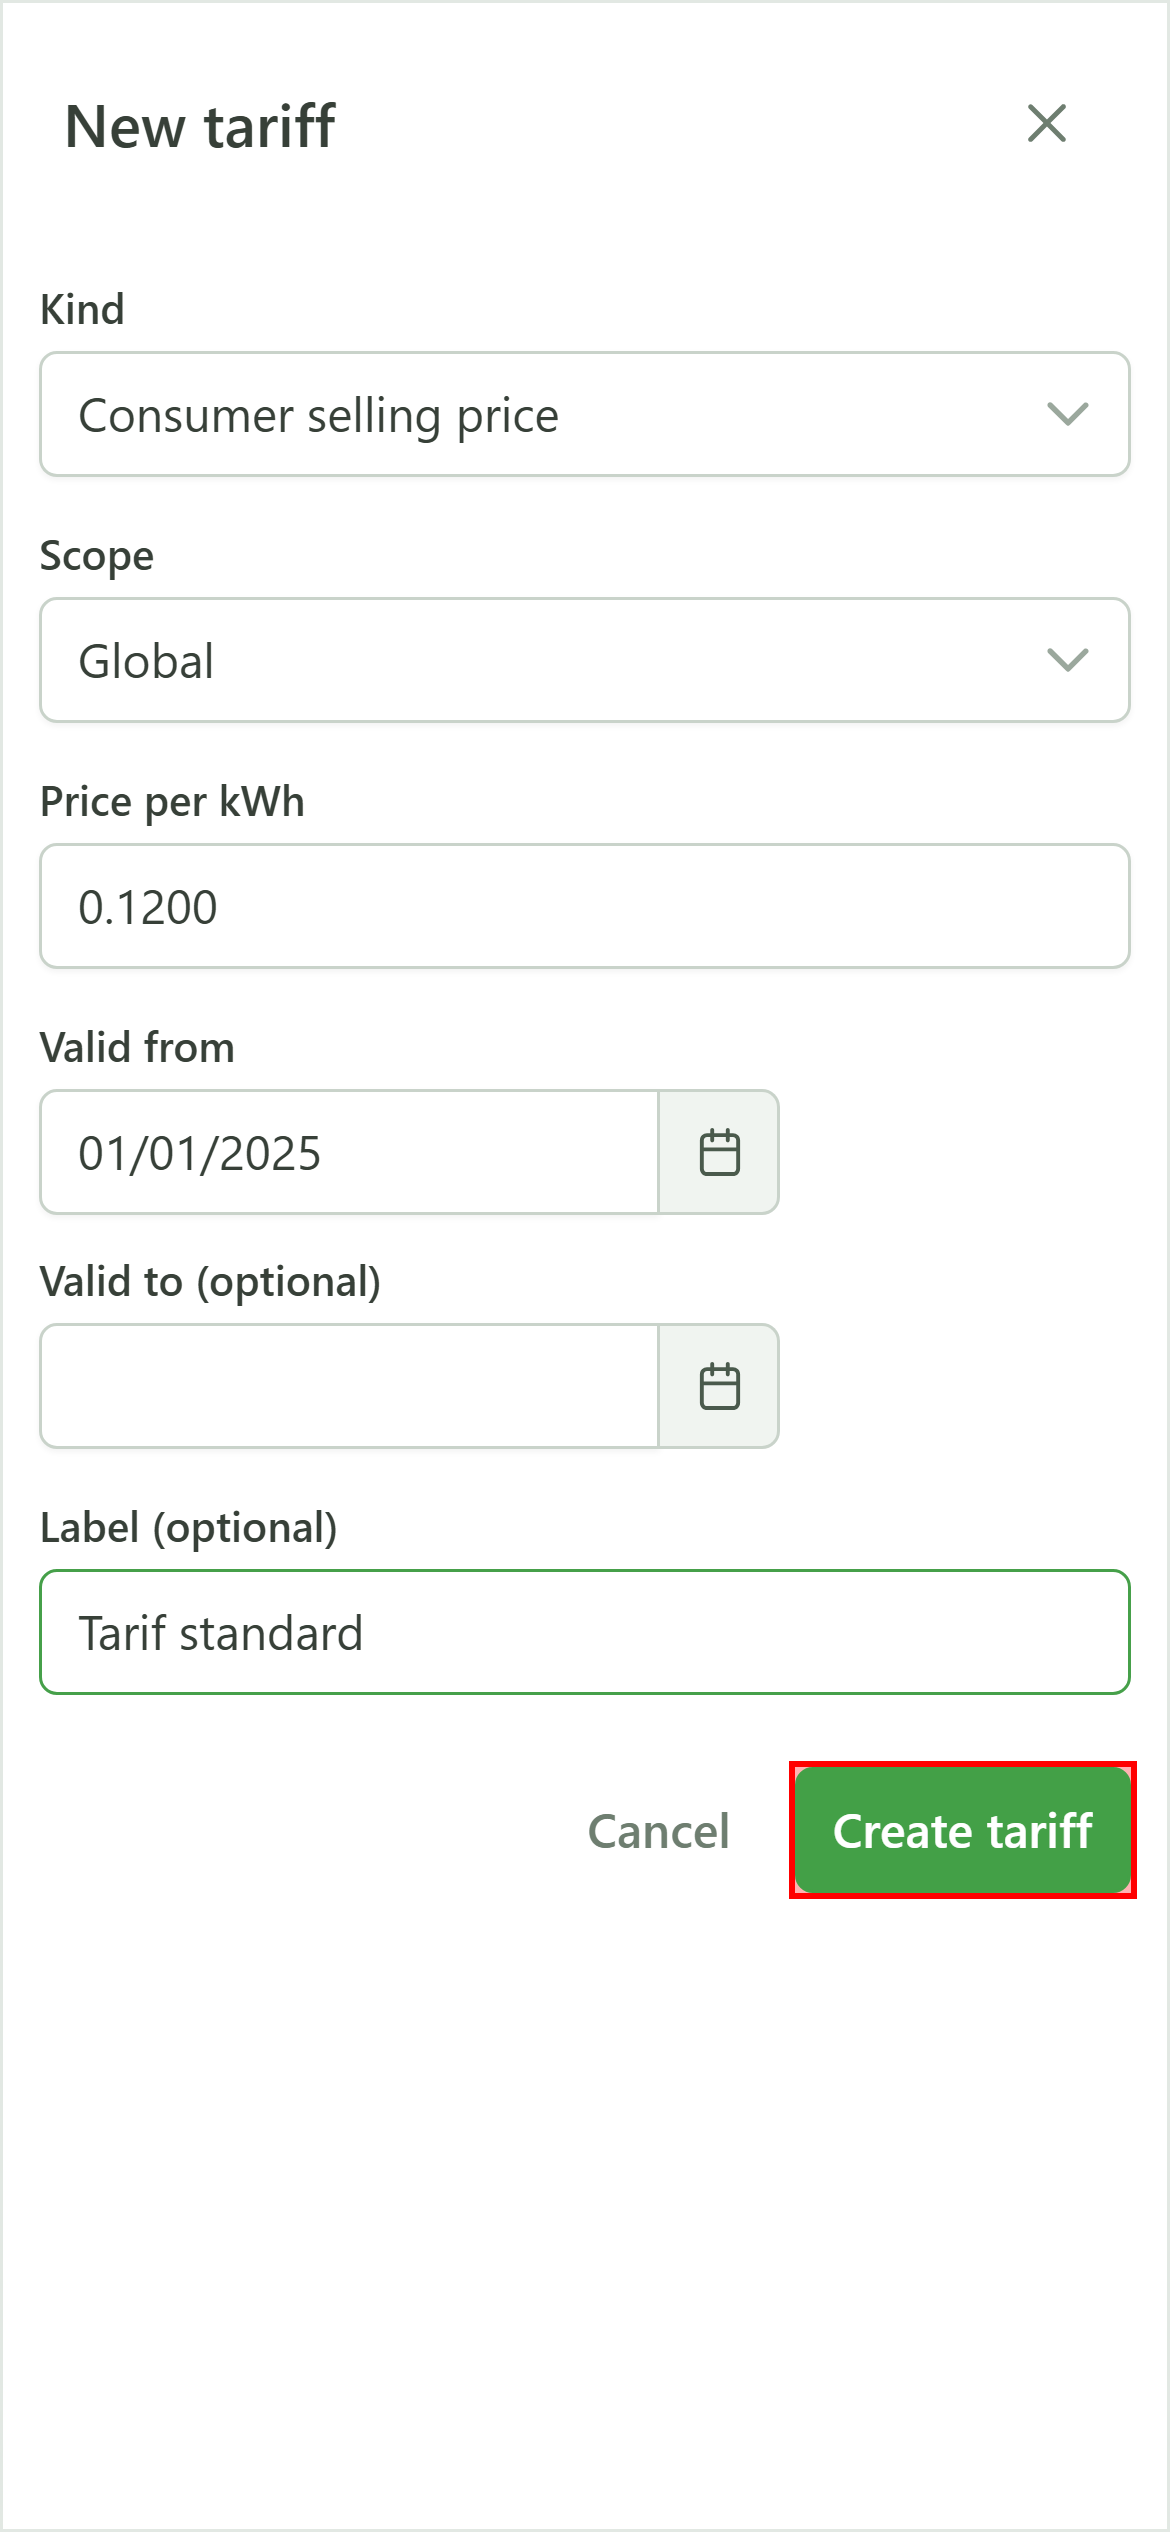
6 Create the tariff
Step 1 — Tariffs
Click "Create tariff". It appears immediately in the list and will be used to compute the invoices.
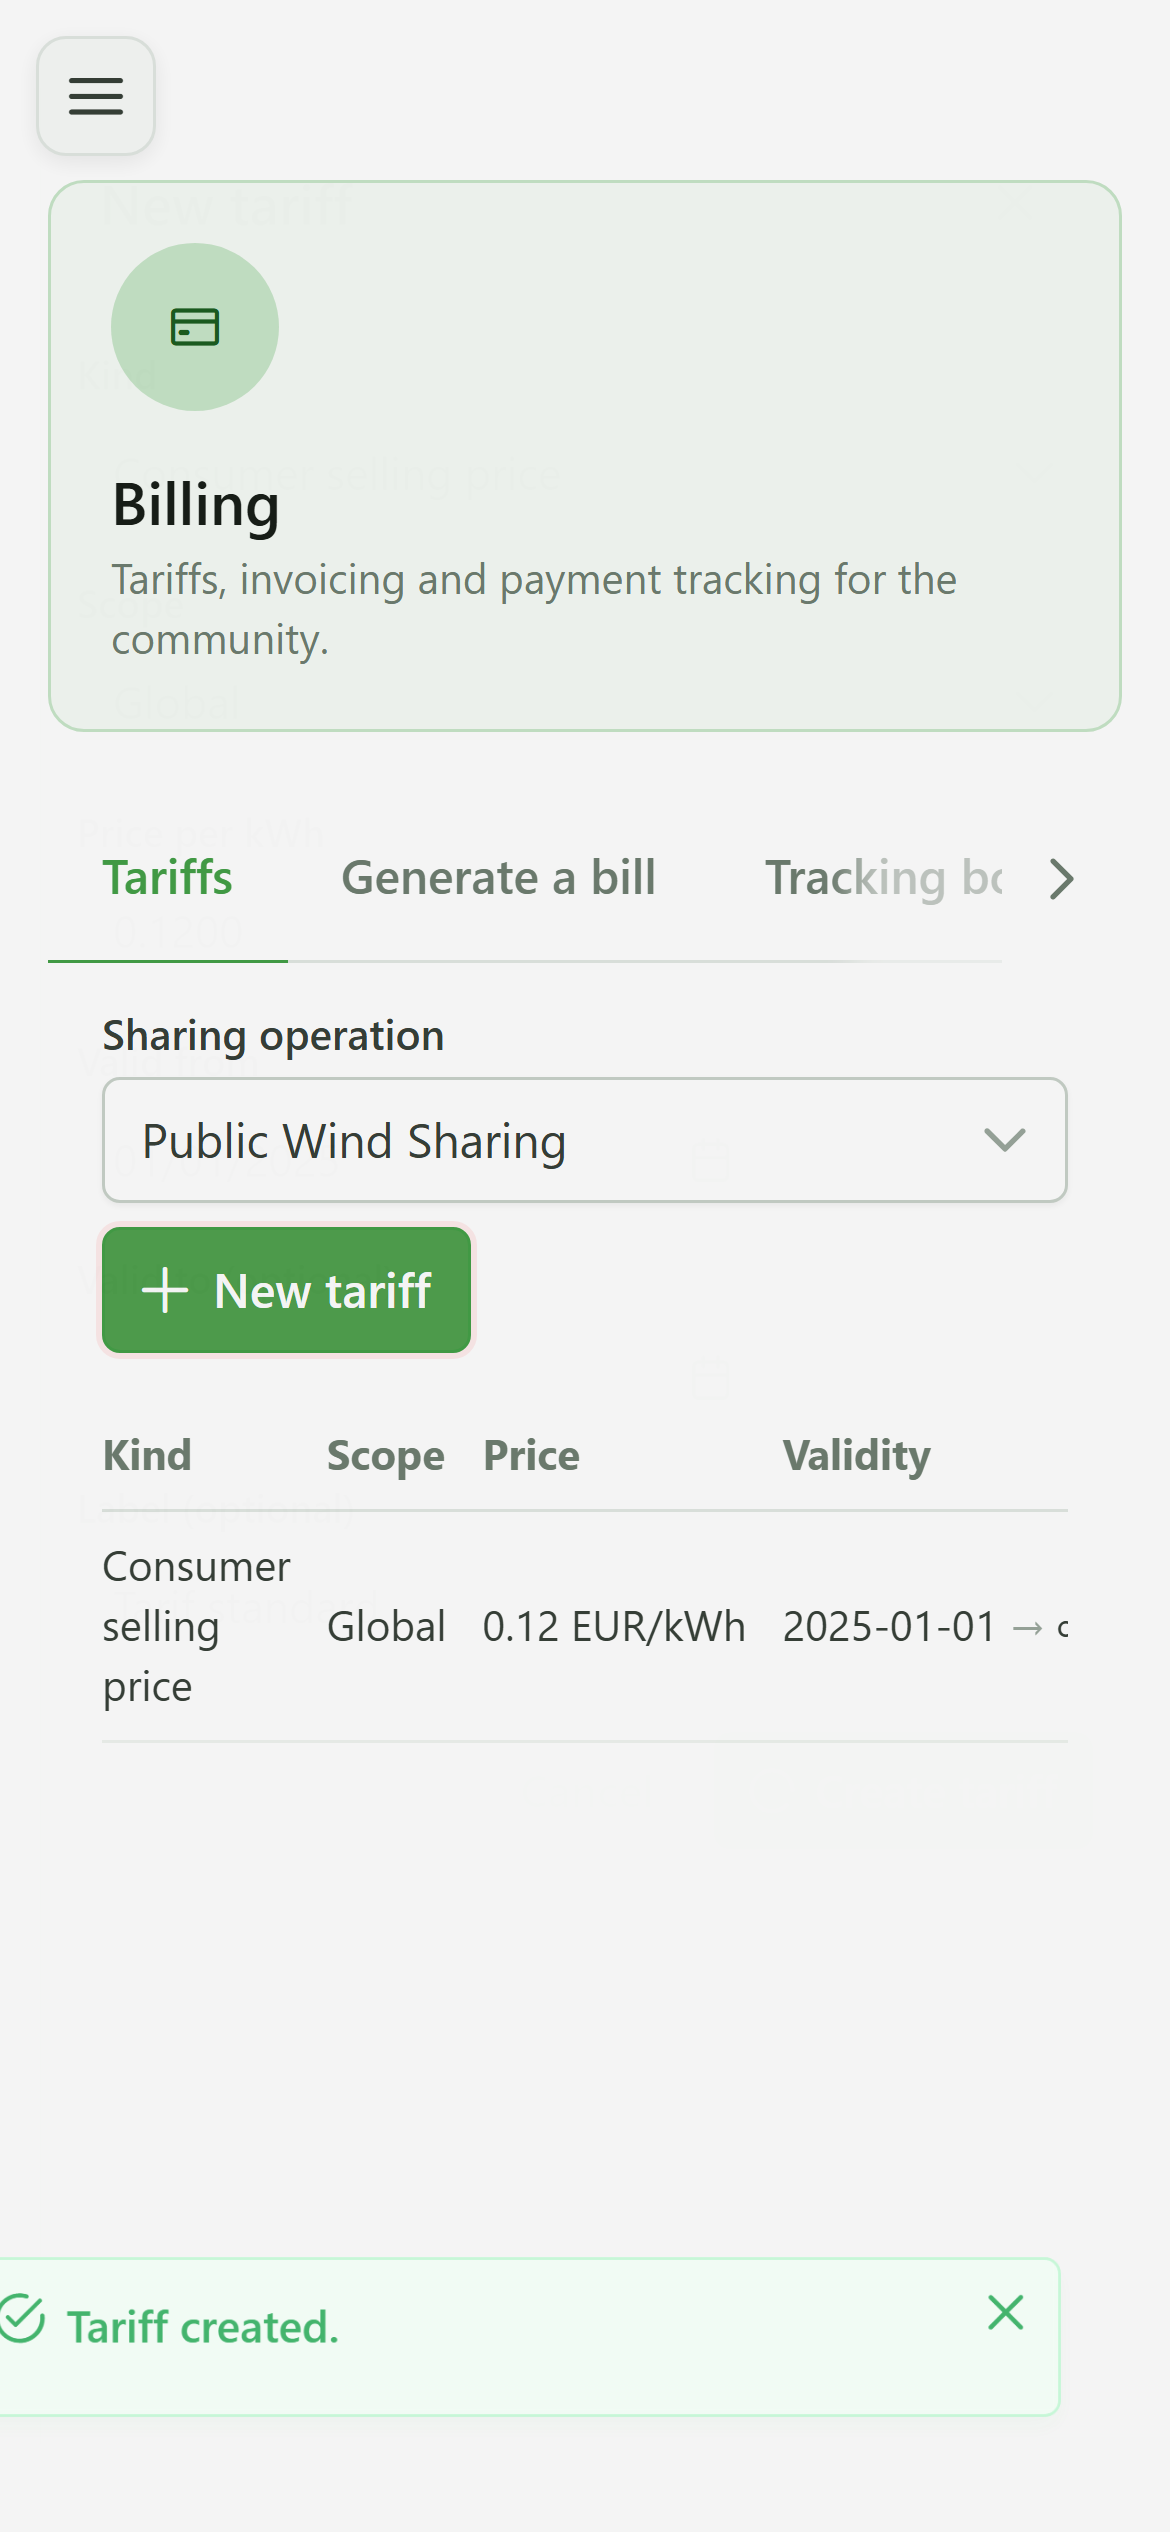
7 Add a buyback tariff
Step 1 — Tariffs
The wind operation has producers: their shared injection must be priced too. Open "New tariff" again to create a buyback tariff.
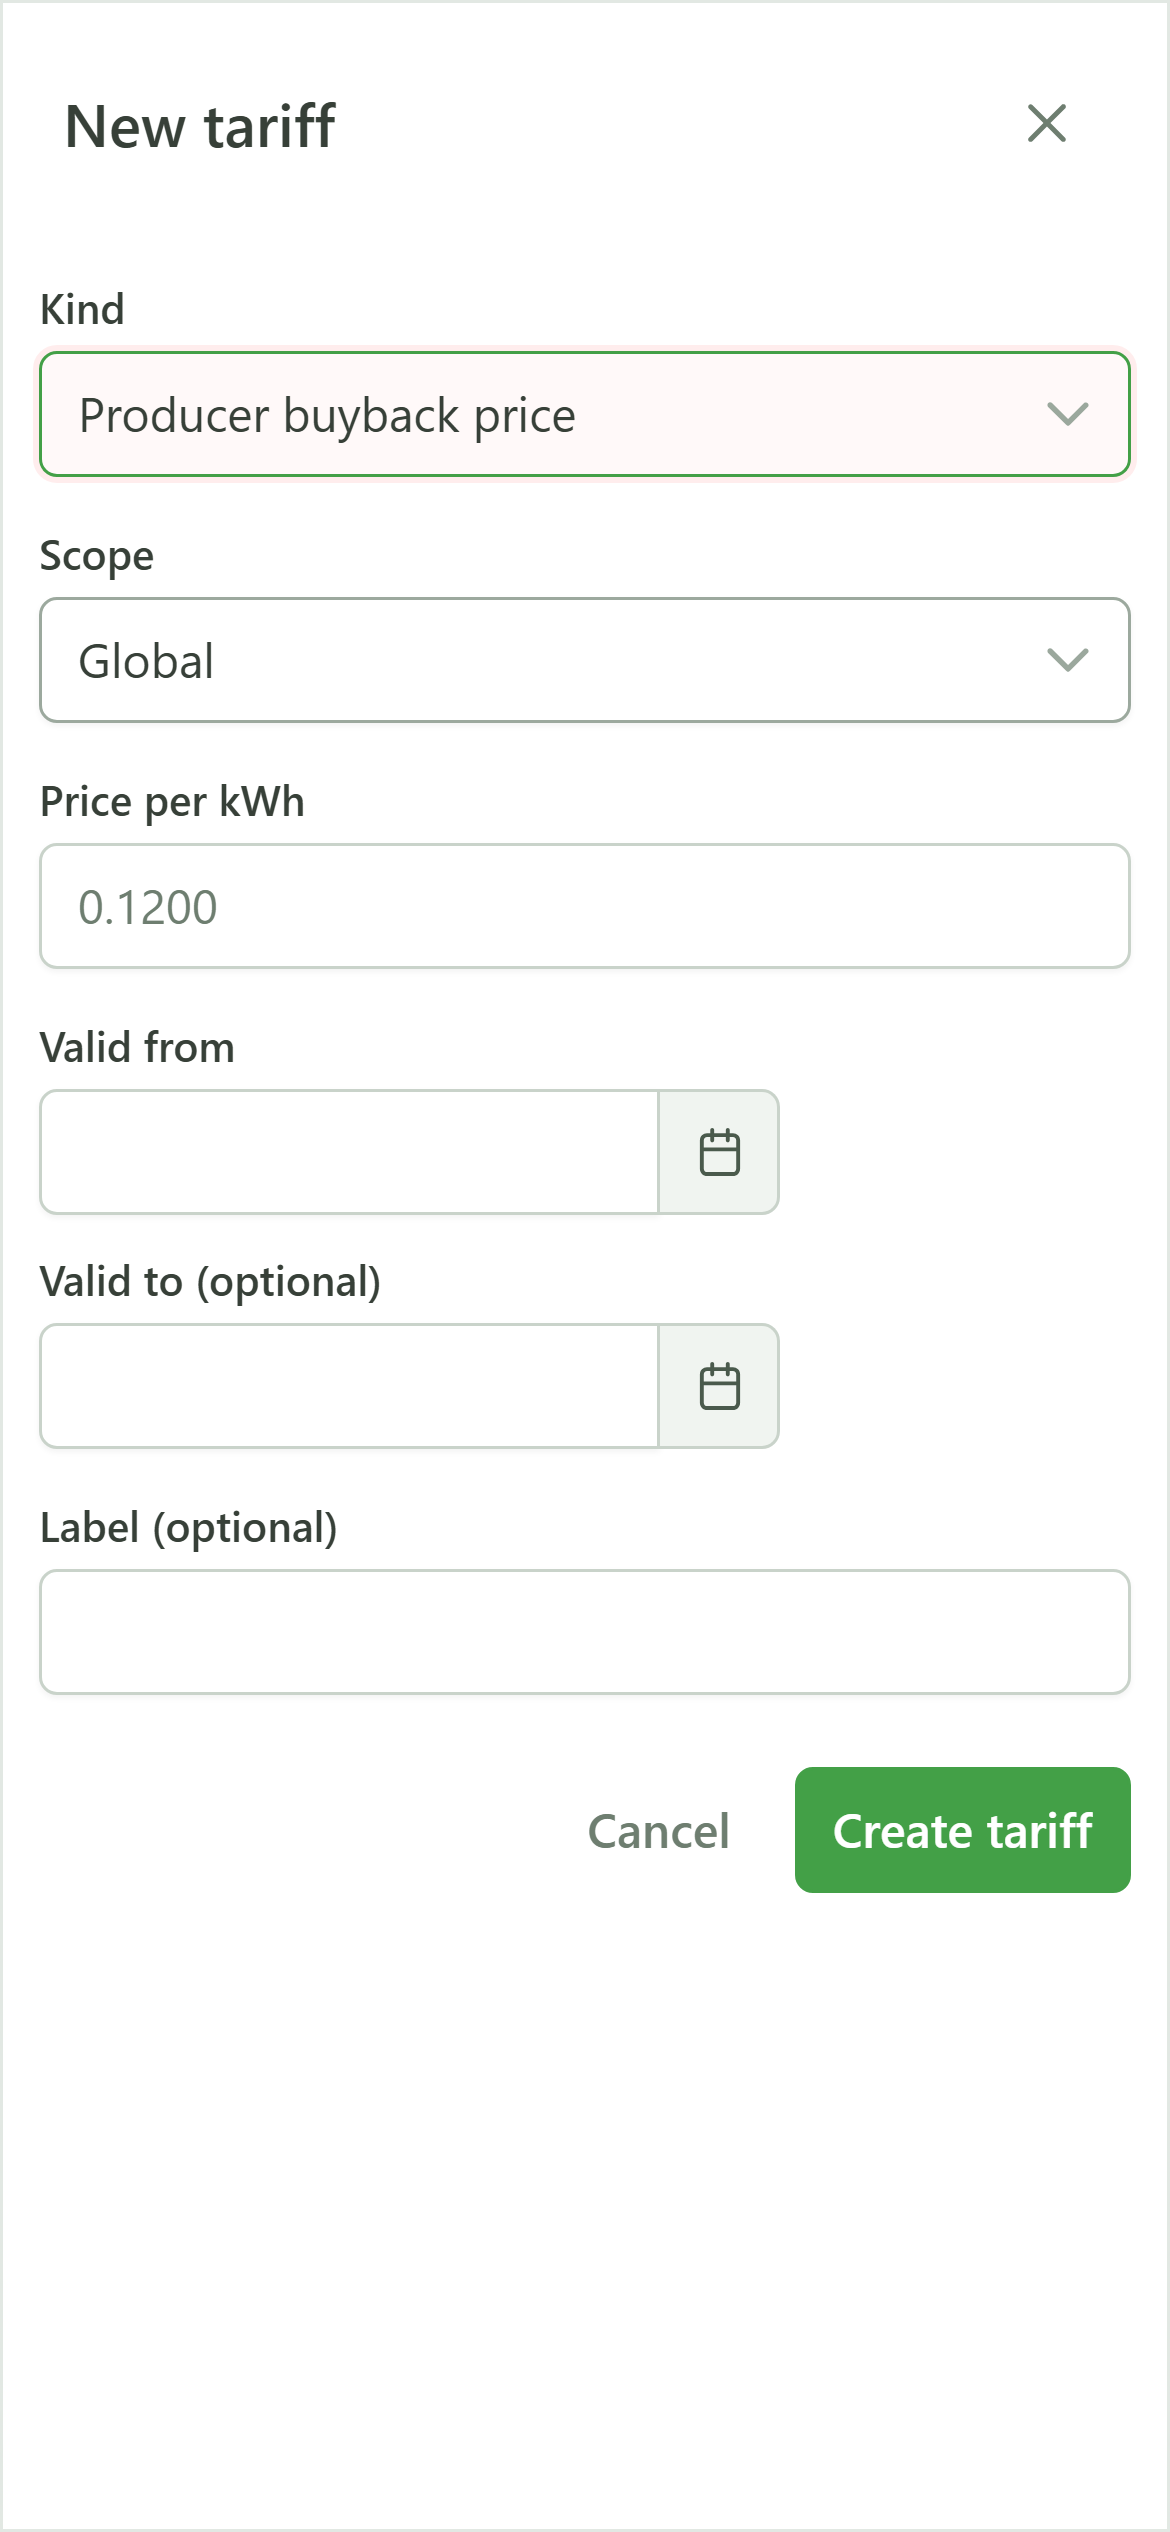
8 Choose the "Producer buyback" kind
Step 1 — Tariffs
Select the "Producer buyback" kind. This tariff pays for the energy producers inject and share with the community.
9 The tariffs are saved
Step 1 — Tariffs
The operation now has a consumer-selling tariff and a producer-buyback tariff. Let's move on to generating the invoices.
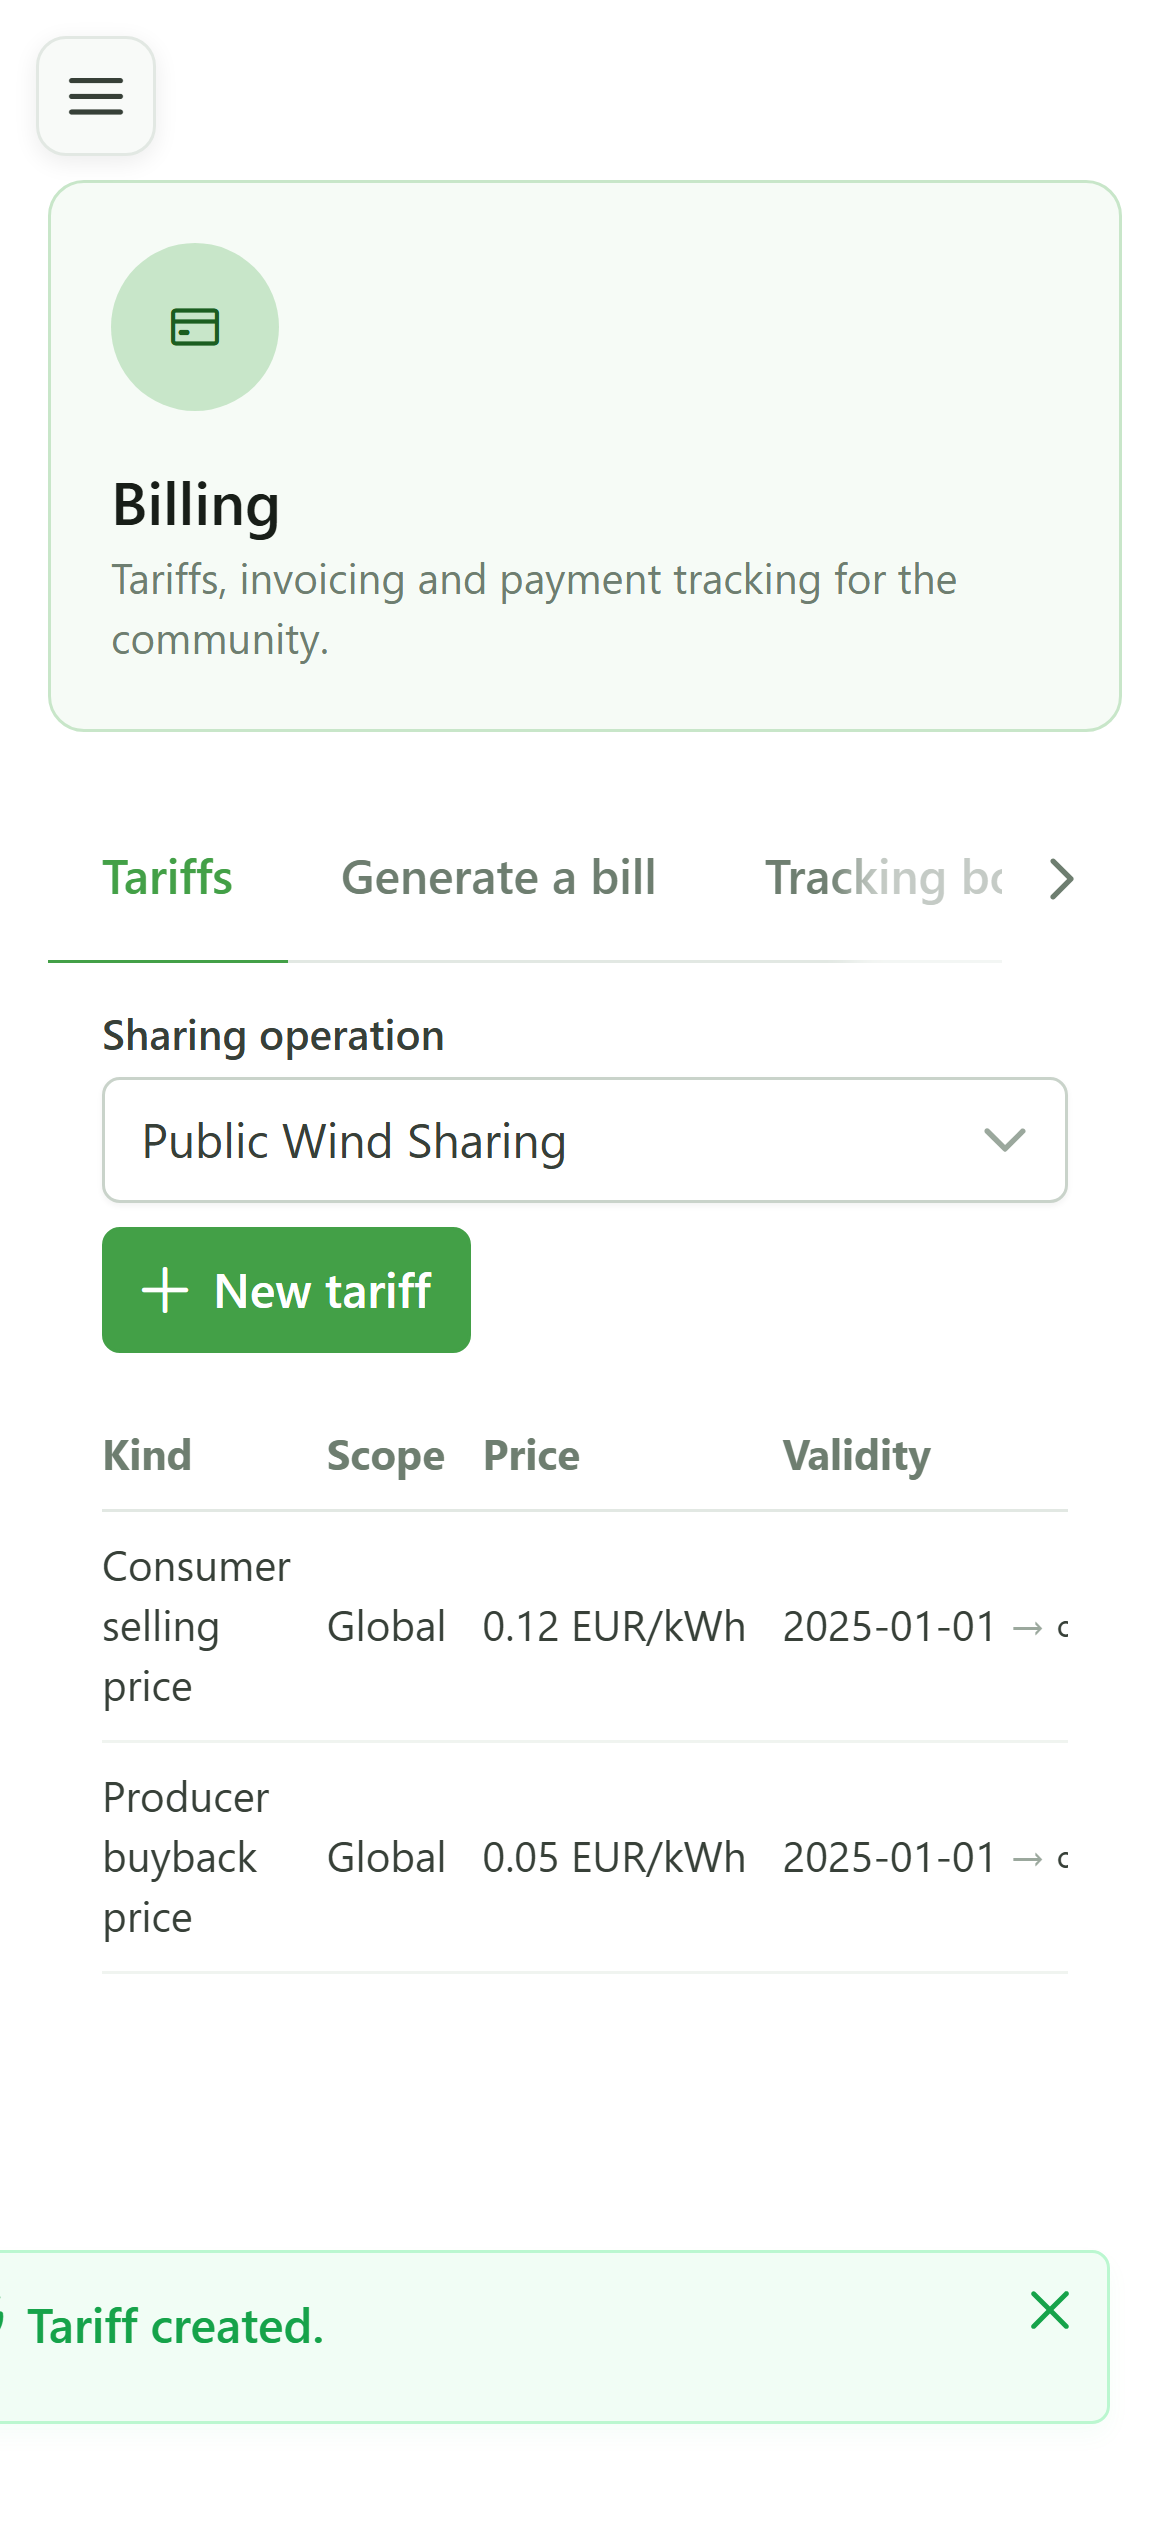
10 Go to generation
Step 2 — Generate
Open the "Generate" tab. This is where you import the consumption data and launch the invoice computation over a period.
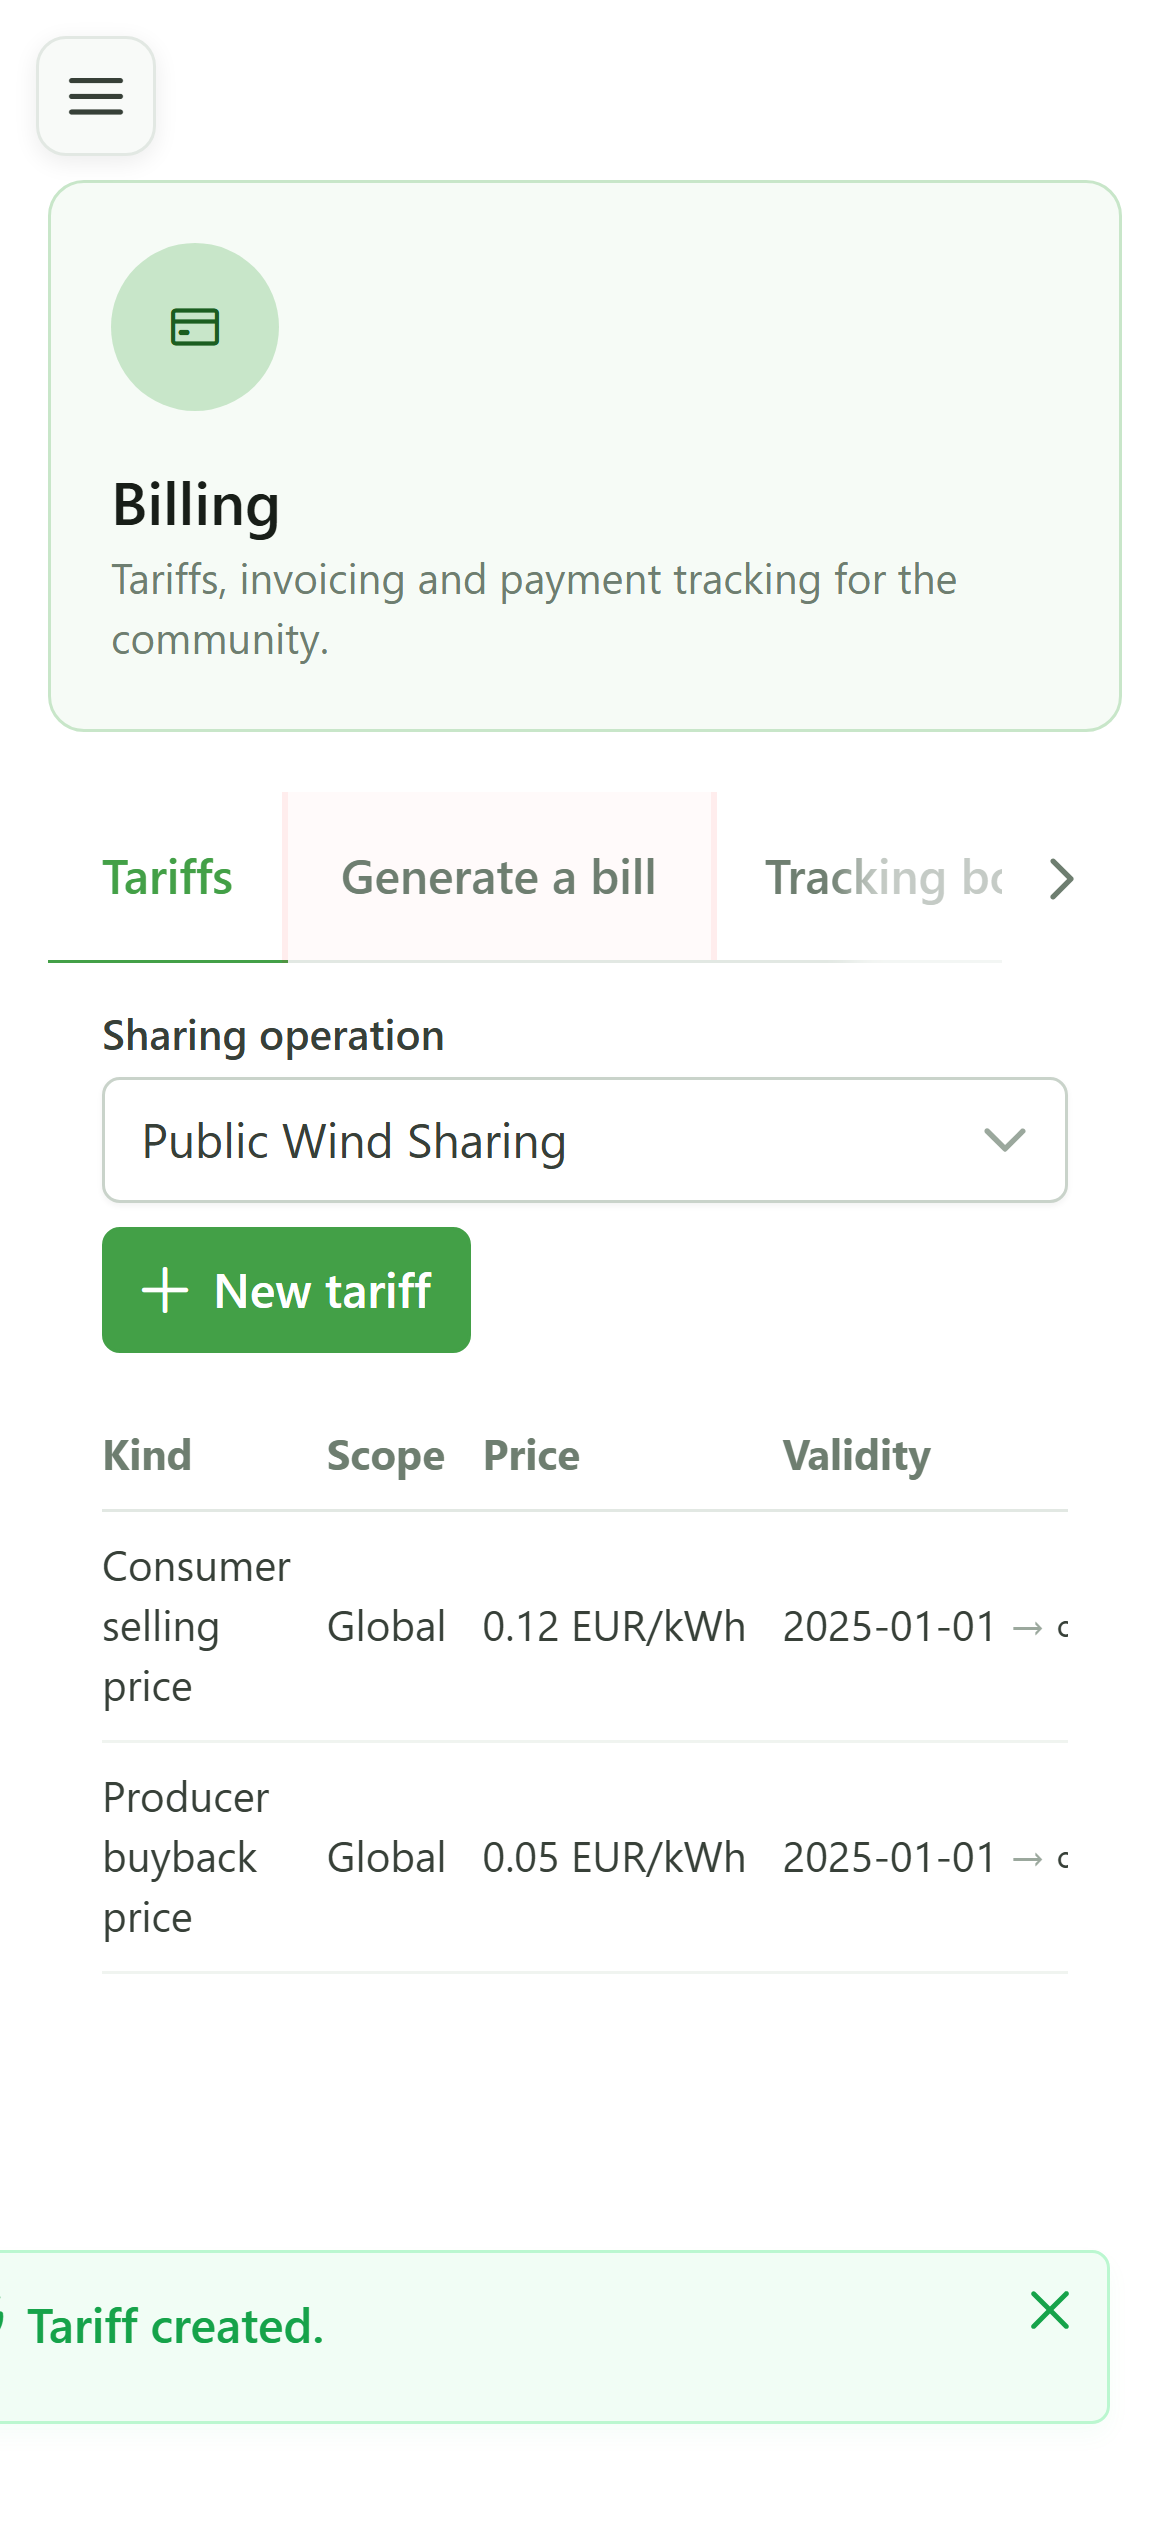
11 Pick the operation to bill
Step 2 — Generate
Select "Public Wind Sharing" again. The consumption-import area appears.
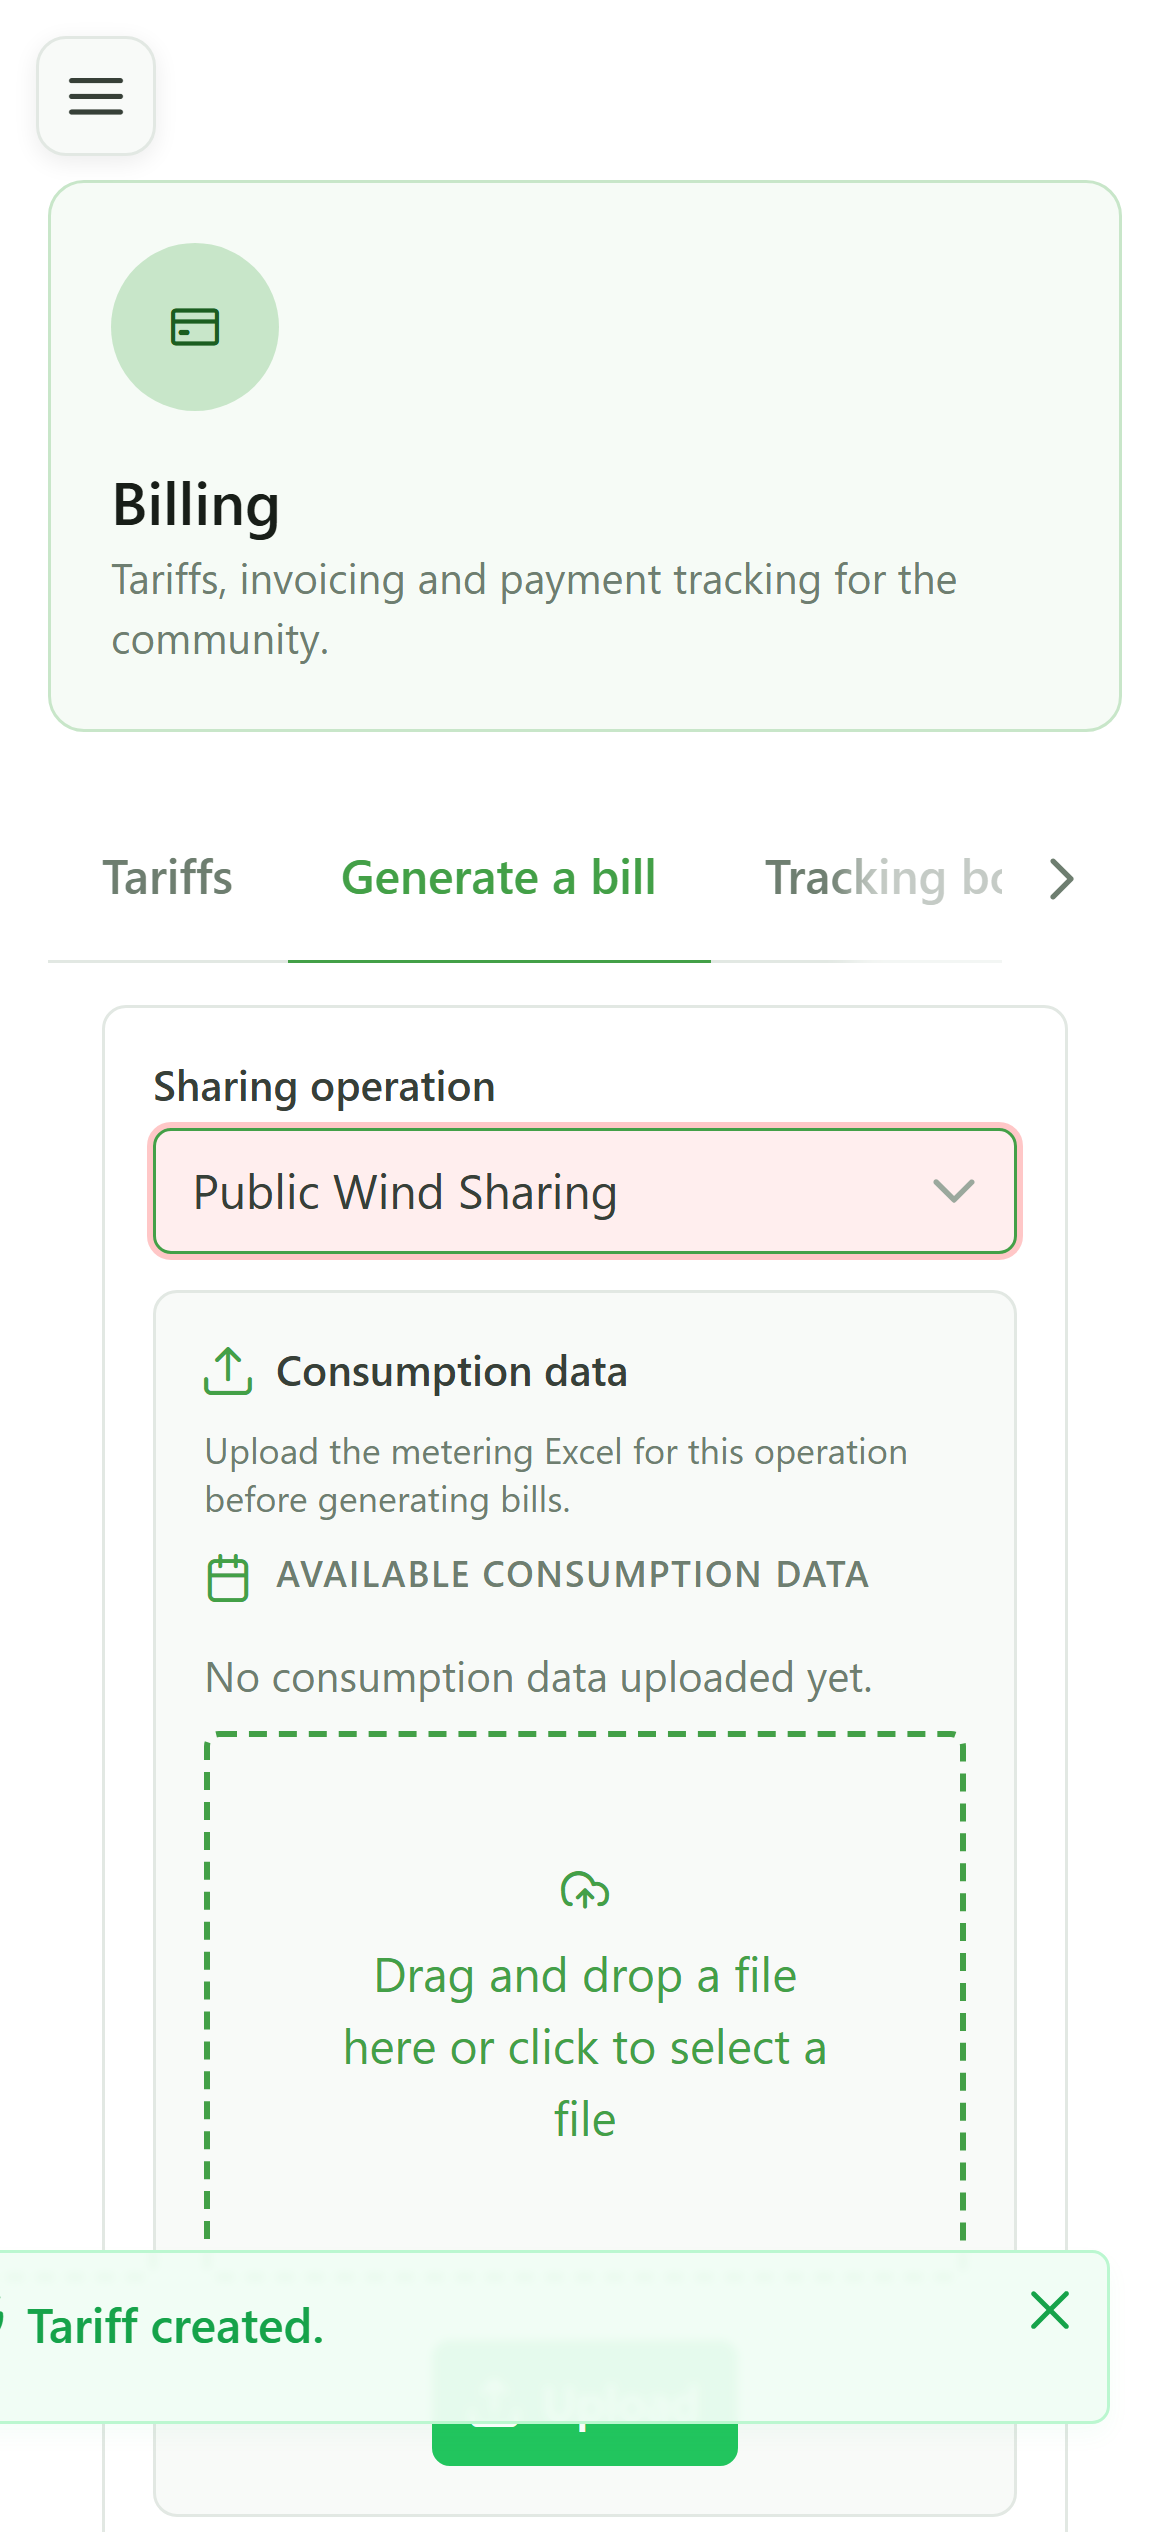
12 Import the RESA metering file
Step 2 — Generate
Drop the operation's RESA file (the month's 15-minute readings) into the import zone. It provides the shared energy that will be billed.
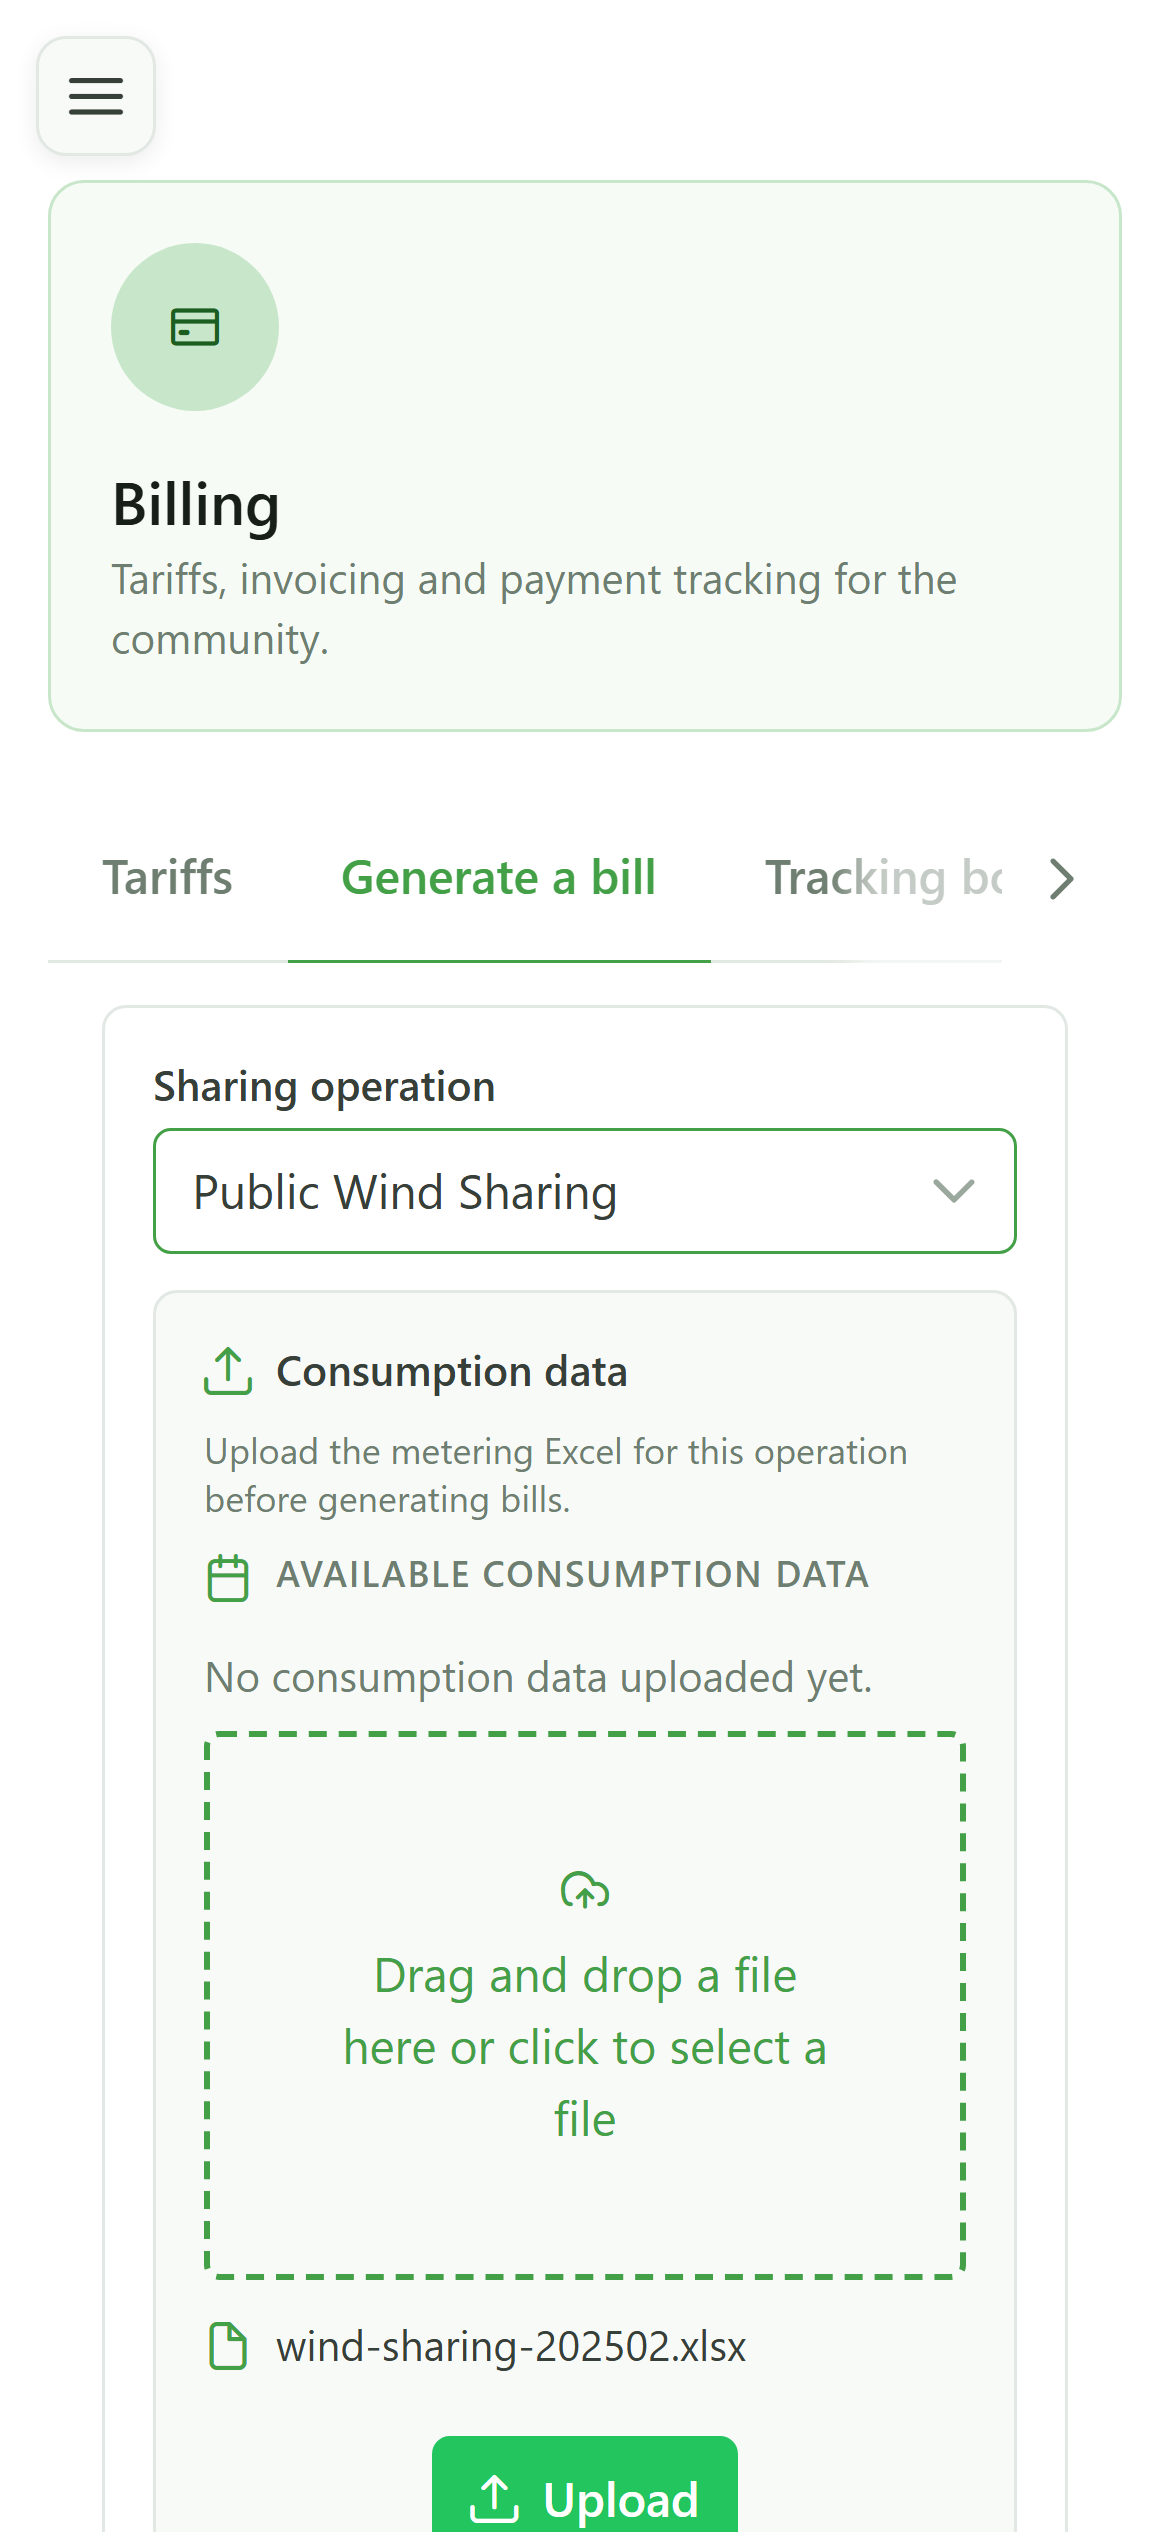
13 Set the period
Step 2 — Generate
Choose the period to bill — here February 2025, the month covered by the imported file. Billing will cover that period's shared energy.
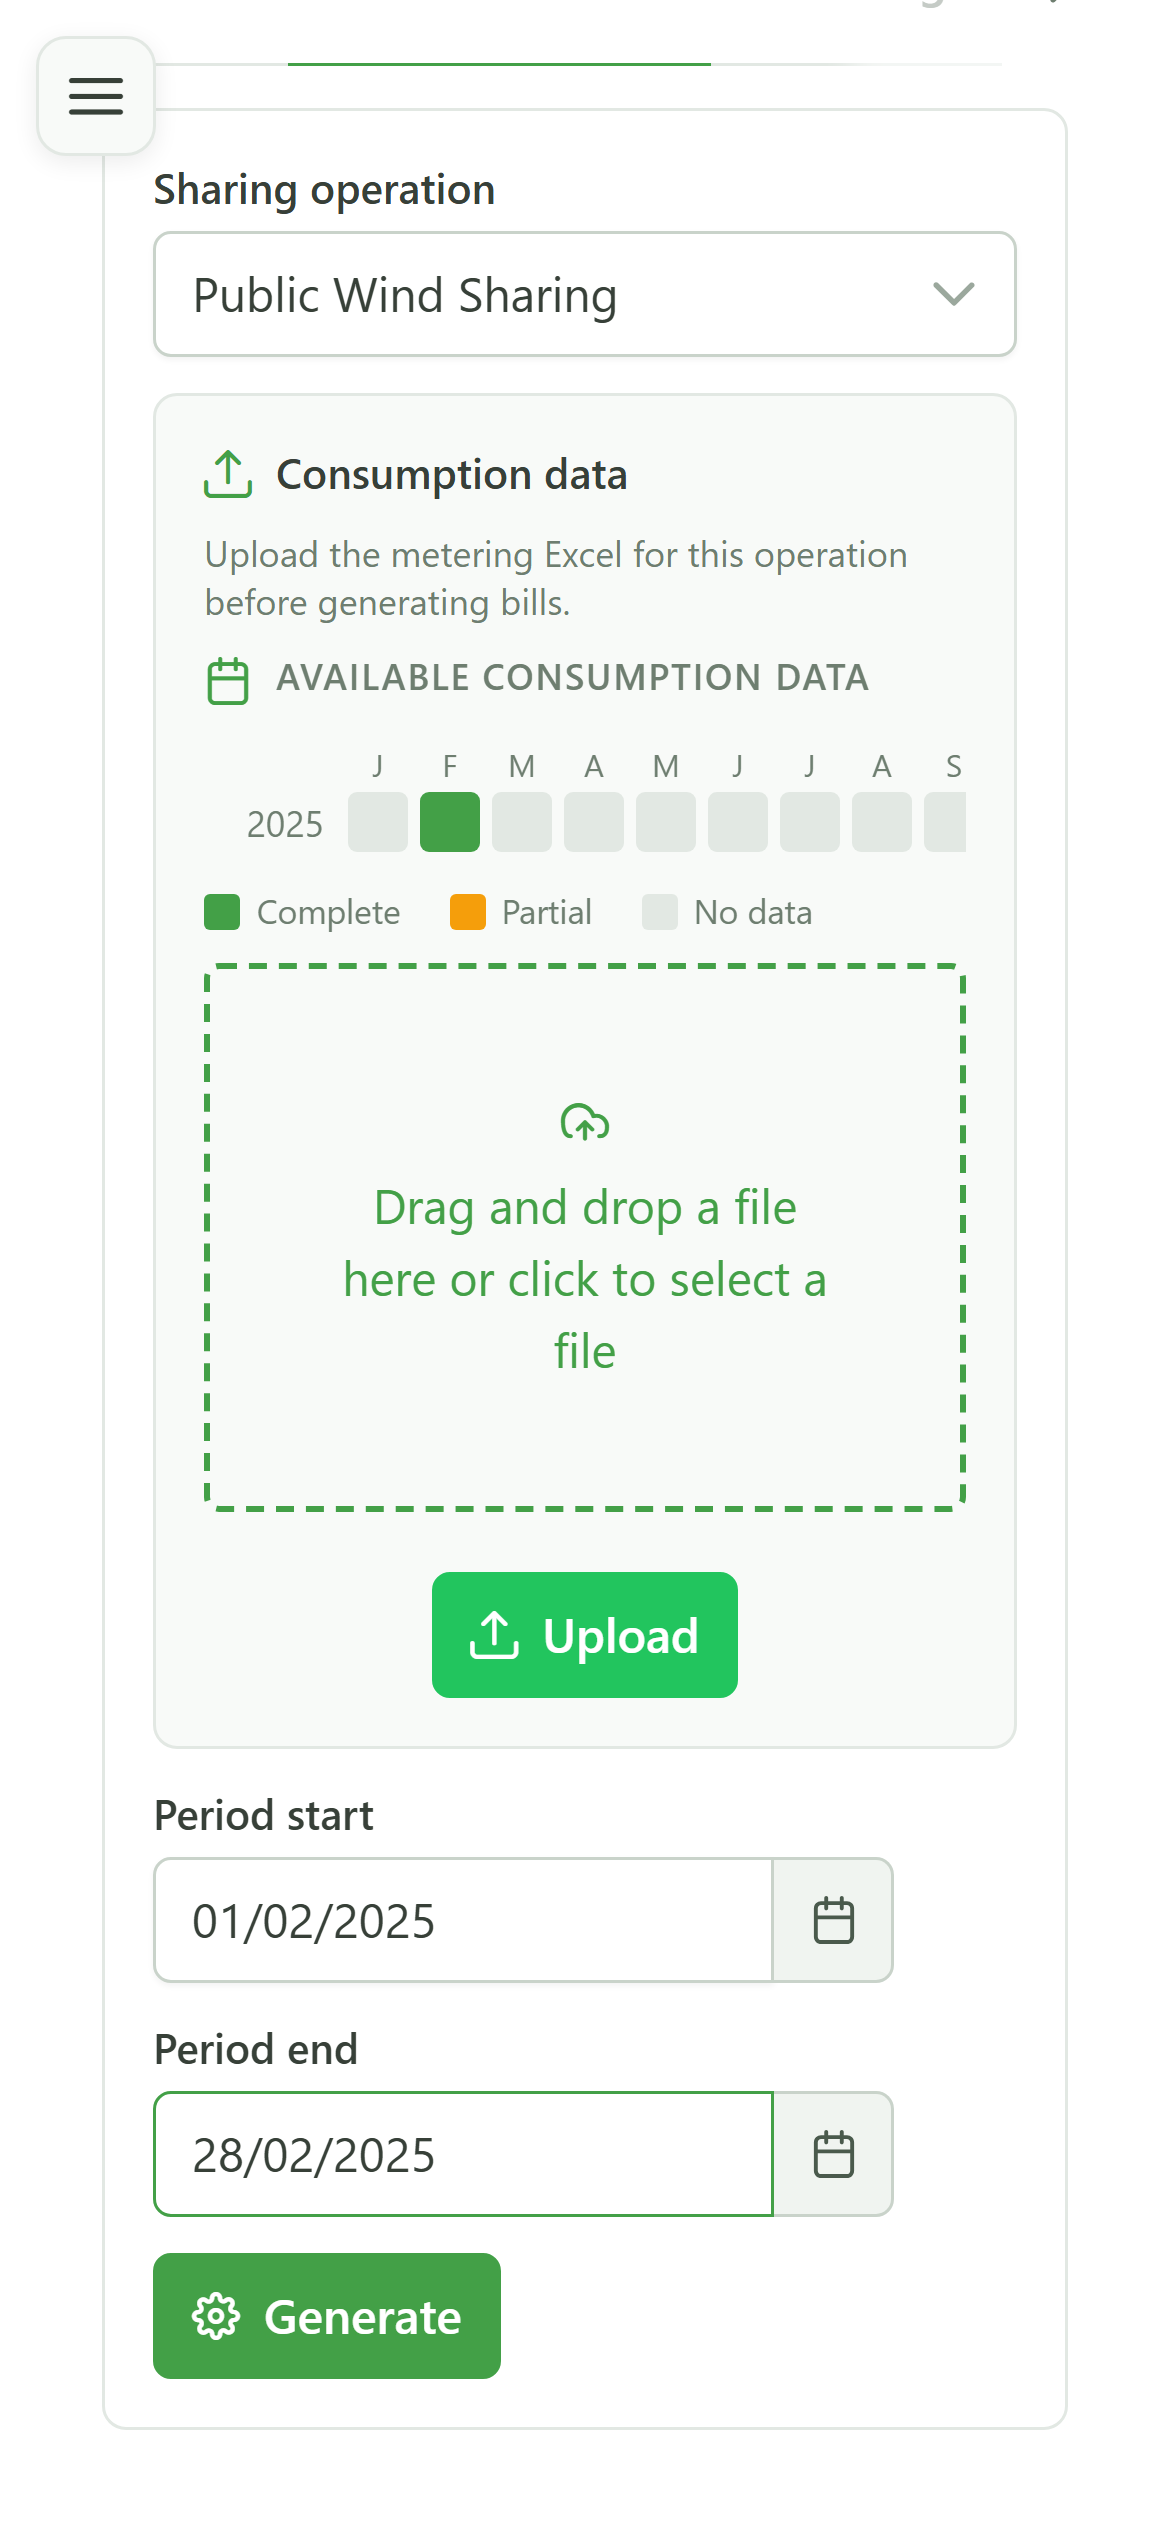
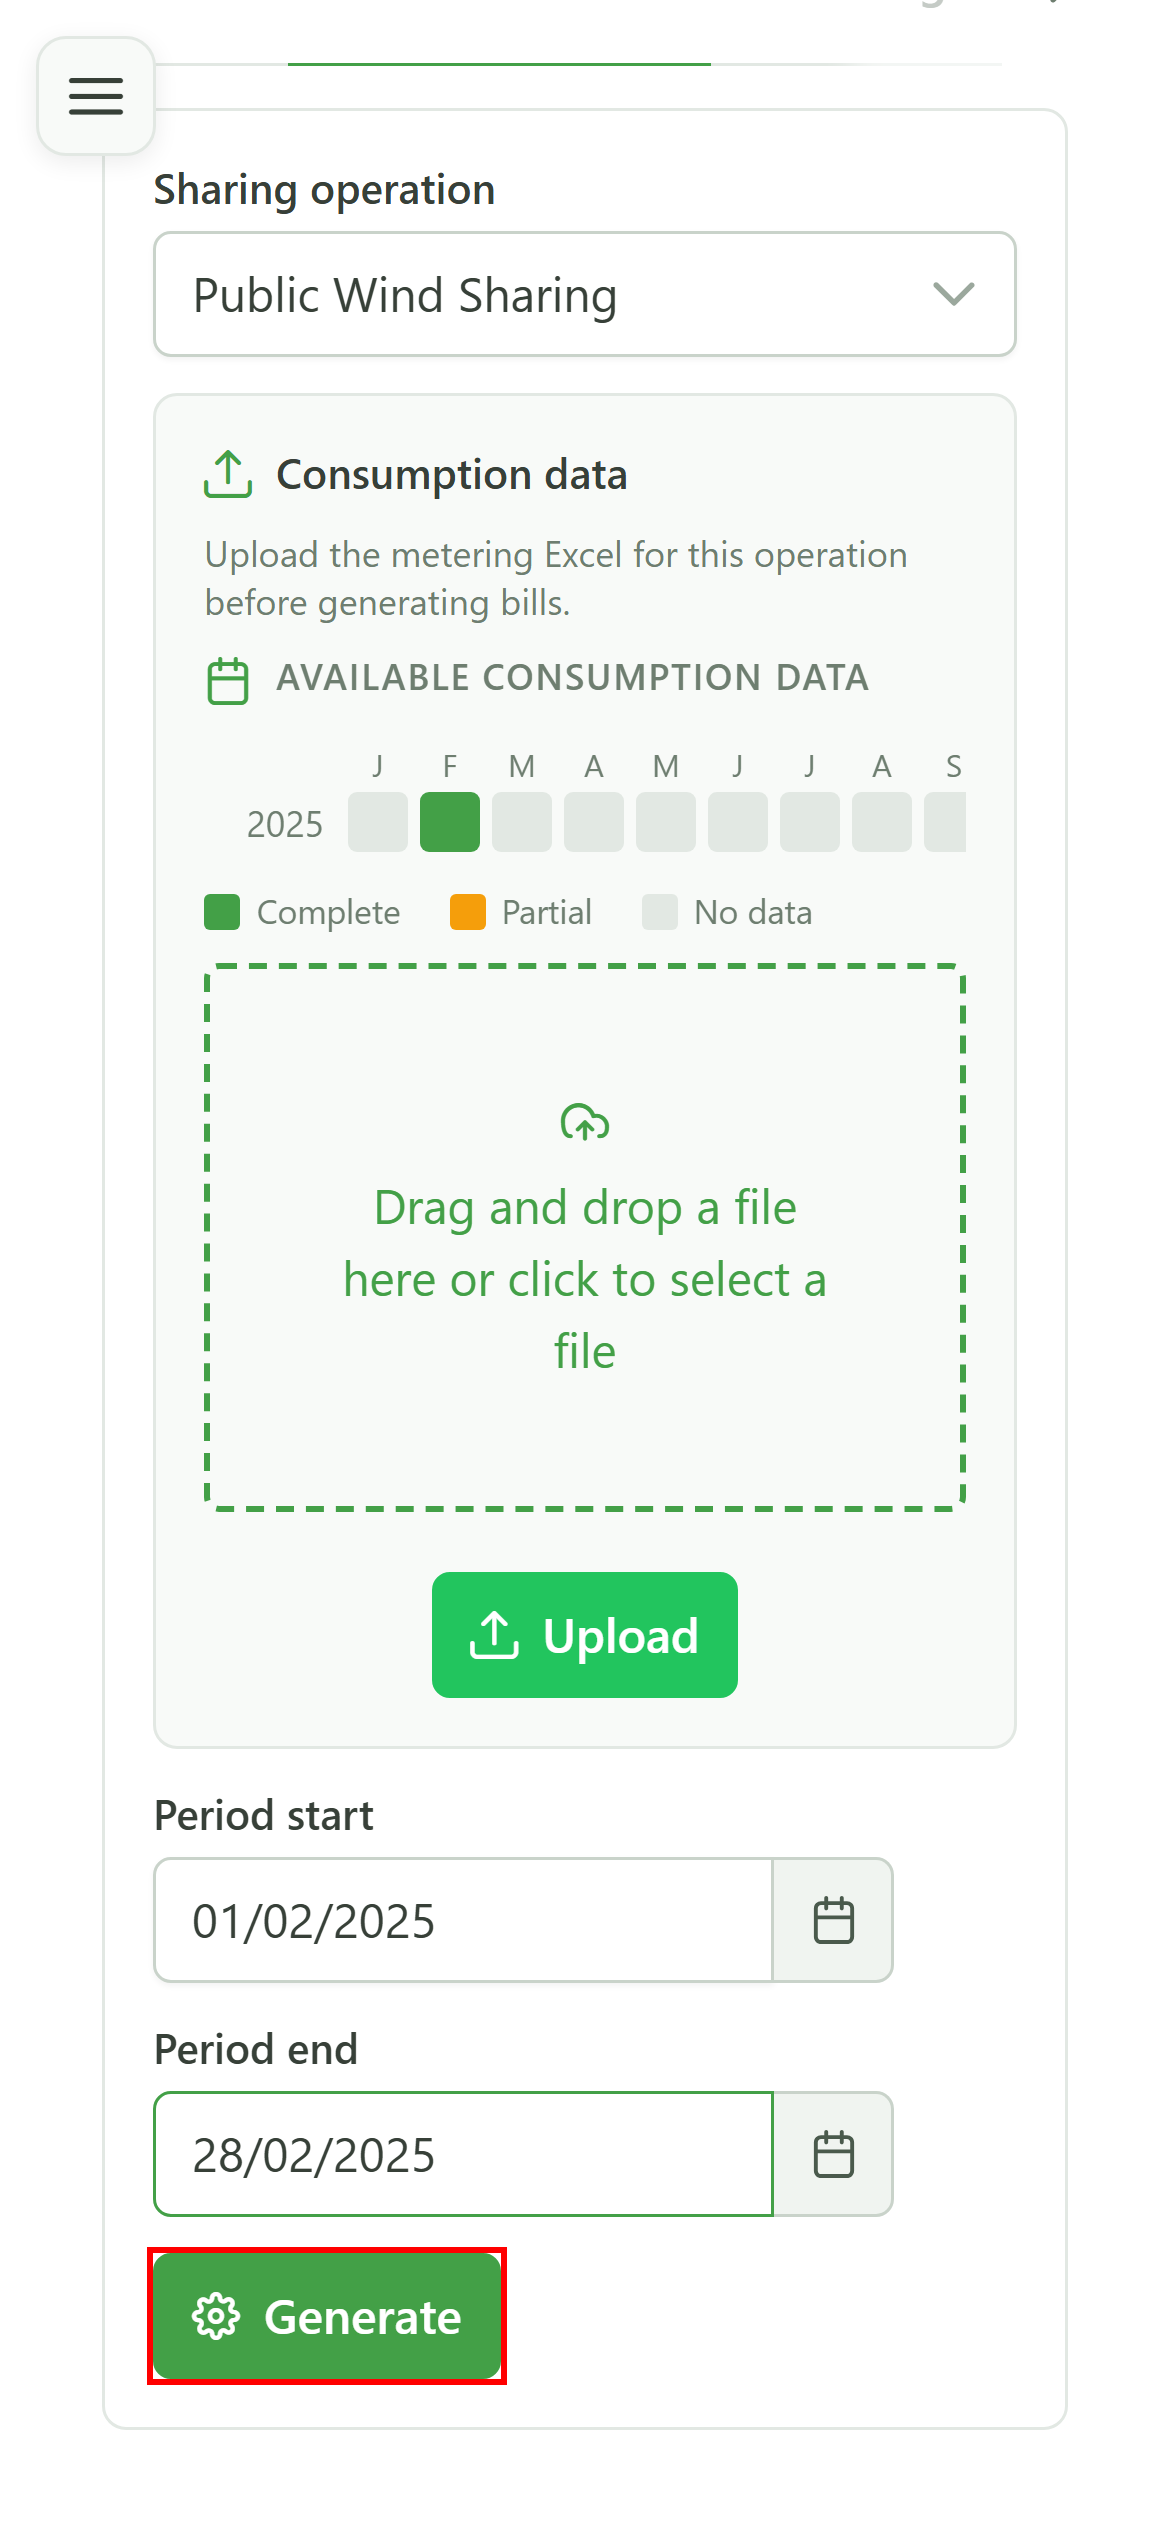
14 Generate the invoices
Step 2 — Generate
Click "Generate". The computation runs in the background: as soon as it finishes, one invoice per operation member appears.
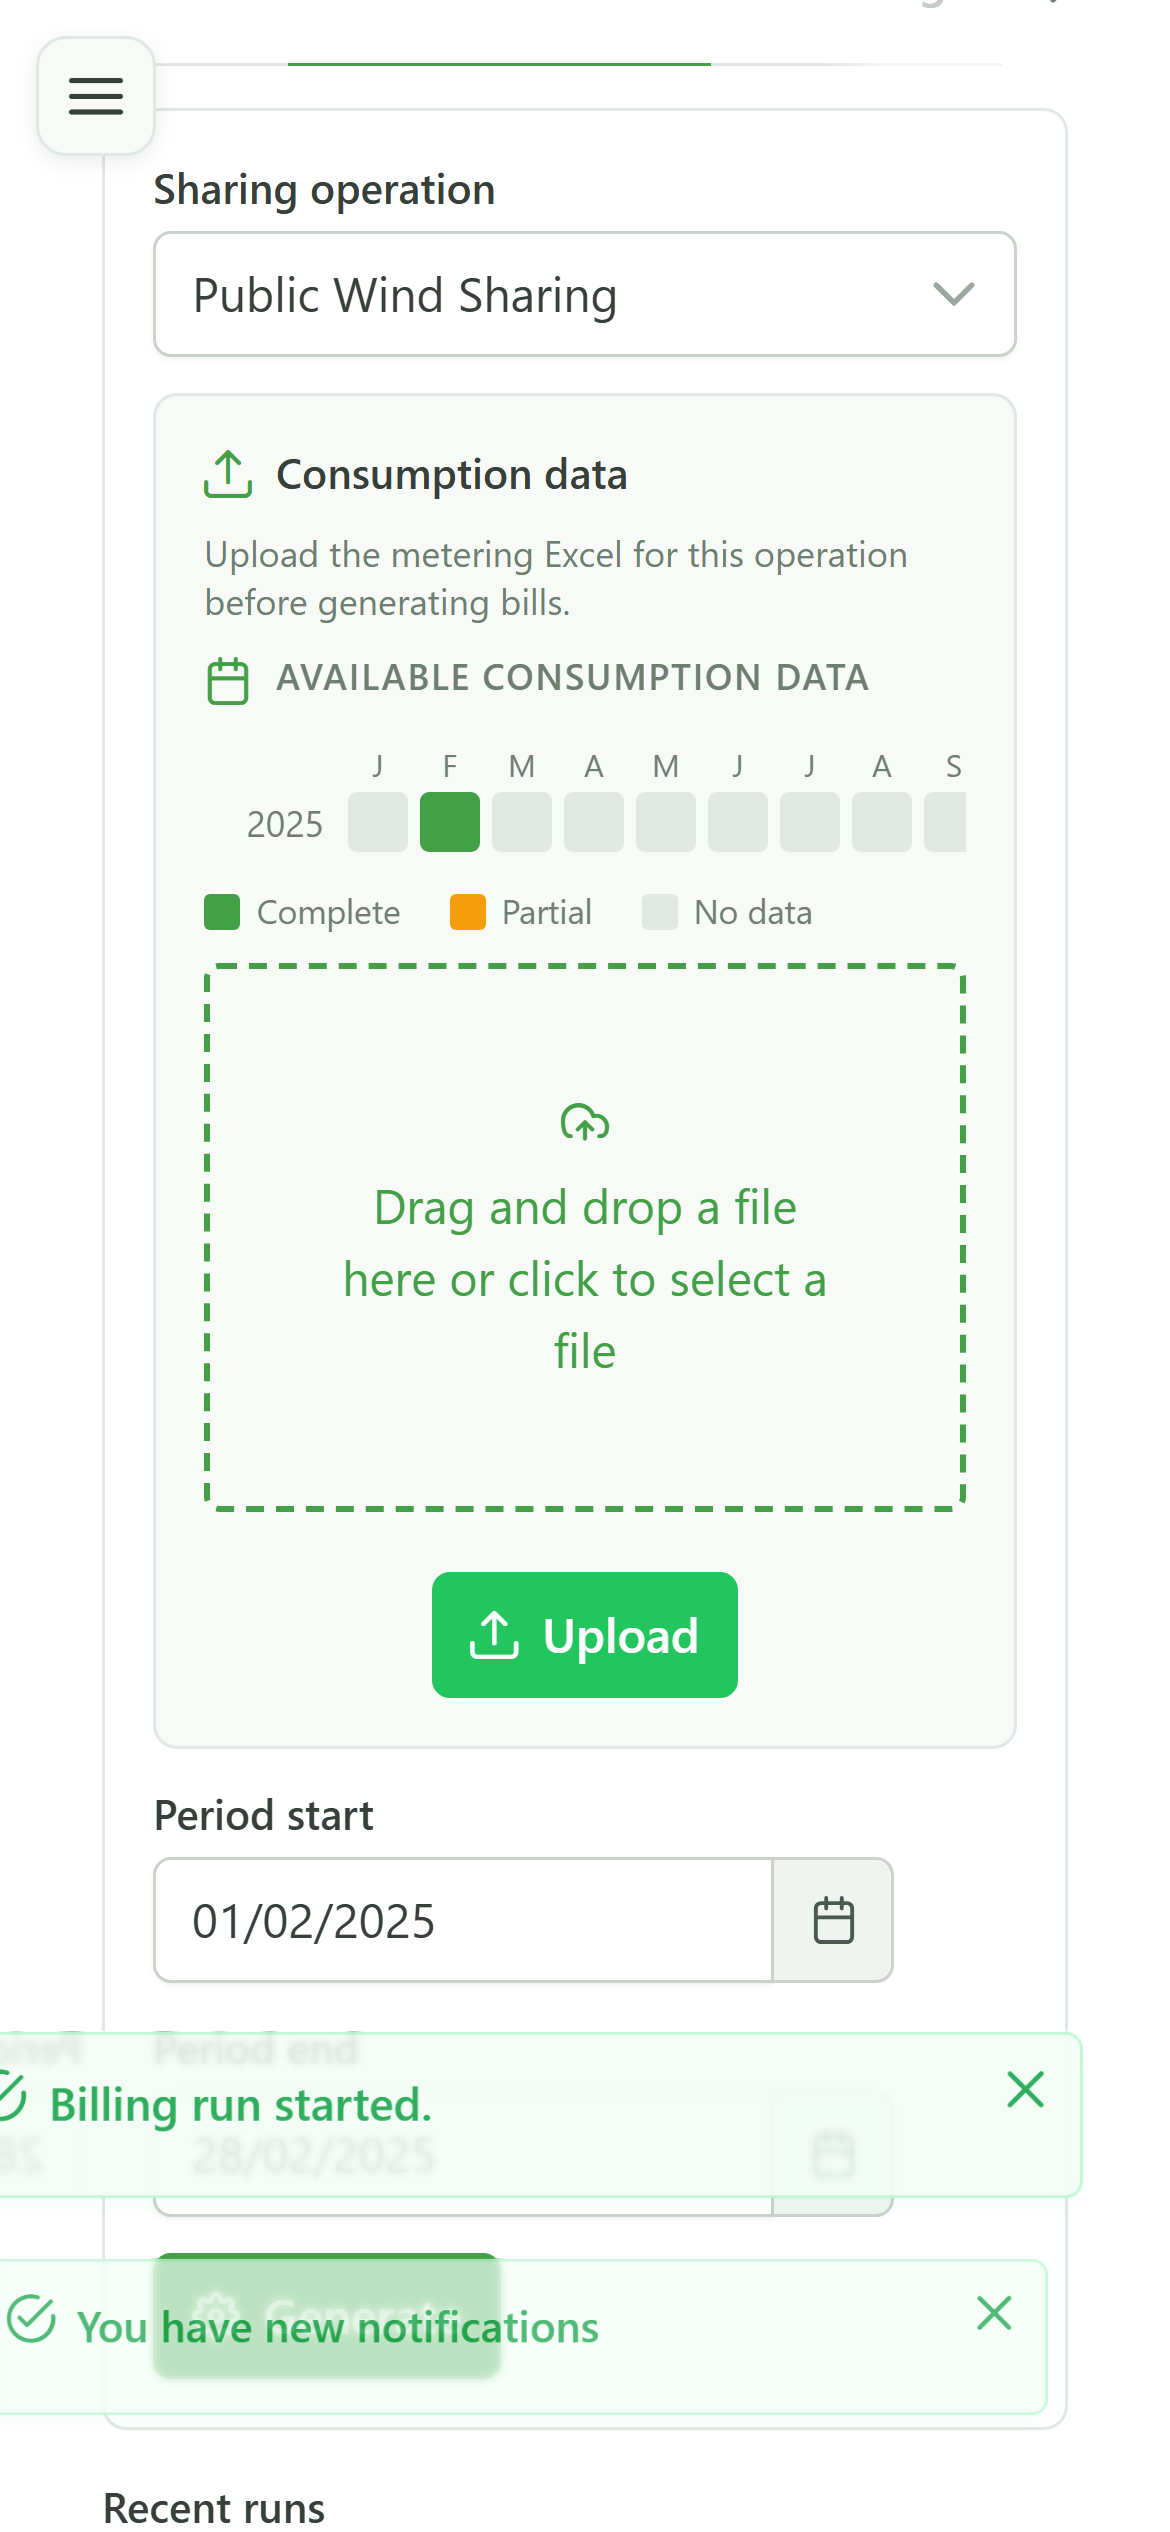
15 The invoices are generated
Step 2 — Generate
Each operation member now has a "Draft" invoice. It remains to issue it and then record its payment.
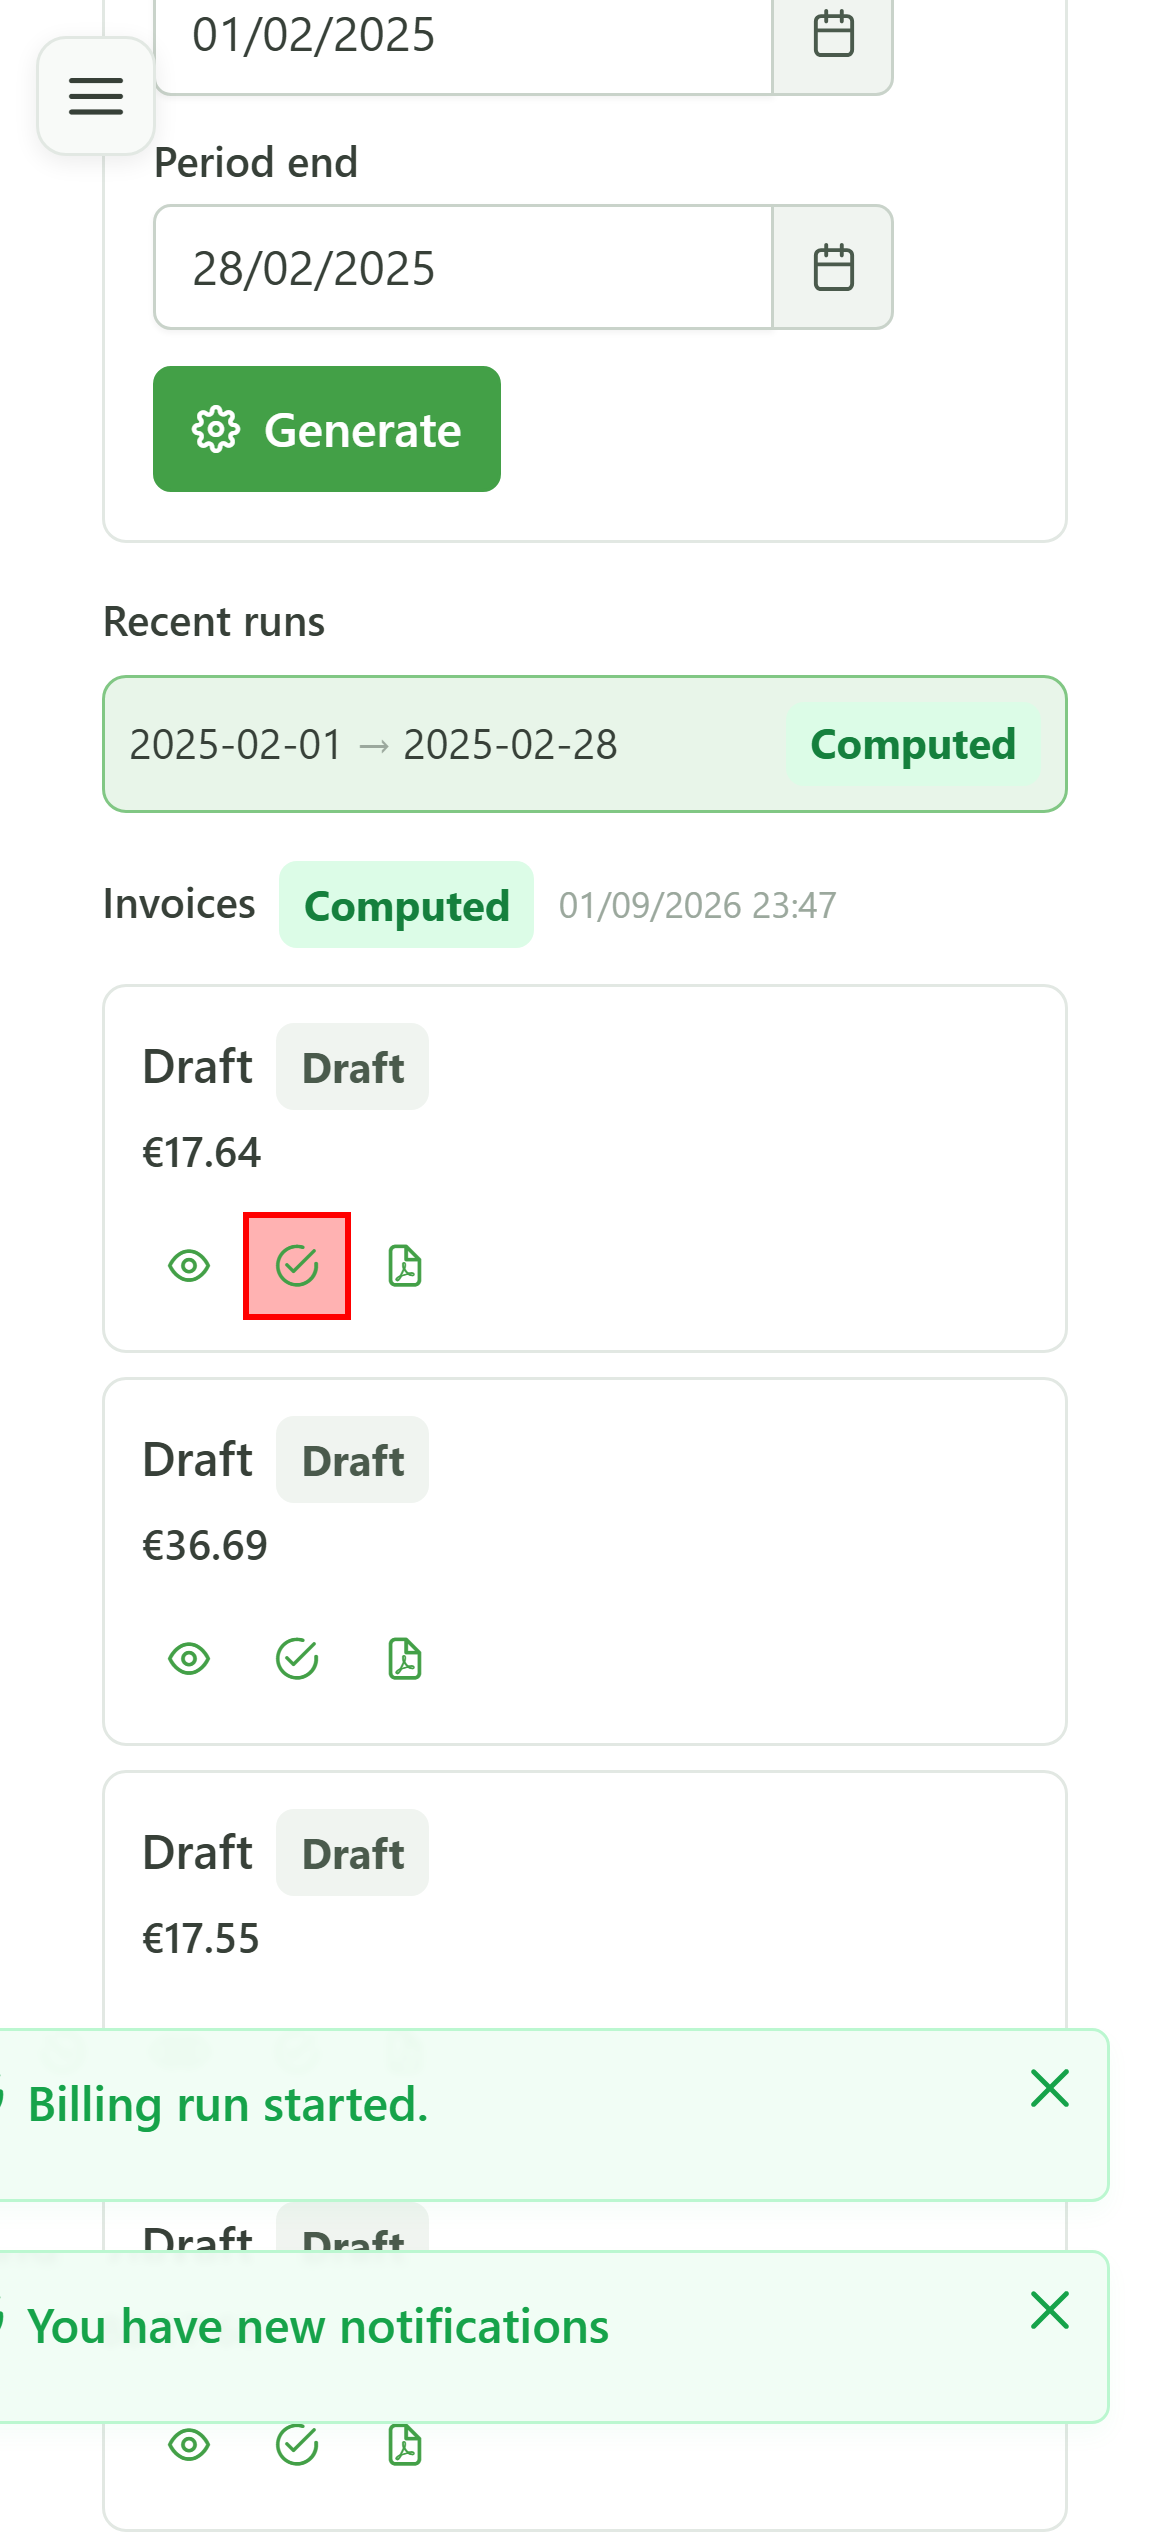
16 Issue the invoice
Step 3 — Issue and collect
Click an invoice's "Issue" icon. It gets a legal number and a structured communication, and its status becomes "Issued".
17 Register a payment
Step 3 — Issue and collect
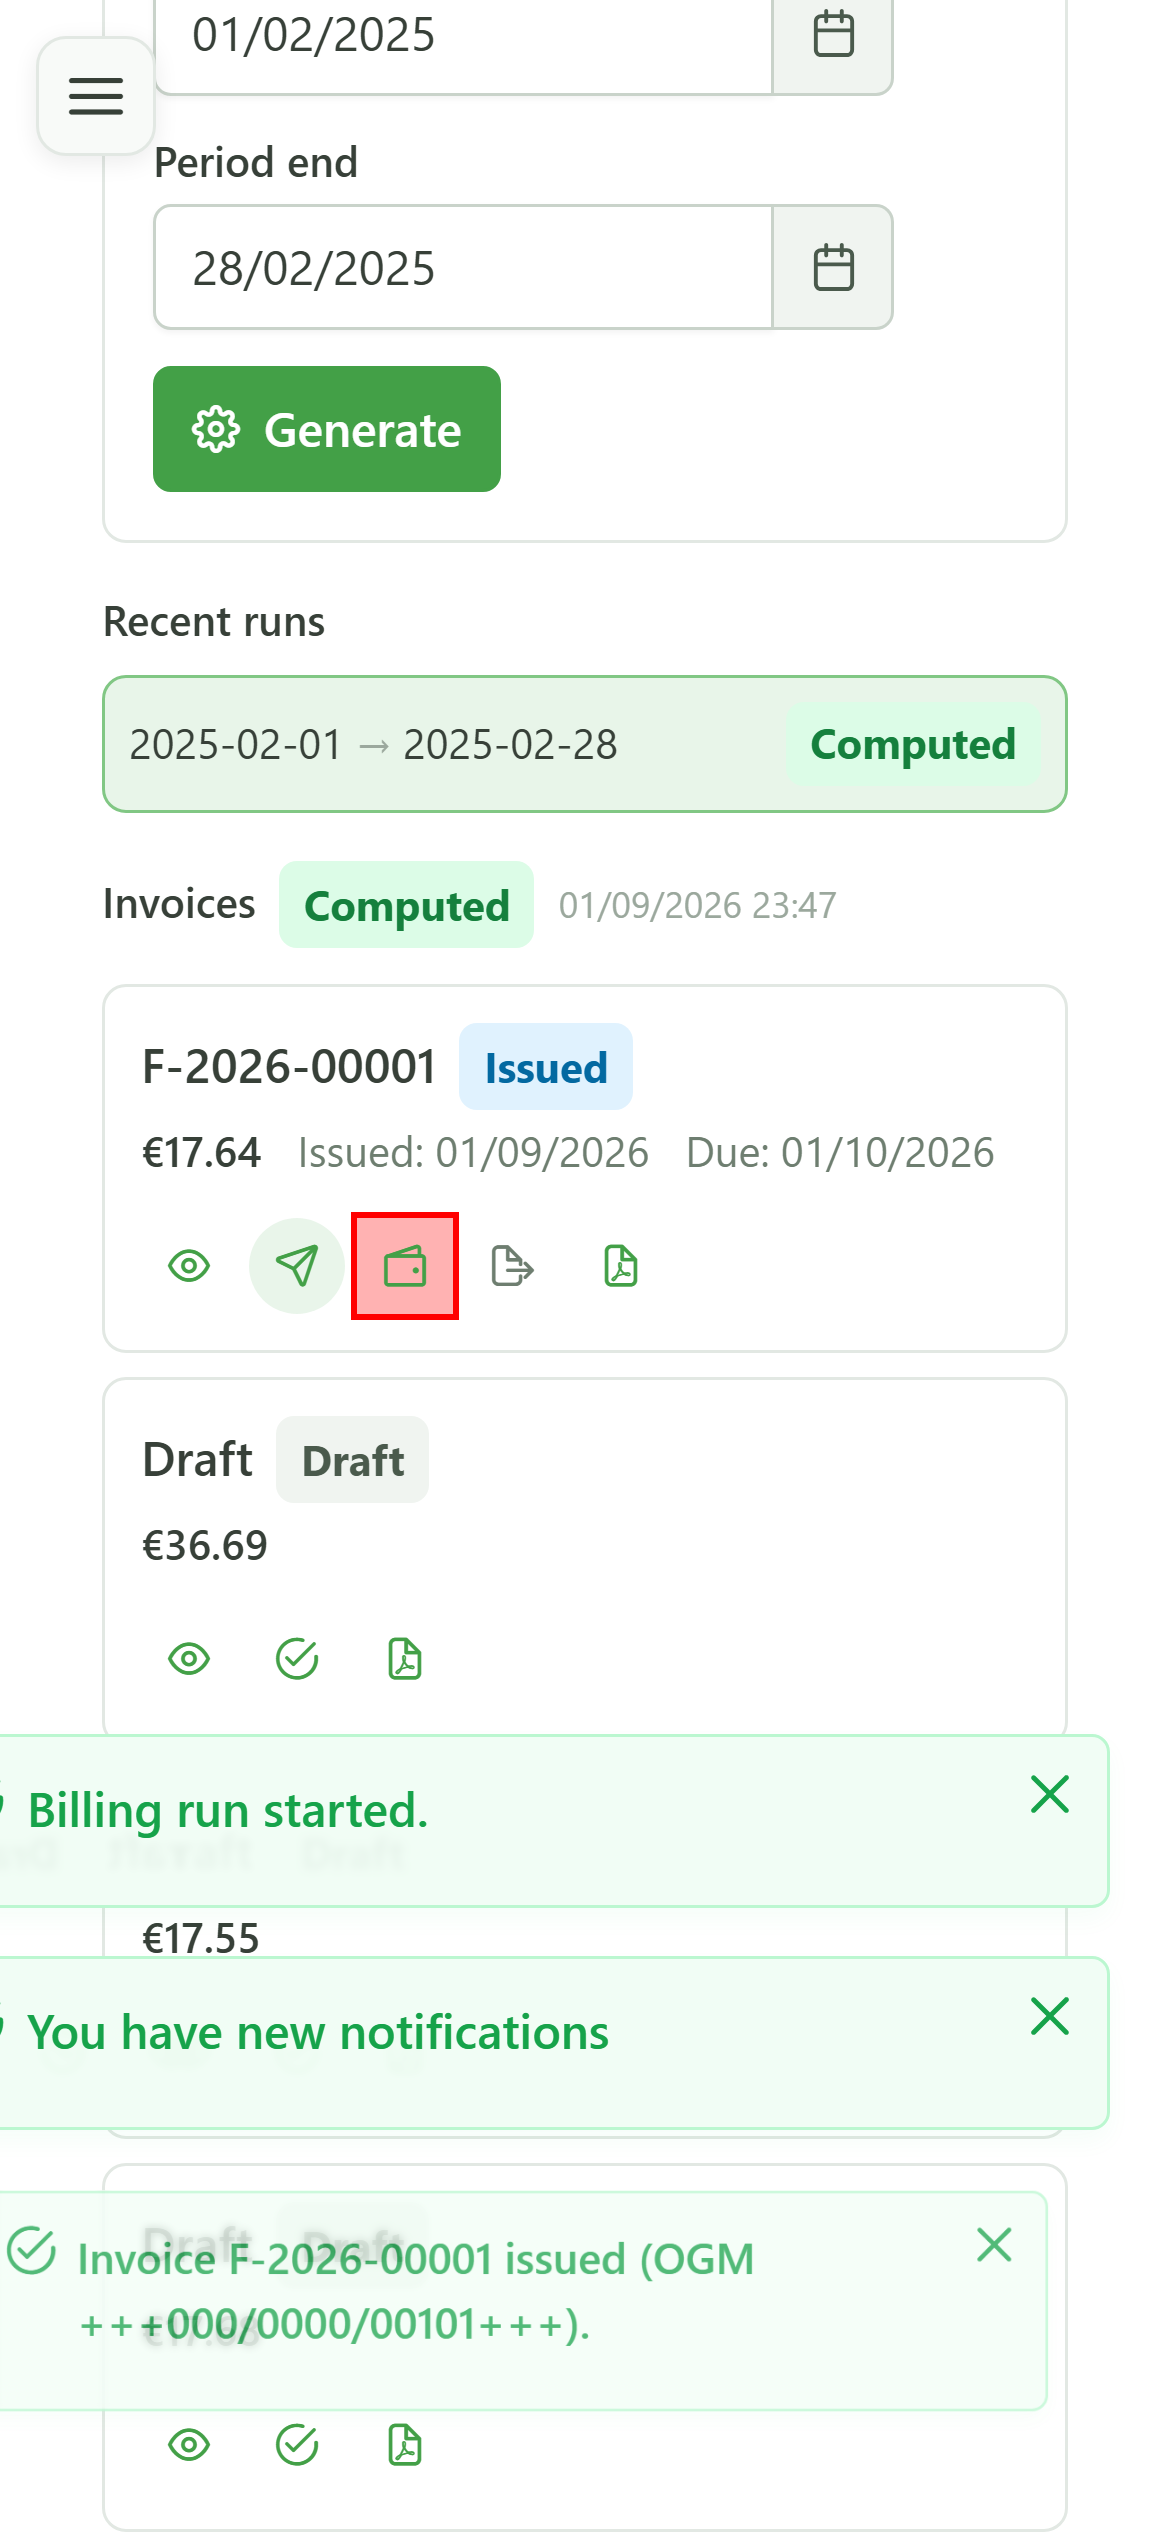
Once the invoice is issued, the "Register a payment" (wallet) icon appears. Click it to open the payment dialog.
18 Confirm the payment
Step 3 — Issue and collect
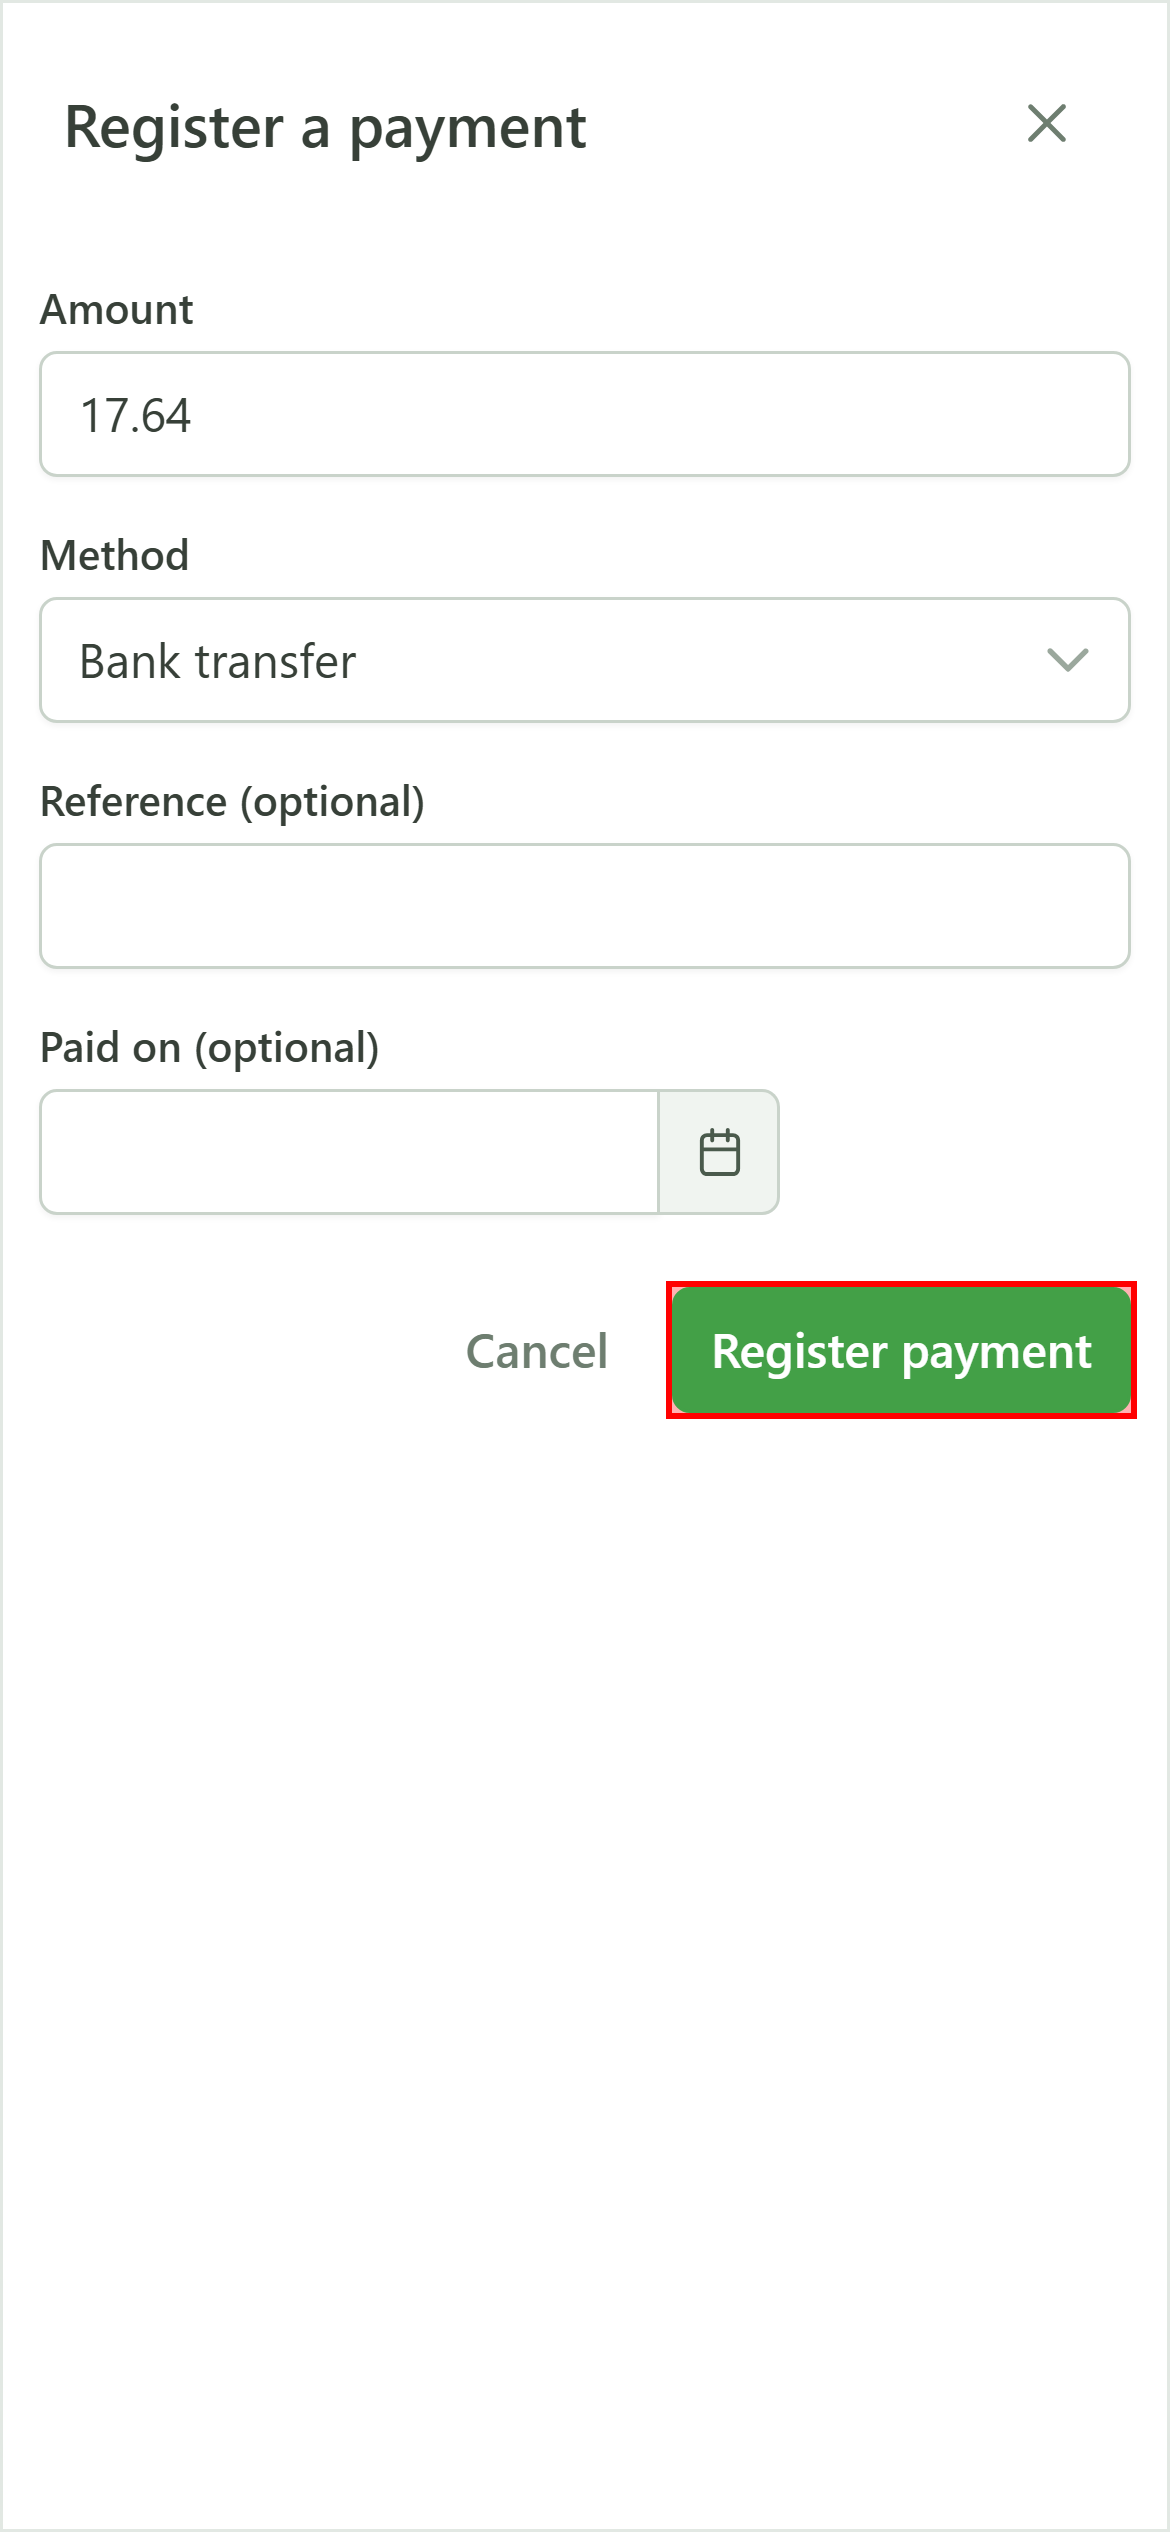
The amount is prefilled with the invoice total and the default method is "Bank transfer". Click "Register payment": the invoice moves to "Paid".
19 The invoice is paid
Billing
The payment is recorded and the invoice now carries the "Paid" status. The full cycle — tariff, generation, issue, payment — is complete.