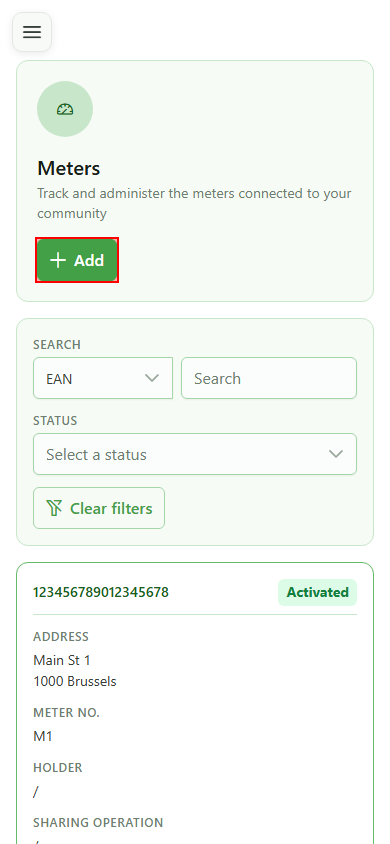
Create a meter
Guide utilisateur
User guide
1 Add a meter
Creating a meter
Click "Add" to open the form that creates a new meter attached to the active community.
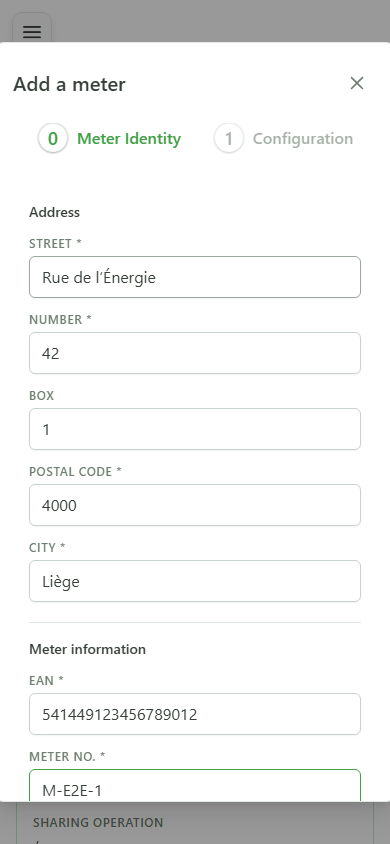
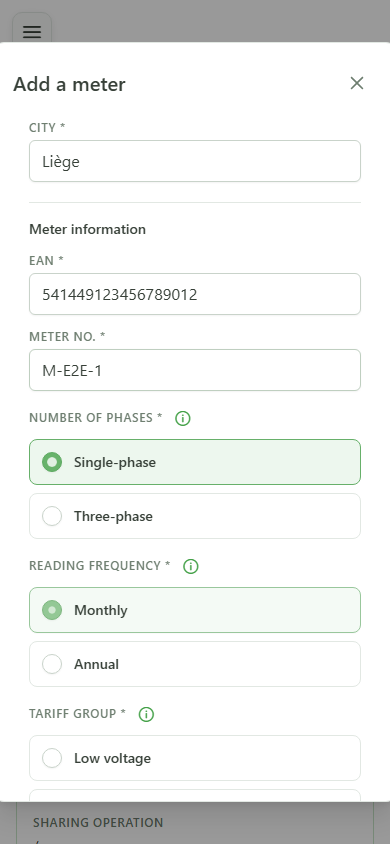
2 Describe the location
Meter identification
Fill in the installation address, the unique EAN of the metering point and the physical meter number. These fields are required to identify the device.
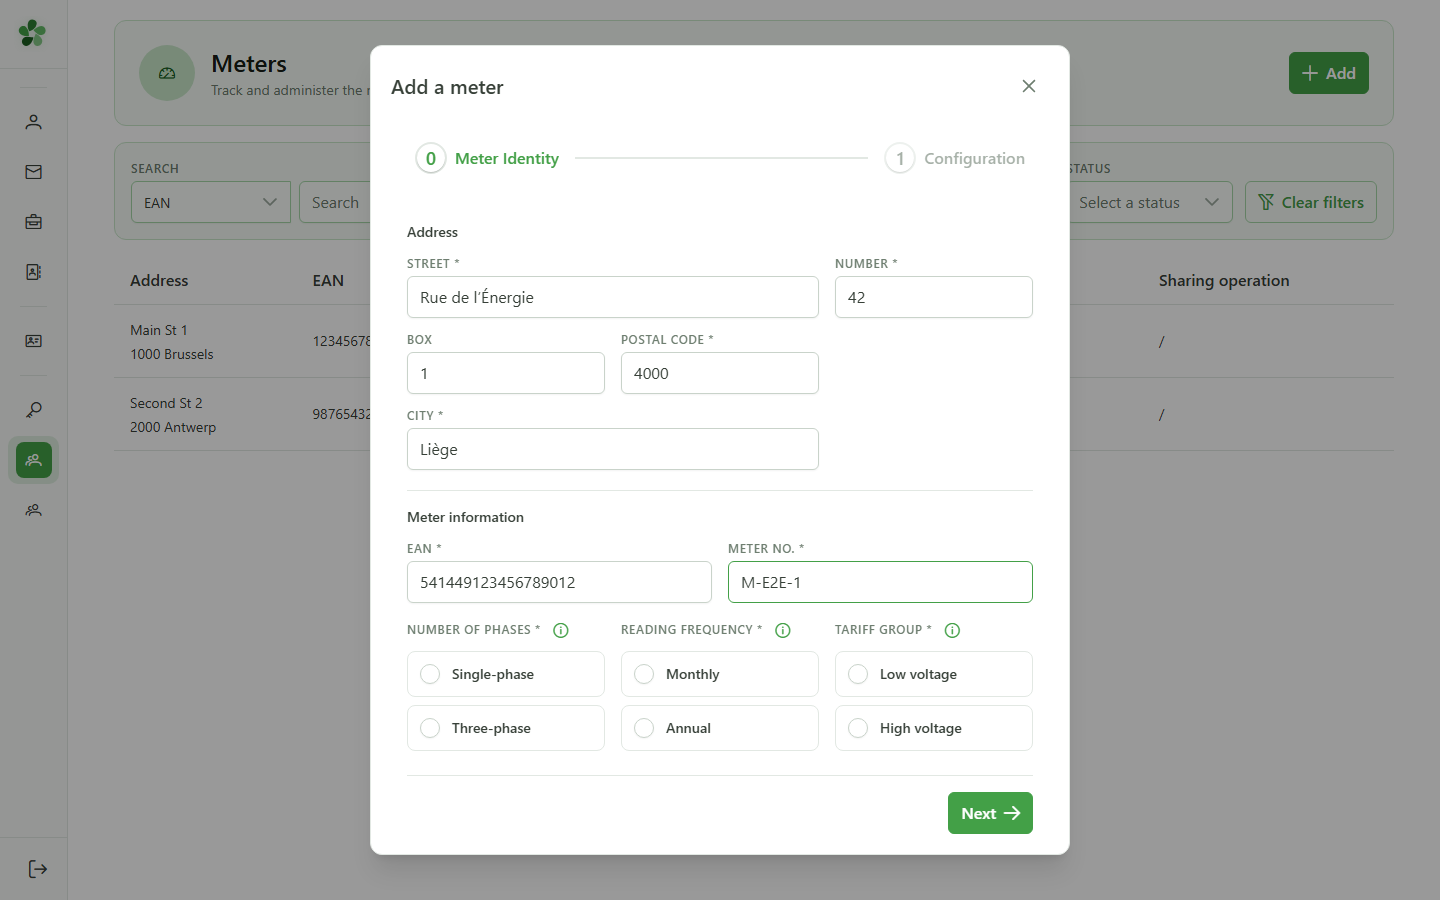
3 Choose the characteristics
Technical characteristics
Select the phase count, reading frequency and tarif group — these choices drive how the meter's consumption is modelled.

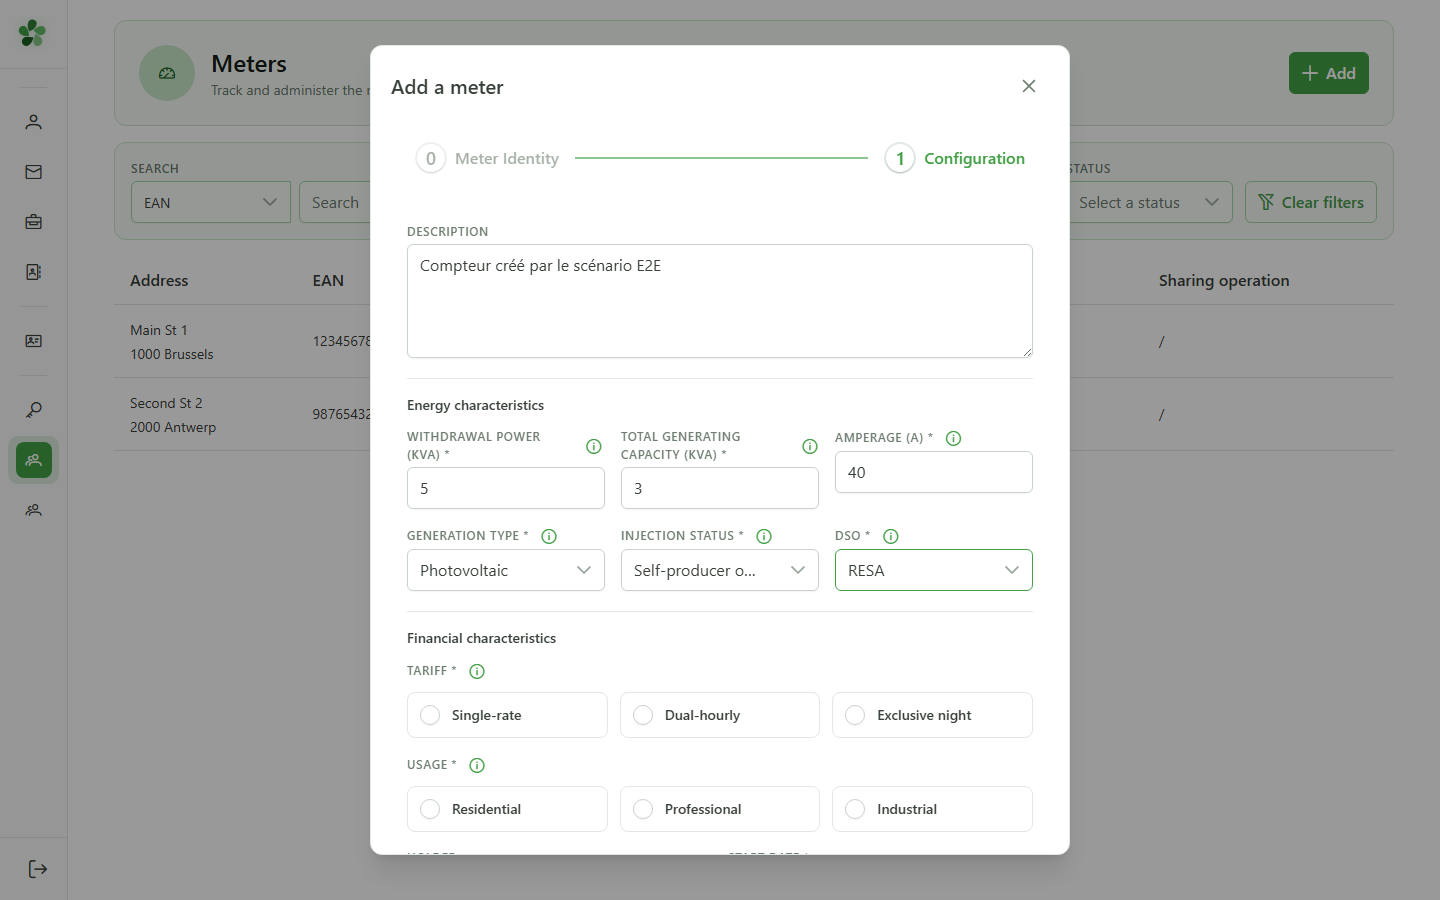
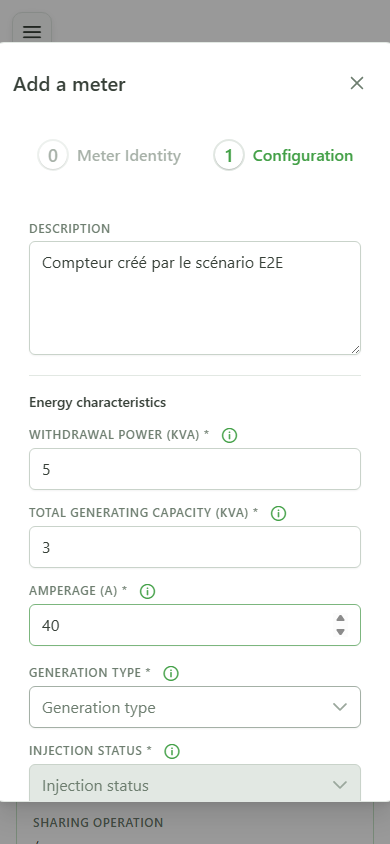
4 Energy characteristics
Energy characteristics
Describe the sampling power, total generating capacity and amperage of the meter. These values feed the allocation calculations for sharing operations.
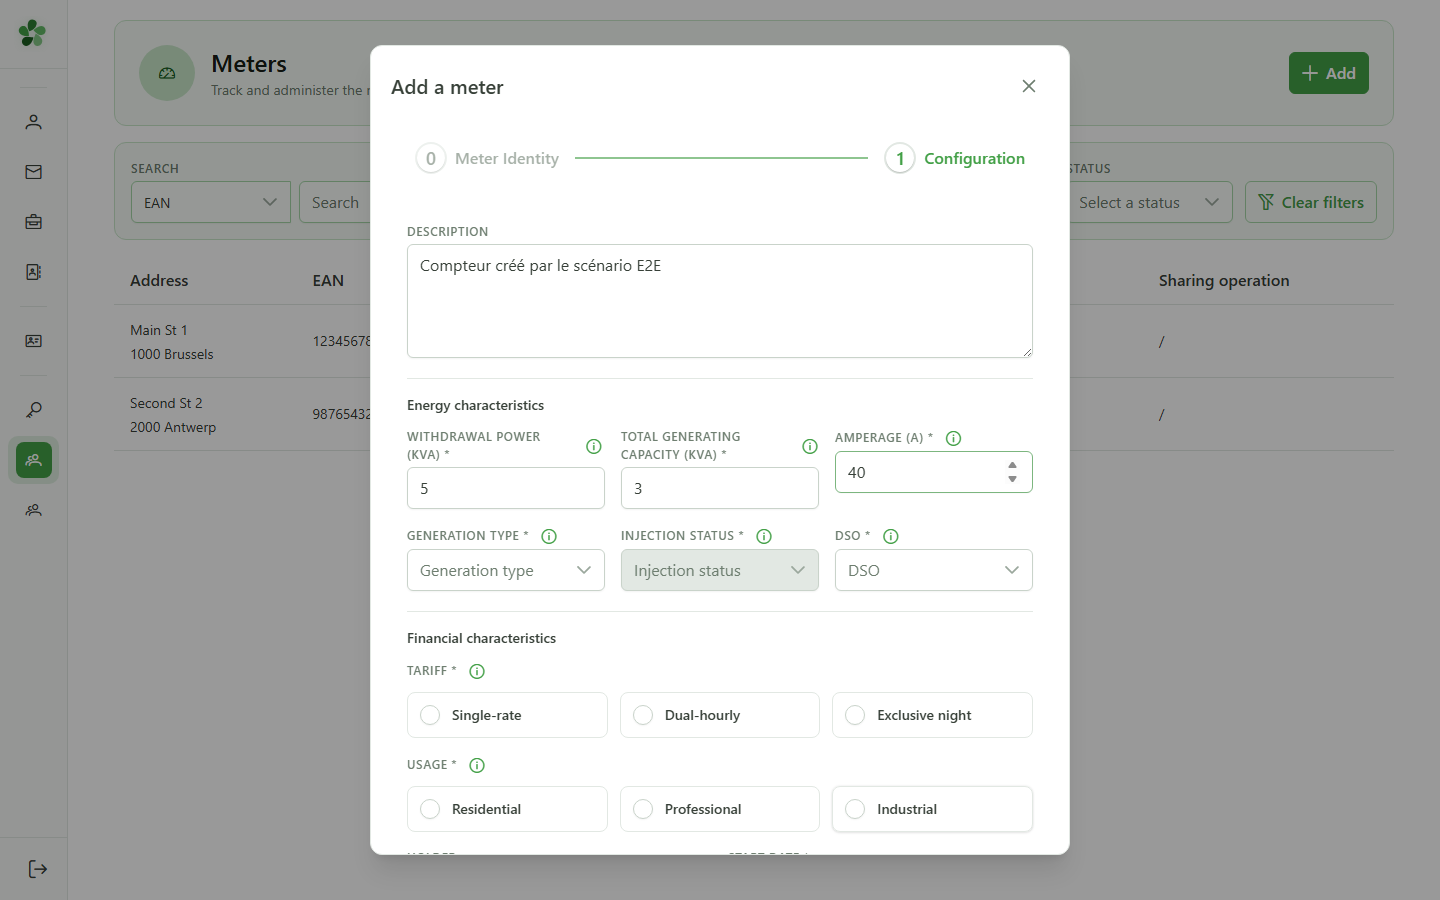
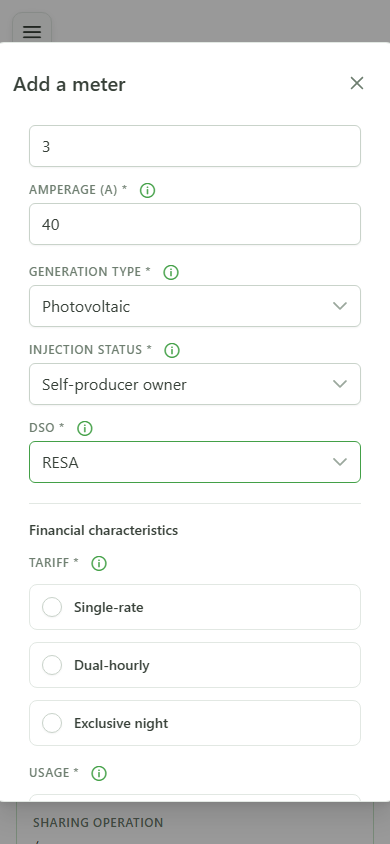
5 Configure the grid
Grid configuration
Select the production chain, injection status and distribution grid operator (DSO) the meter connects to.
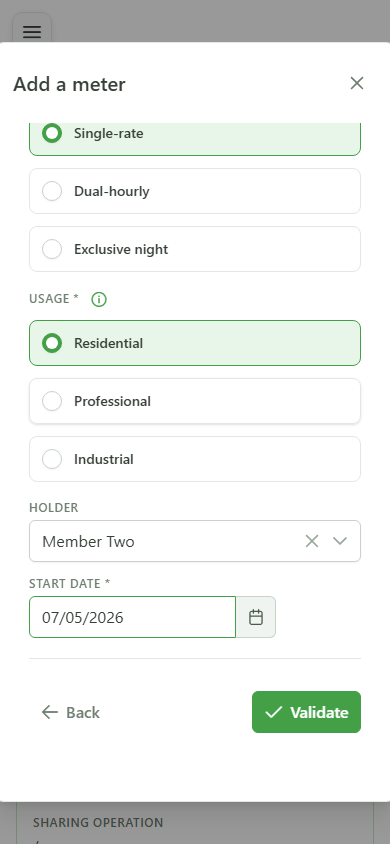
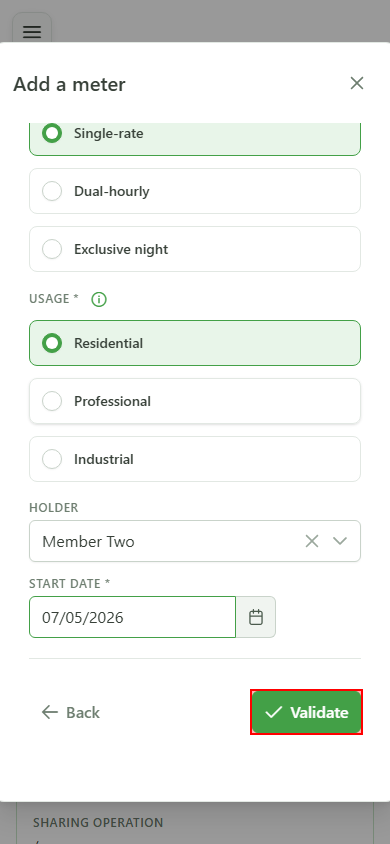
6 Assign to a member
Member assignment
Pick the rate (simple or dual), the client type (residential, business) and the community member who owns the meter.
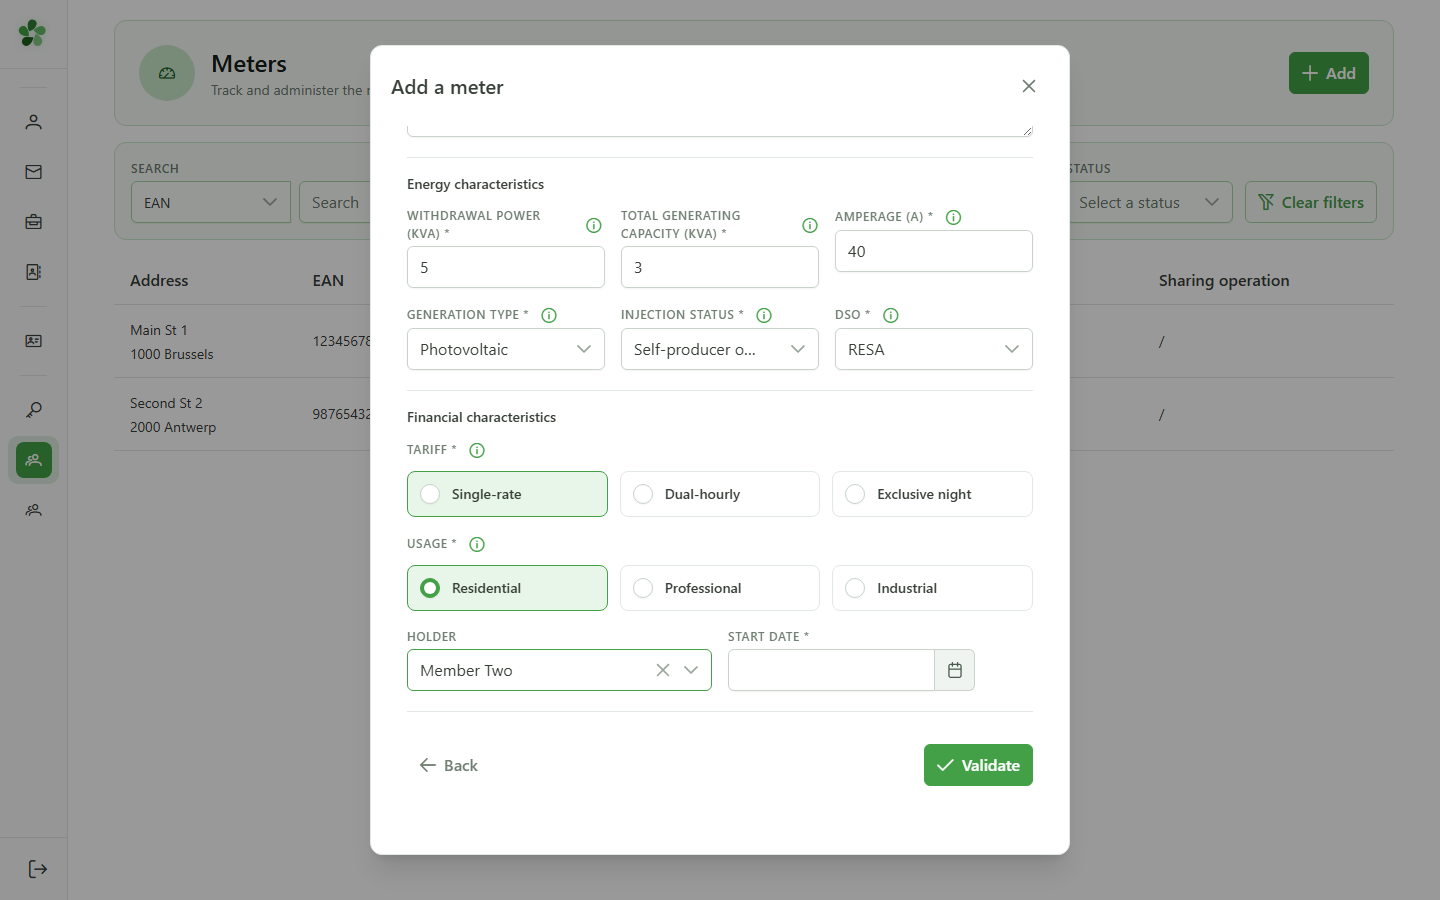
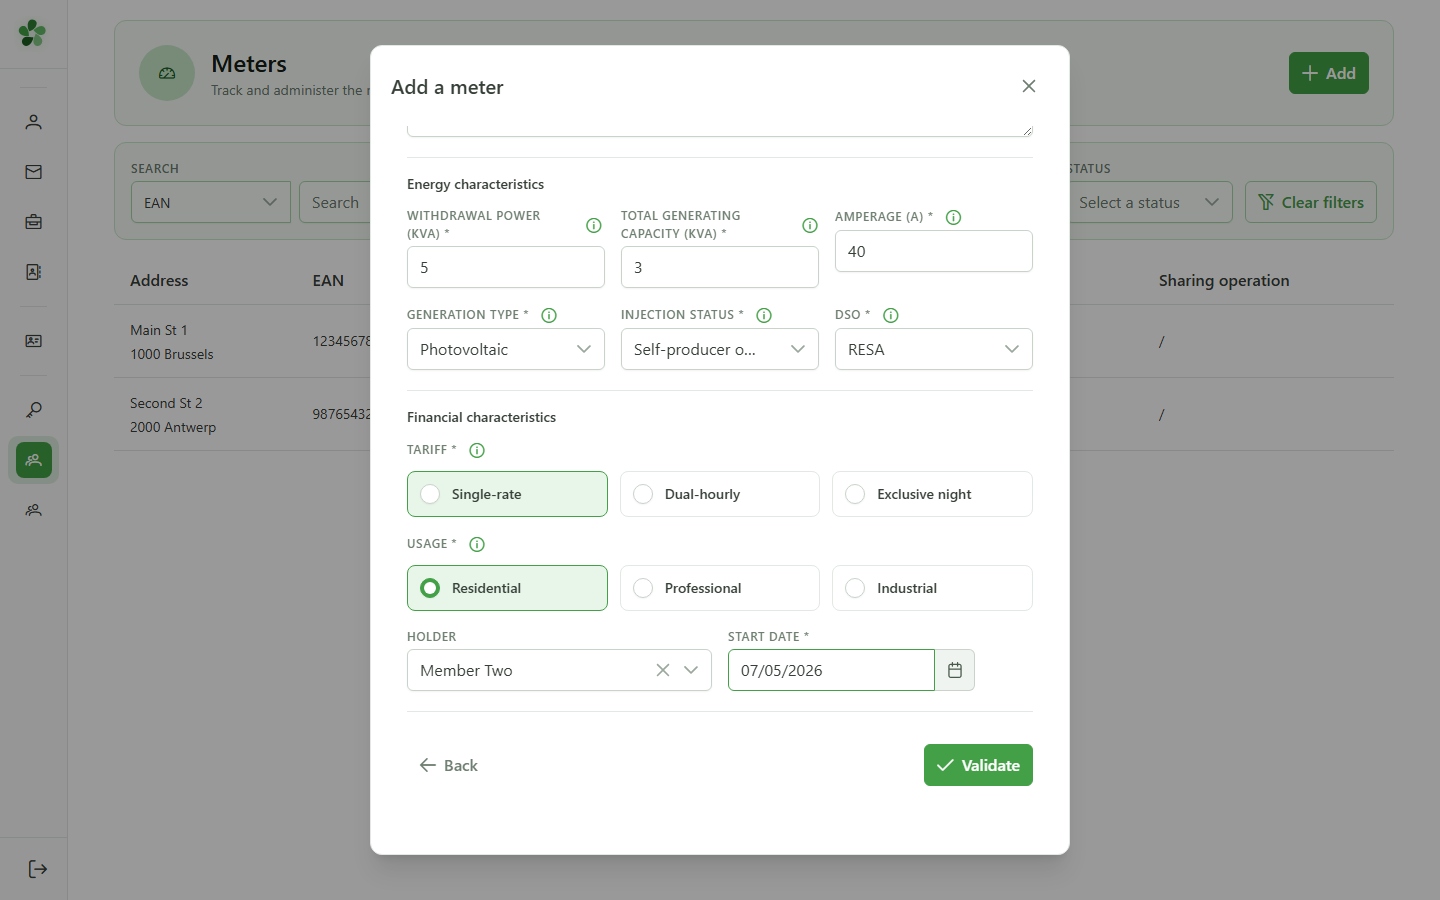
7 Set the activation date
Activation date
Pick the date from which the meter is considered active in the community. Before that date, the meter is excluded from any calculations.
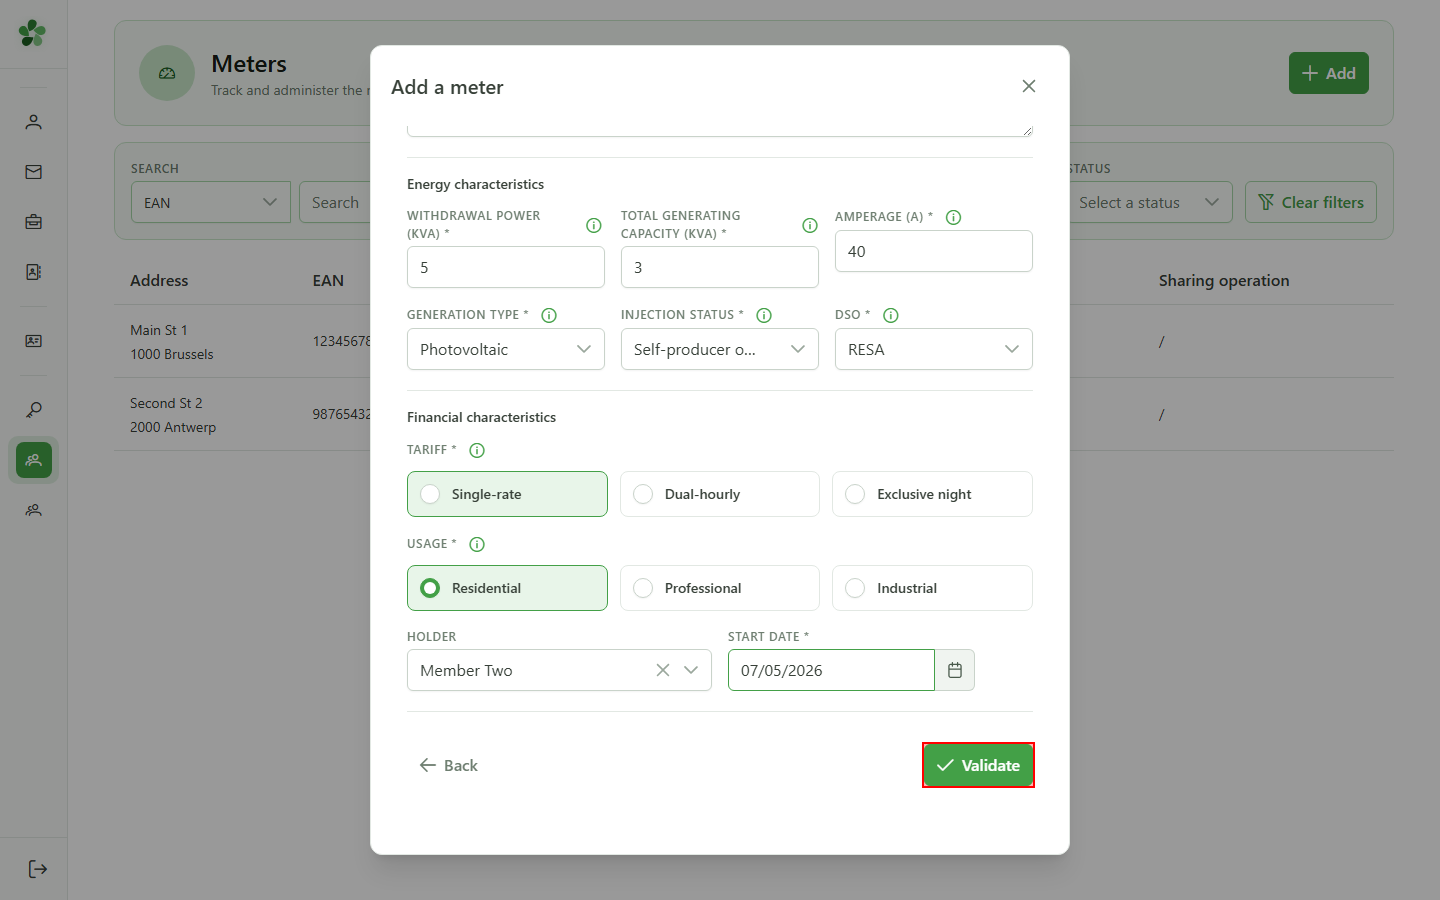
8 Save the meter
Saving
Click "Validate" — the full form is submitted to the CRM, which creates the meter and links it to the active community.
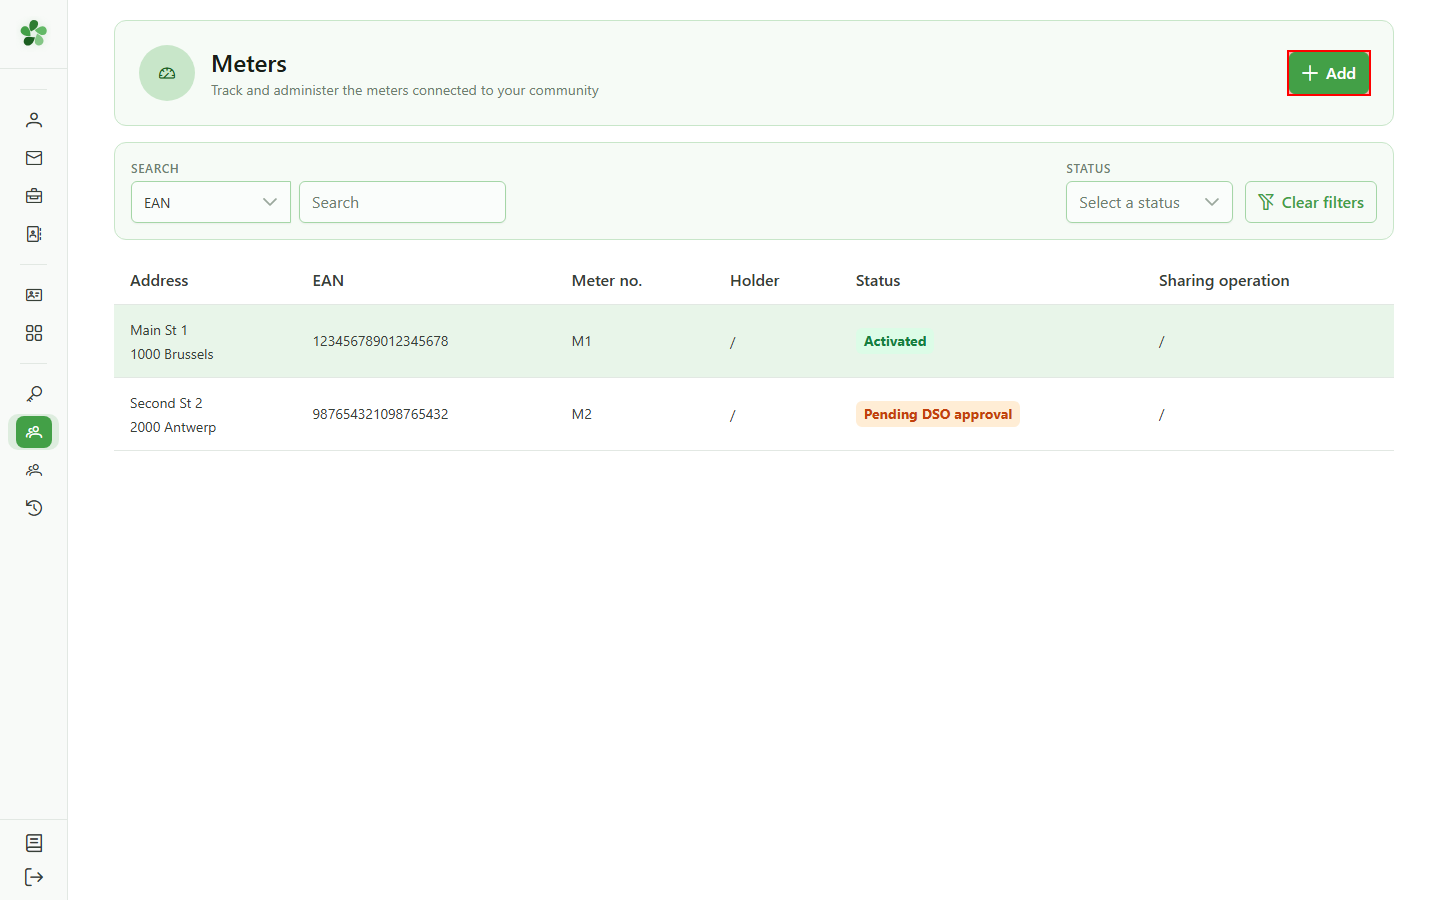
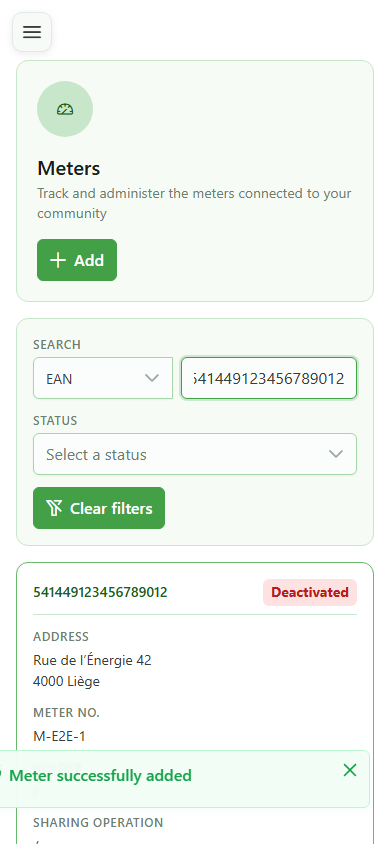
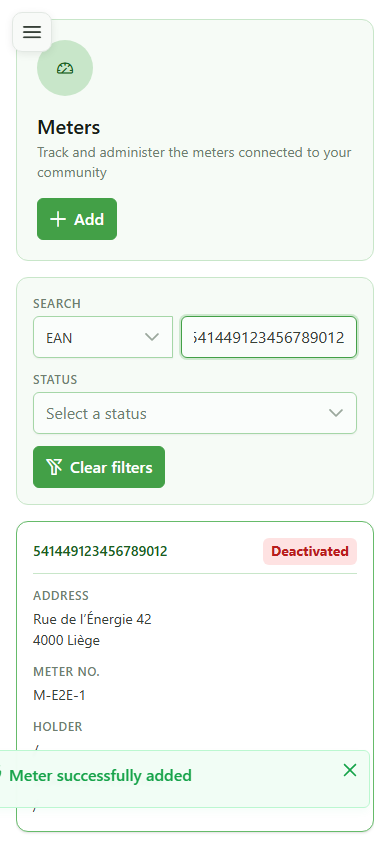
9 Filter by EAN
Verifying in the list
Type the meter's EAN into the search bar to filter the list and immediately locate the newly created meter.
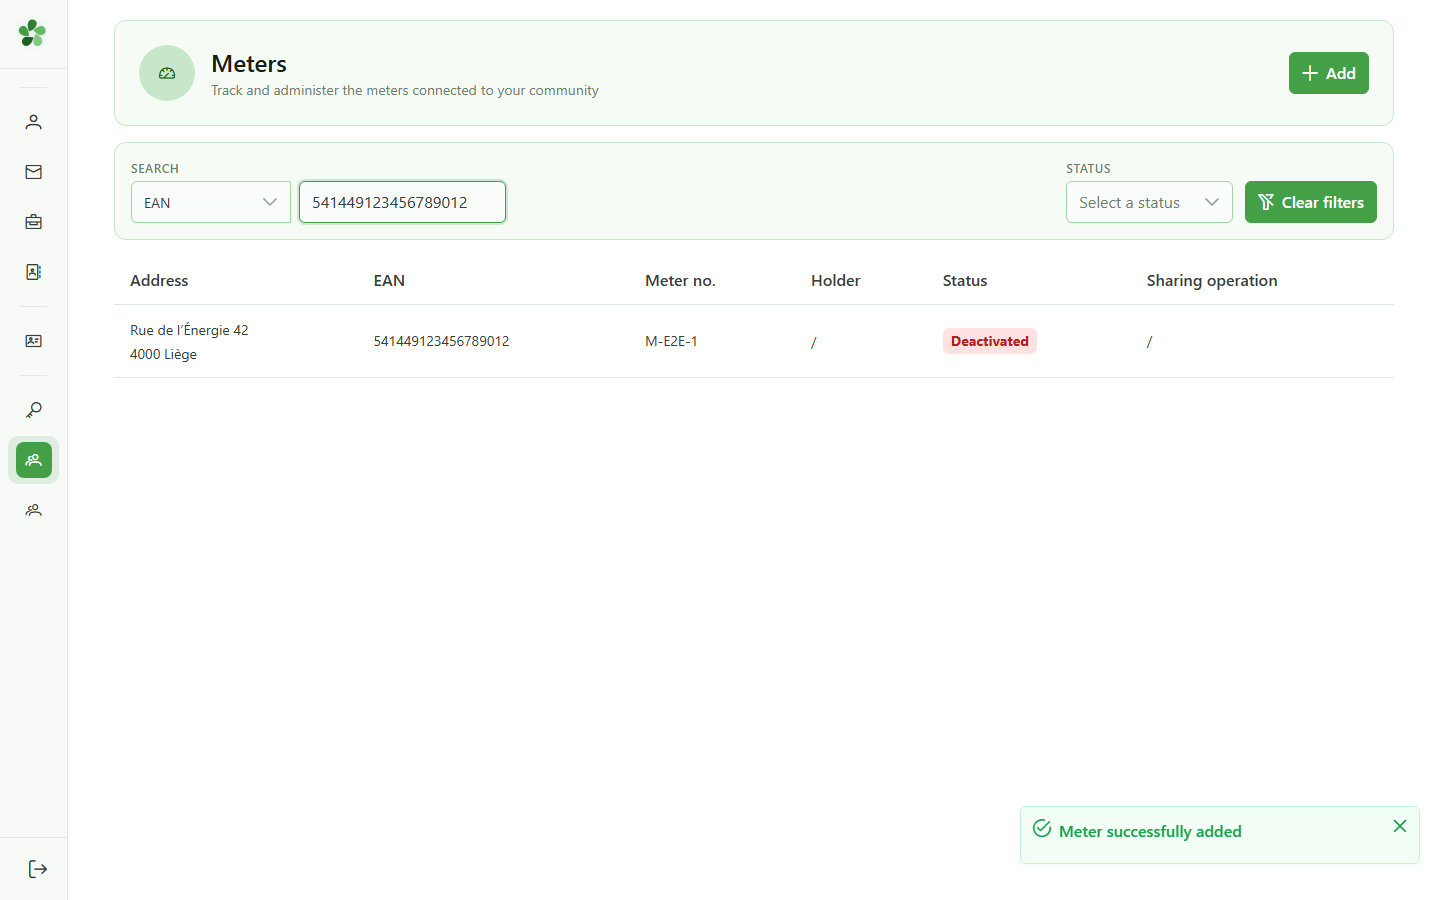
10 Meter found
Verifying in the list
The meter "541449123456789012" appears in the filtered table — the creation is confirmed and the detail page is reachable from the list.

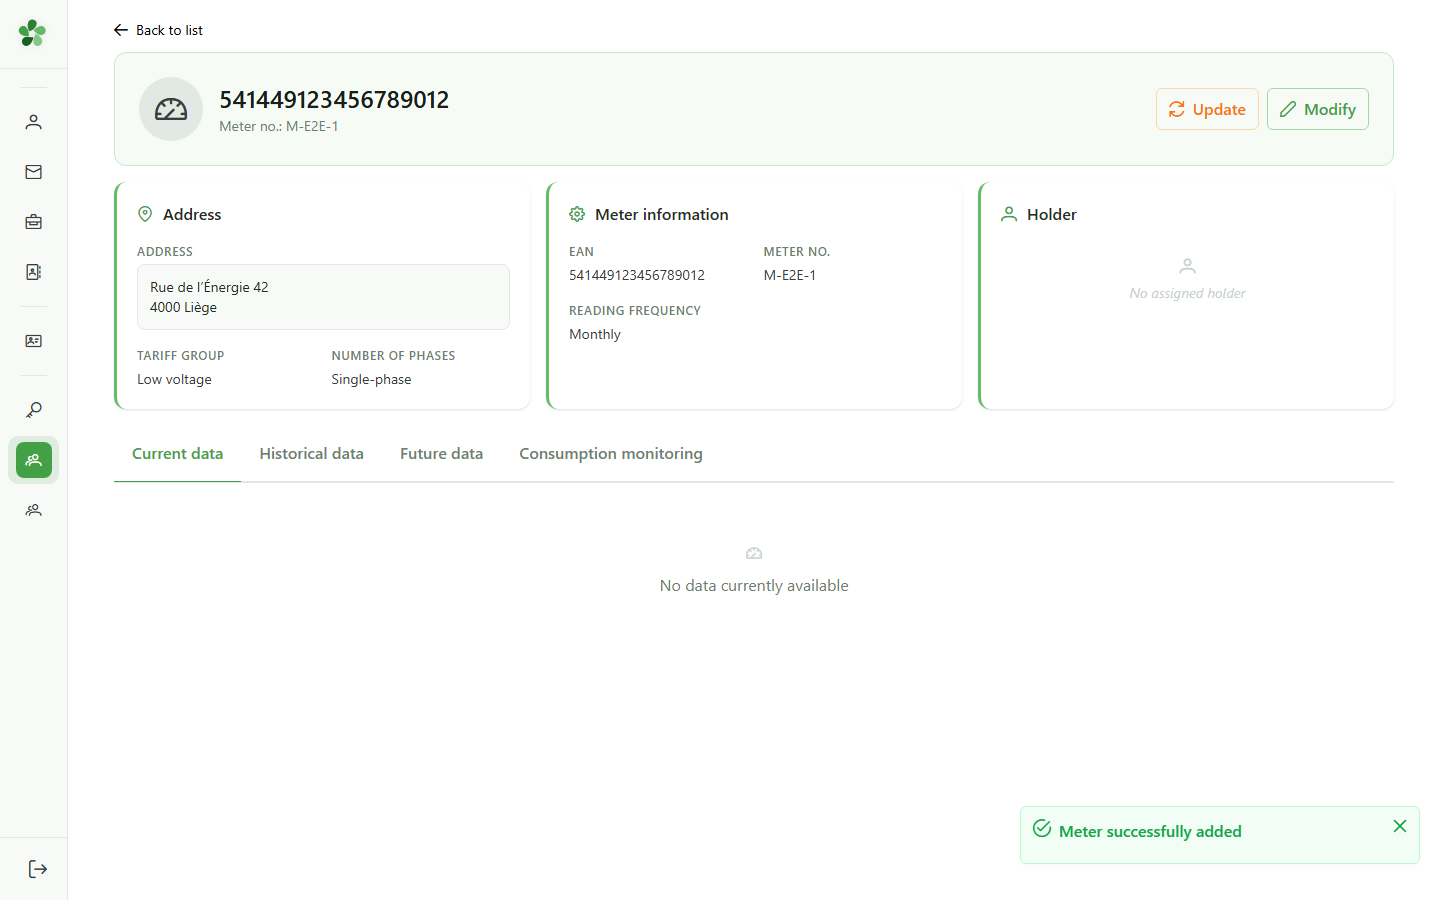
11 Open the detail
Opening the detail
Click the meter row to open its detail page and reach the tabs that browse the consumption data.

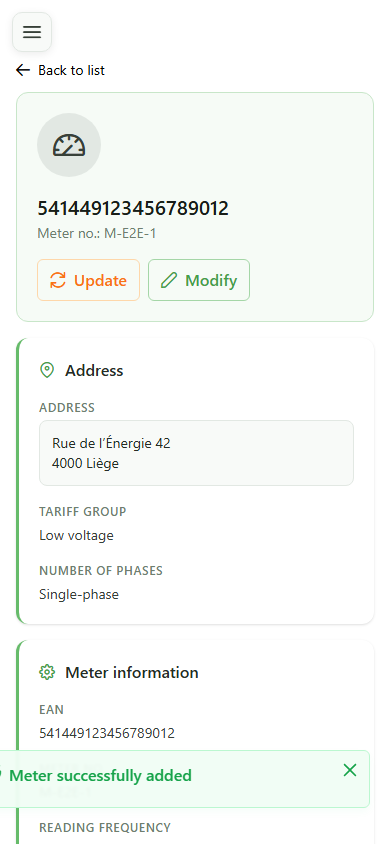
12 Meter detail ready
Meter detail
The detail page shows the new meter's EAN and exposes the browsing tabs: actual, historical, future and consumption data.
Create a meter
Guide utilisateur
User guide
1 Add a meter
Creating a meter
Click "Add" to open the form that creates a new meter attached to the active community.
2 Describe the location
Meter identification
Fill in the installation address, the unique EAN of the metering point and the physical meter number. These fields are required to identify the device.
3 Choose the characteristics
Technical characteristics
Select the phase count, reading frequency and tarif group — these choices drive how the meter's consumption is modelled.
4 Energy characteristics
Energy characteristics
Describe the sampling power, total generating capacity and amperage of the meter. These values feed the allocation calculations for sharing operations.
5 Configure the grid
Grid configuration
Select the production chain, injection status and distribution grid operator (DSO) the meter connects to.
6 Assign to a member
Member assignment
Pick the rate (simple or dual), the client type (residential, business) and the community member who owns the meter.

7 Set the activation date
Activation date
Pick the date from which the meter is considered active in the community. Before that date, the meter is excluded from any calculations.
8 Save the meter
Saving
Click "Validate" — the full form is submitted to the CRM, which creates the meter and links it to the active community.
9 Filter by EAN
Verifying in the list
Type the meter's EAN into the search bar to filter the list and immediately locate the newly created meter.
10 Meter found
Verifying in the list
The meter "541449123456789012" appears in the filtered table — the creation is confirmed and the detail page is reachable from the list.

11 Open the detail
Opening the detail
Tap the meter card to open its detail page and reach the tabs that browse the consumption data.
12 Meter detail ready
Meter detail
The detail page shows the new meter's EAN and exposes the browsing tabs: actual, historical, future and consumption data.