Connect a device
Guide utilisateur
User guide
Gebruikershandleiding
Benutzerhandbuch
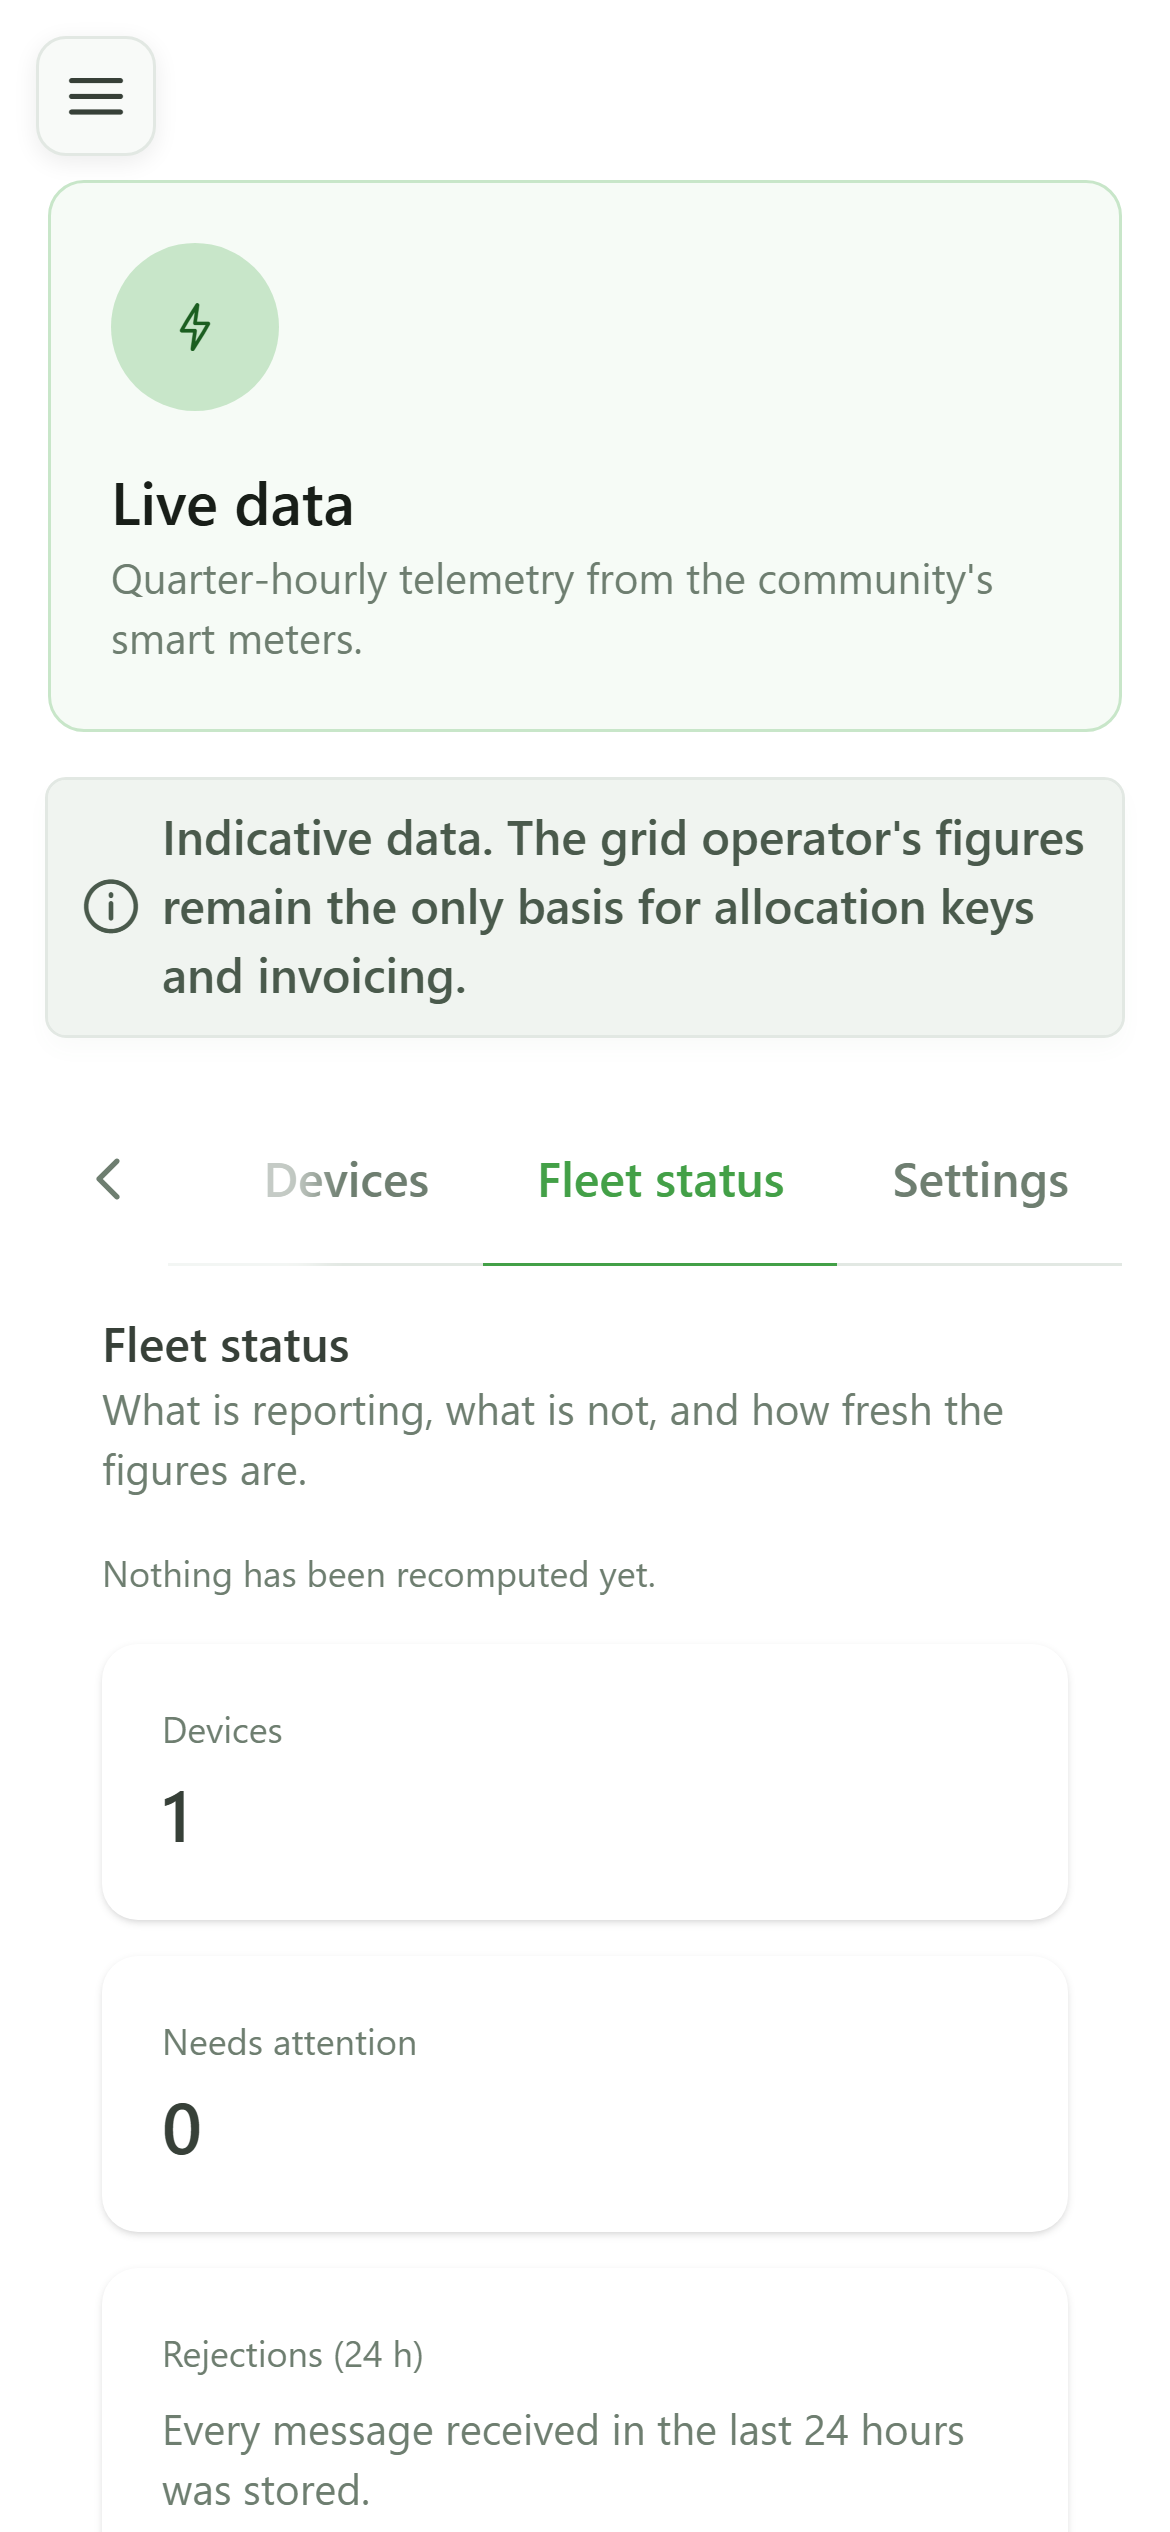
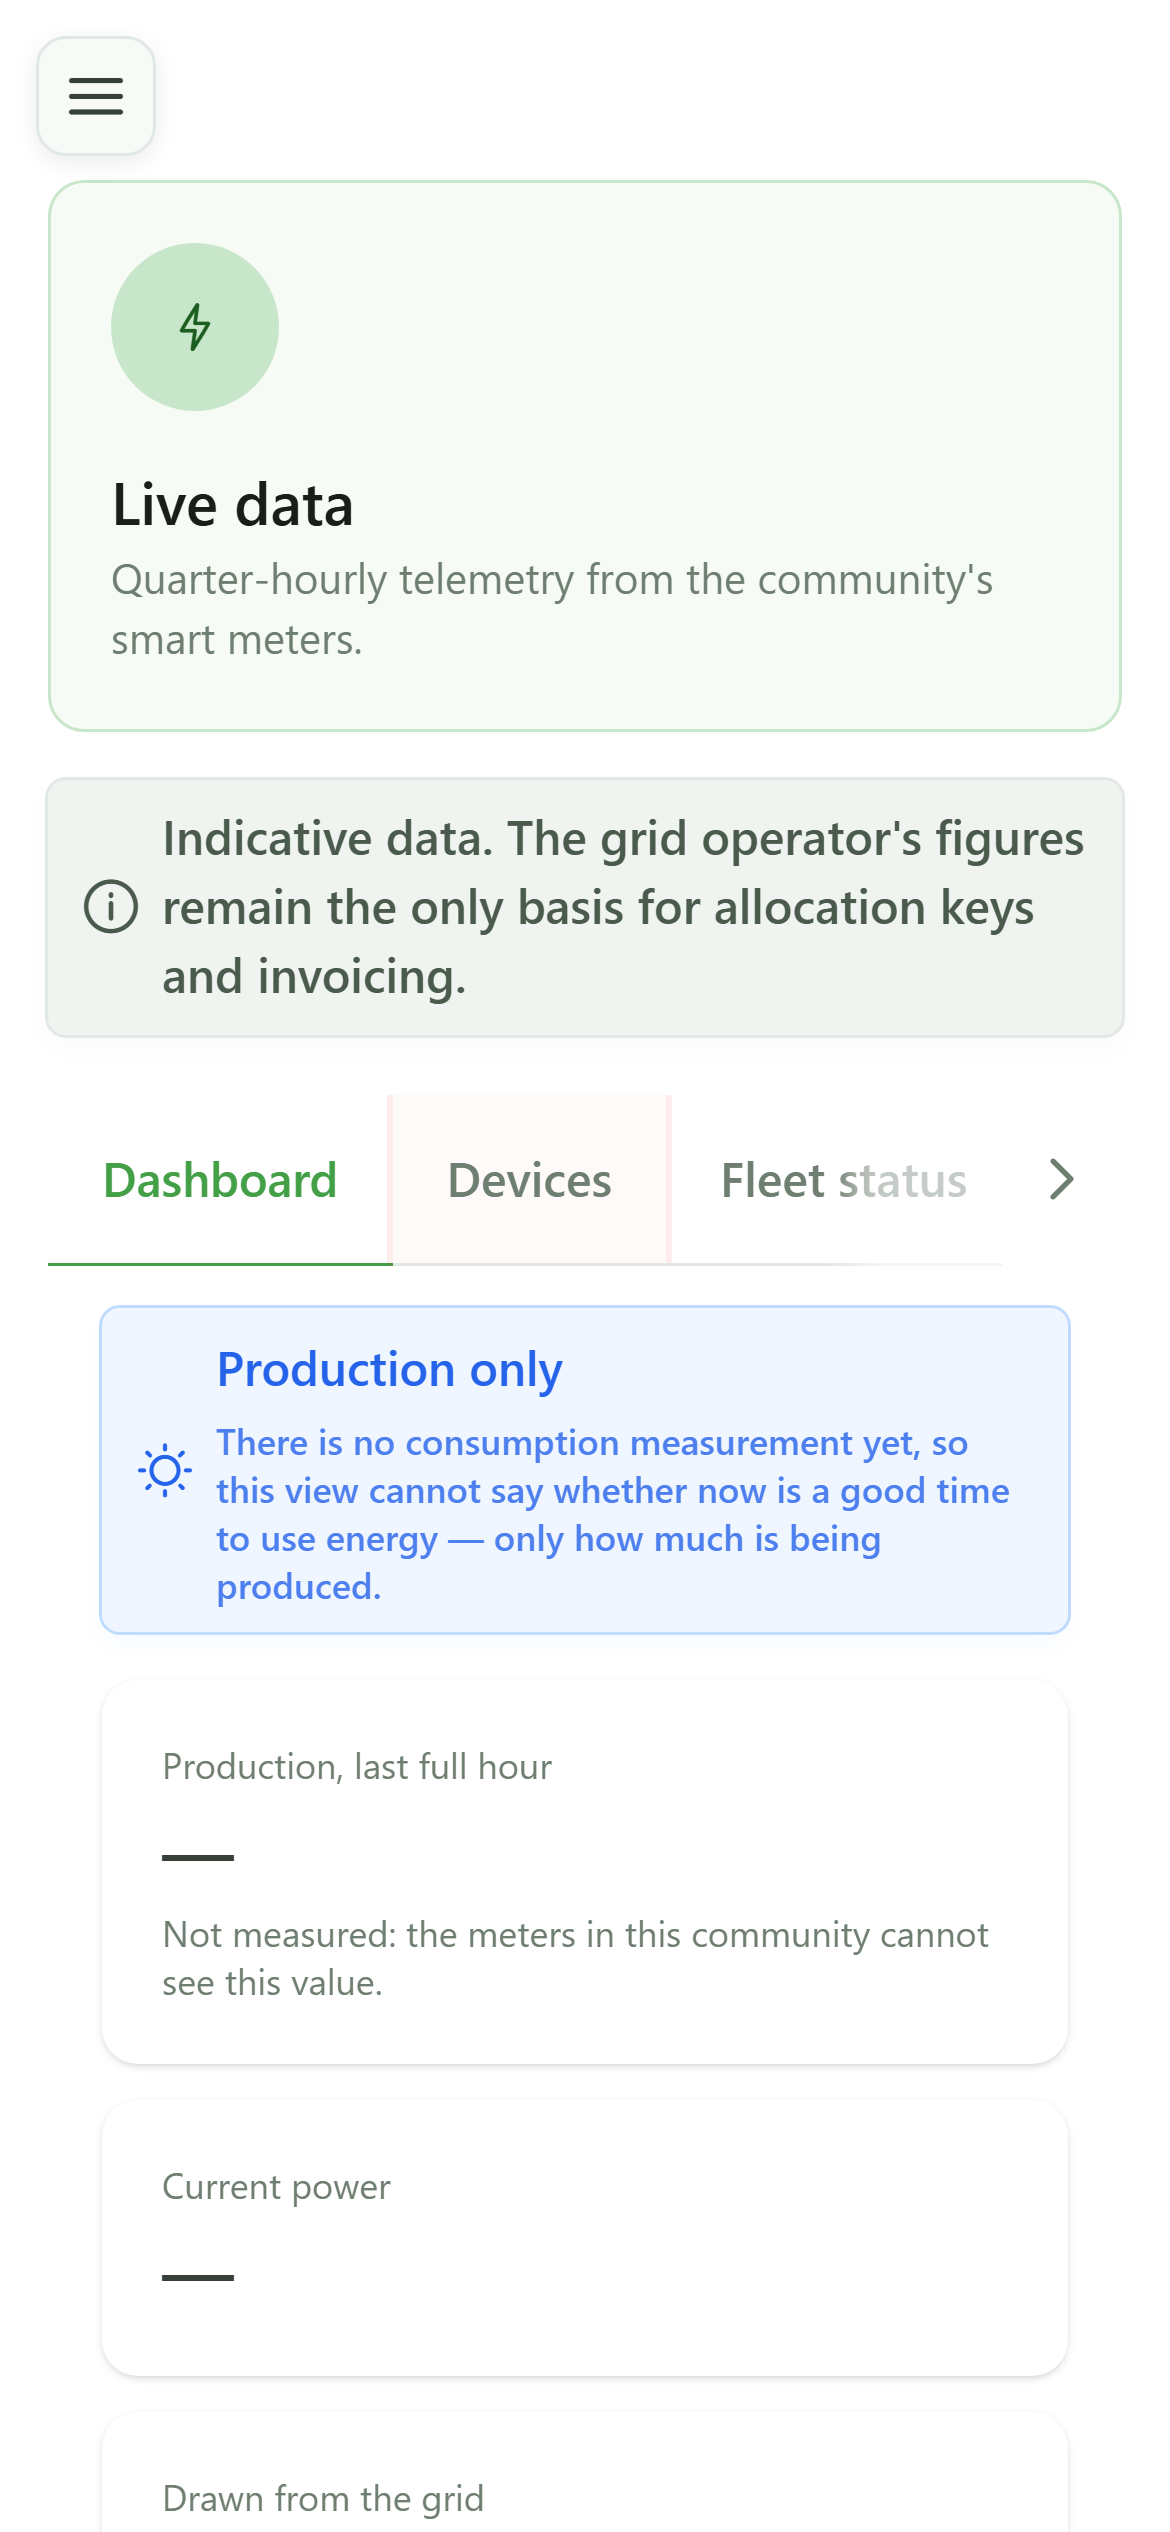
1 Open the Devices tab
Live data
In the Live data console, open the "Devices" tab. A device is the box plugged into a member's meter (P1 port) or inverter: it sends a reading every quarter-hour.
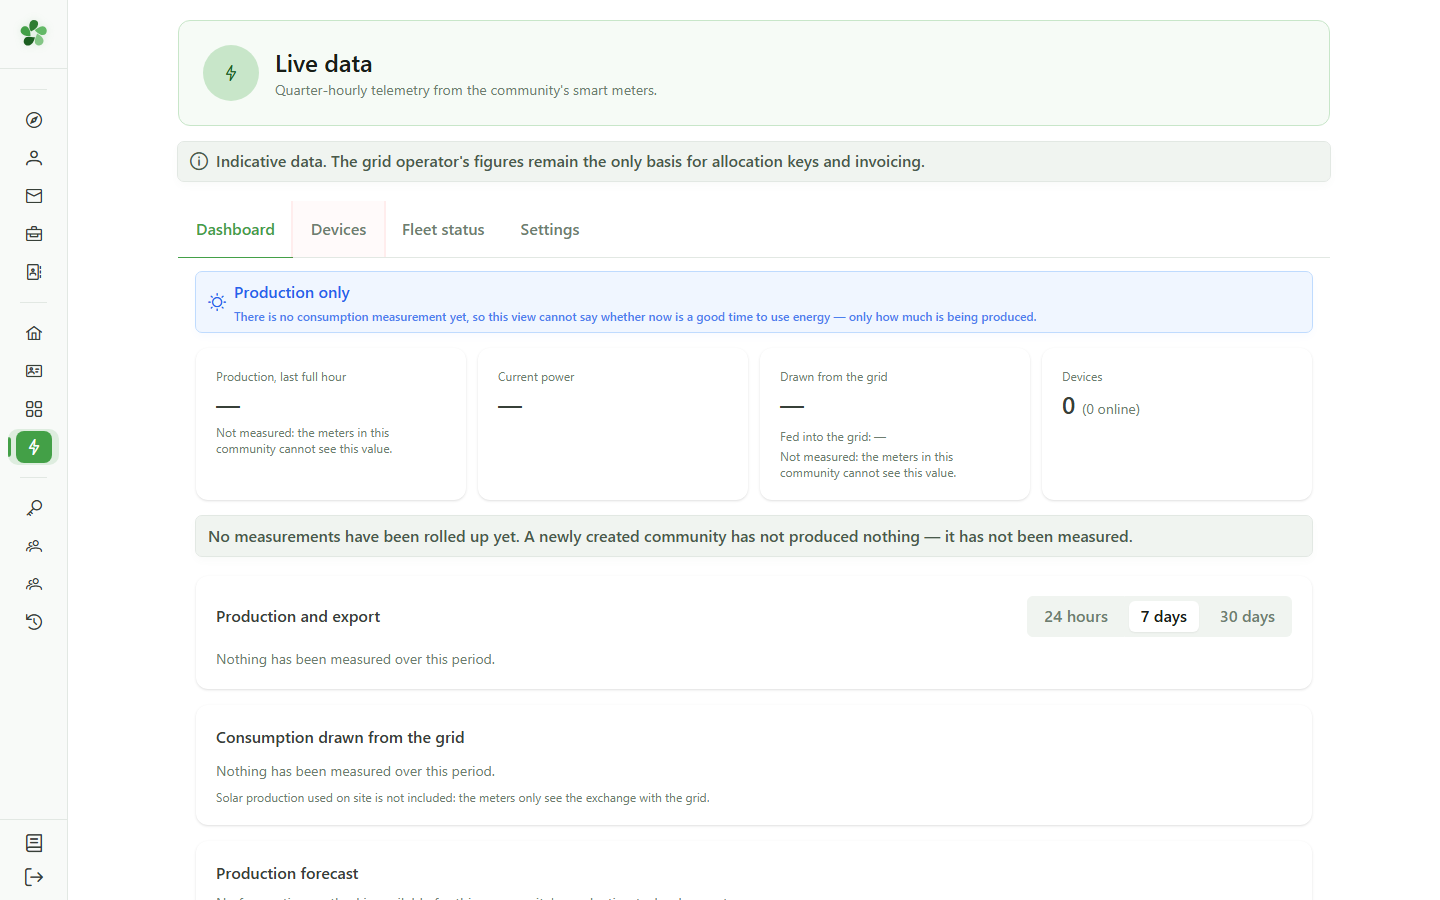
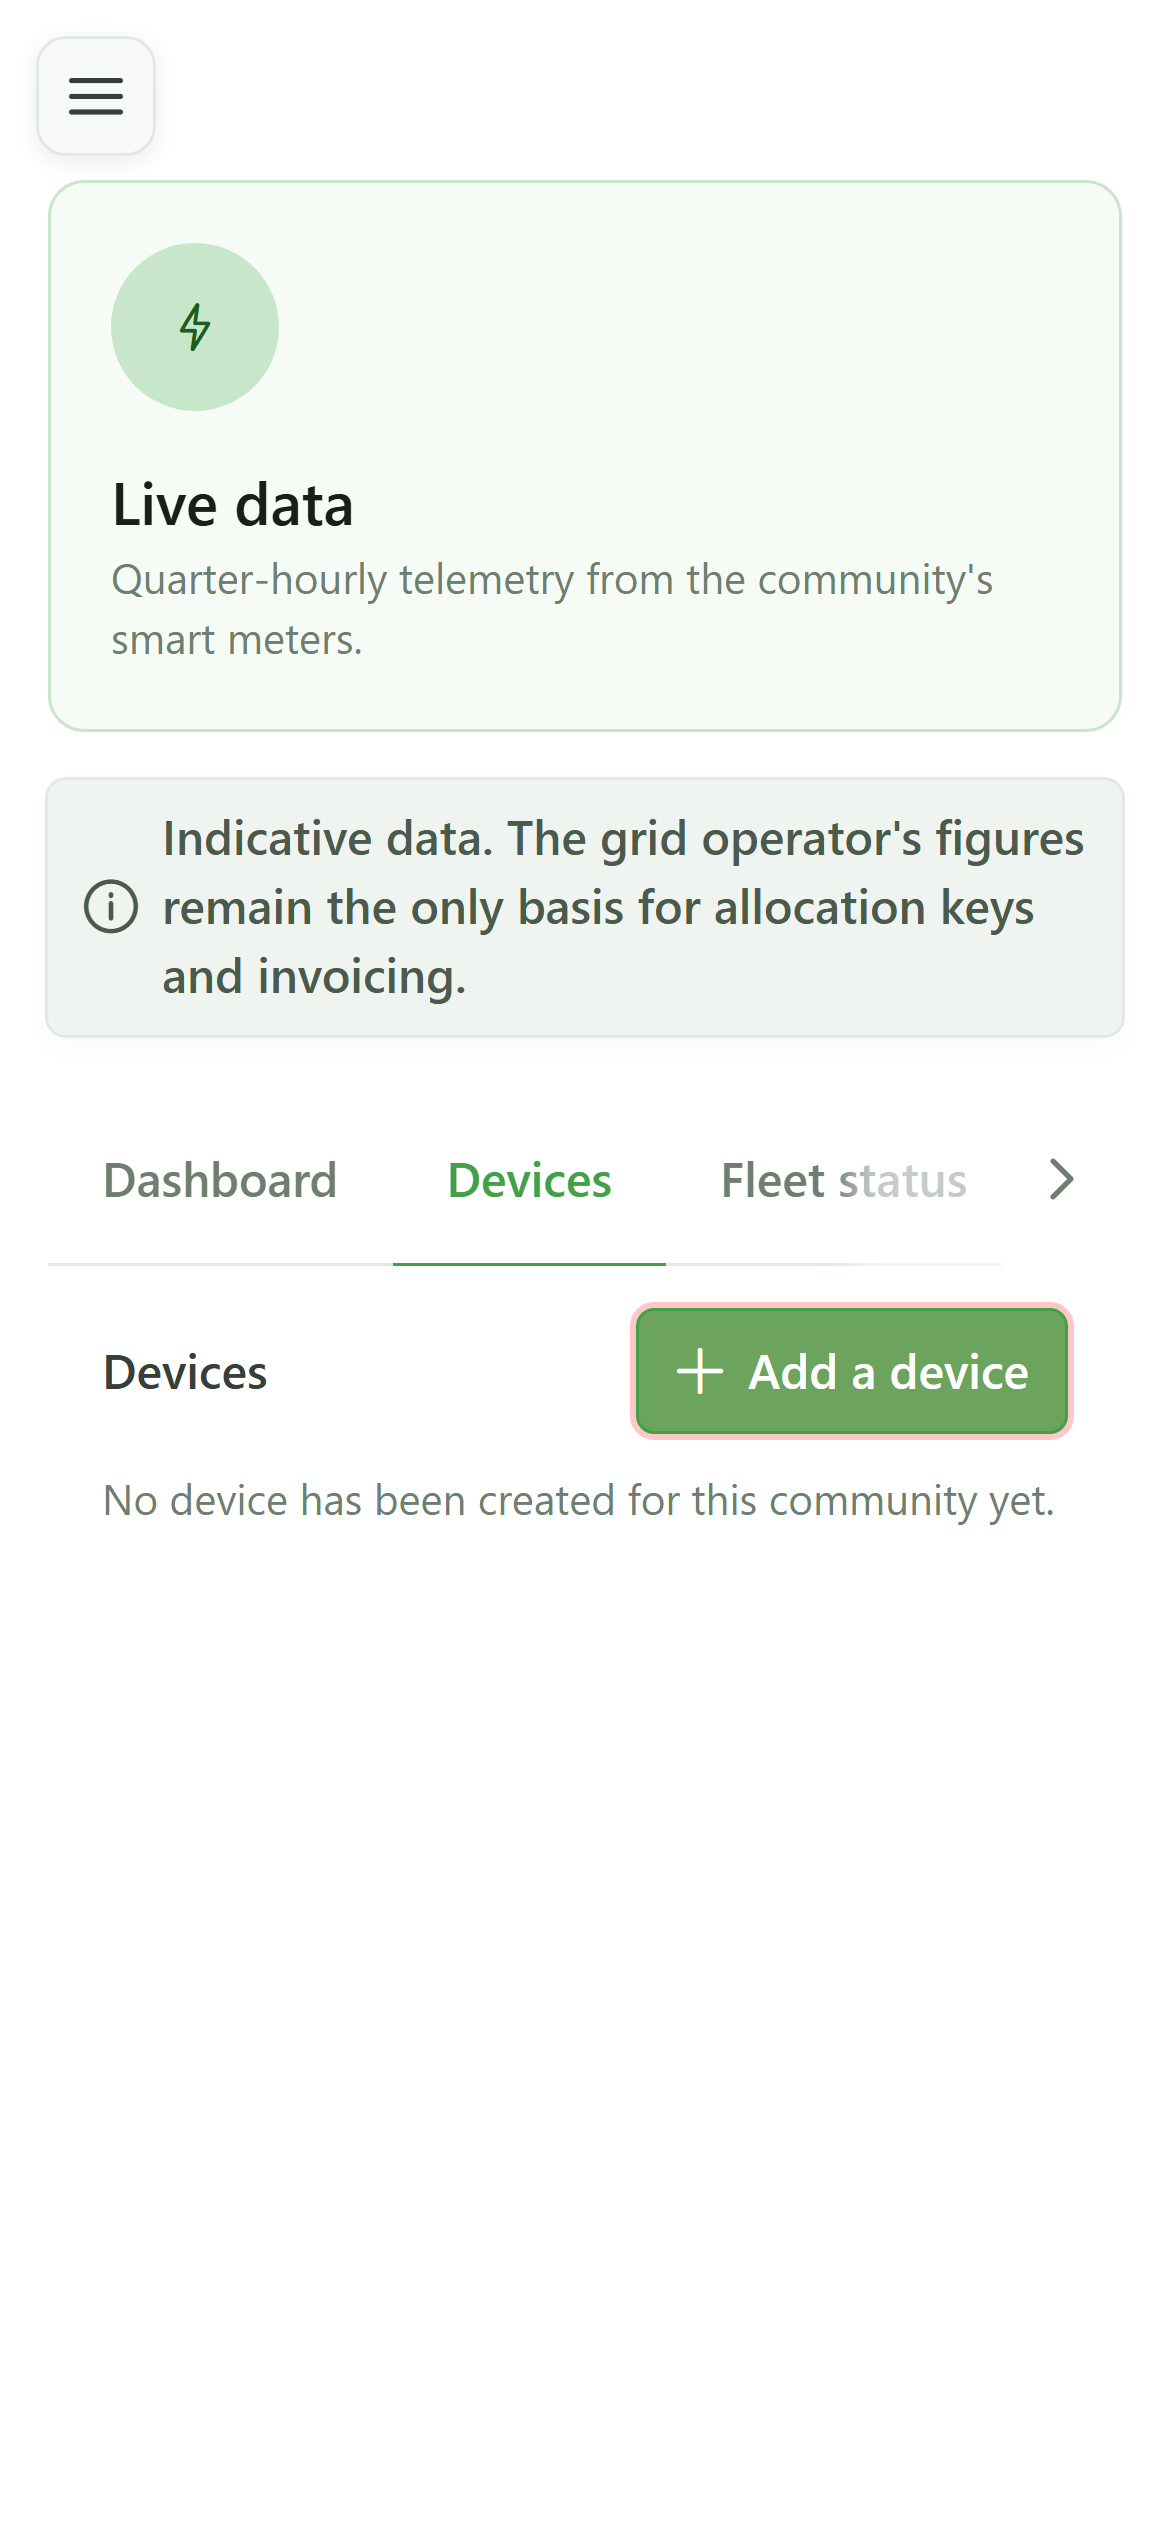
2 Add a device
Devices
Click "Add a device".
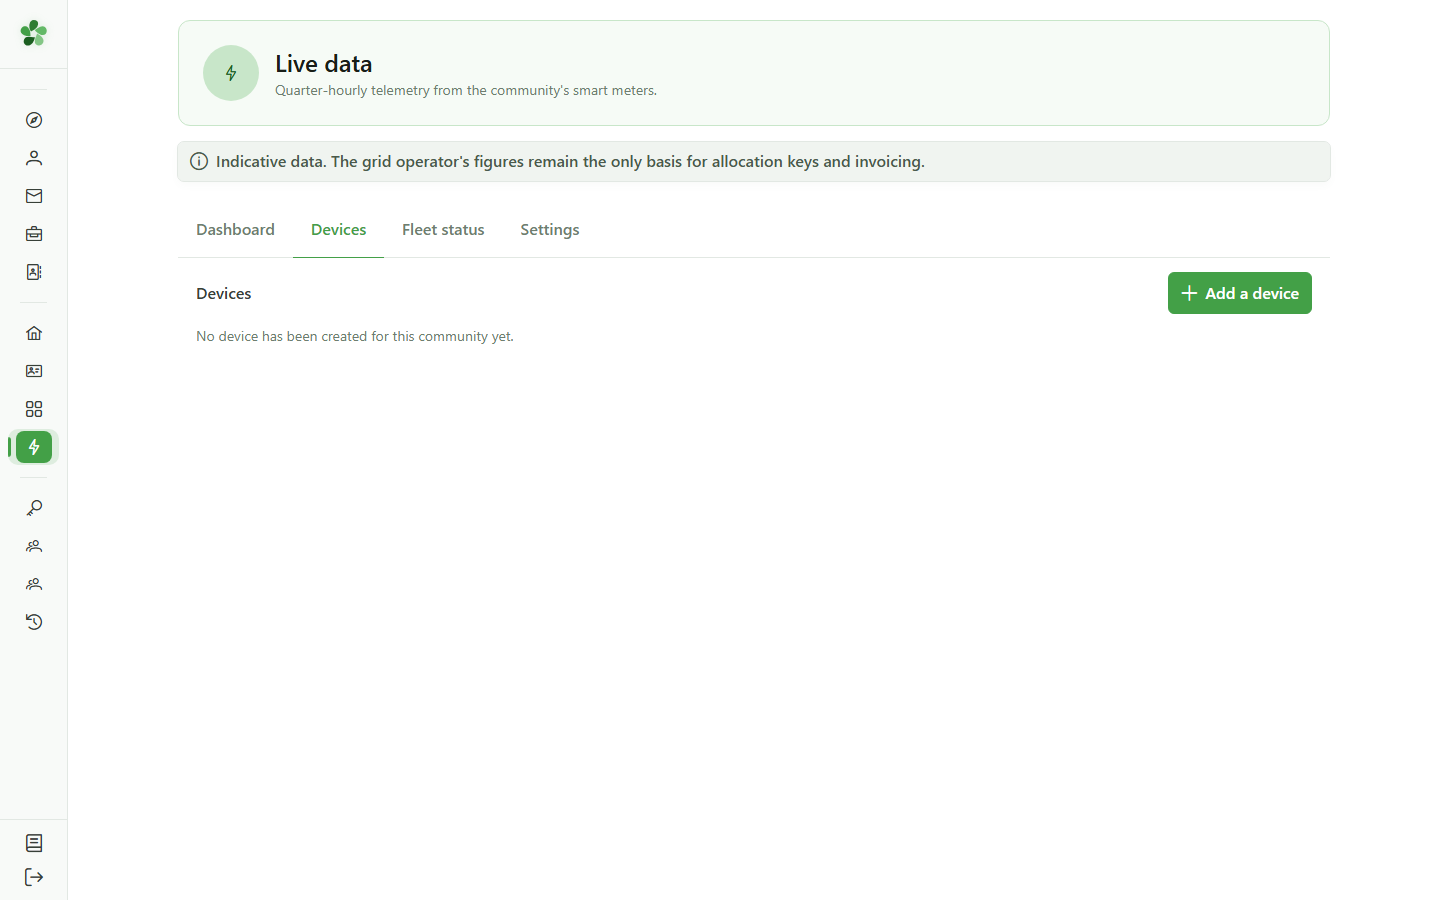
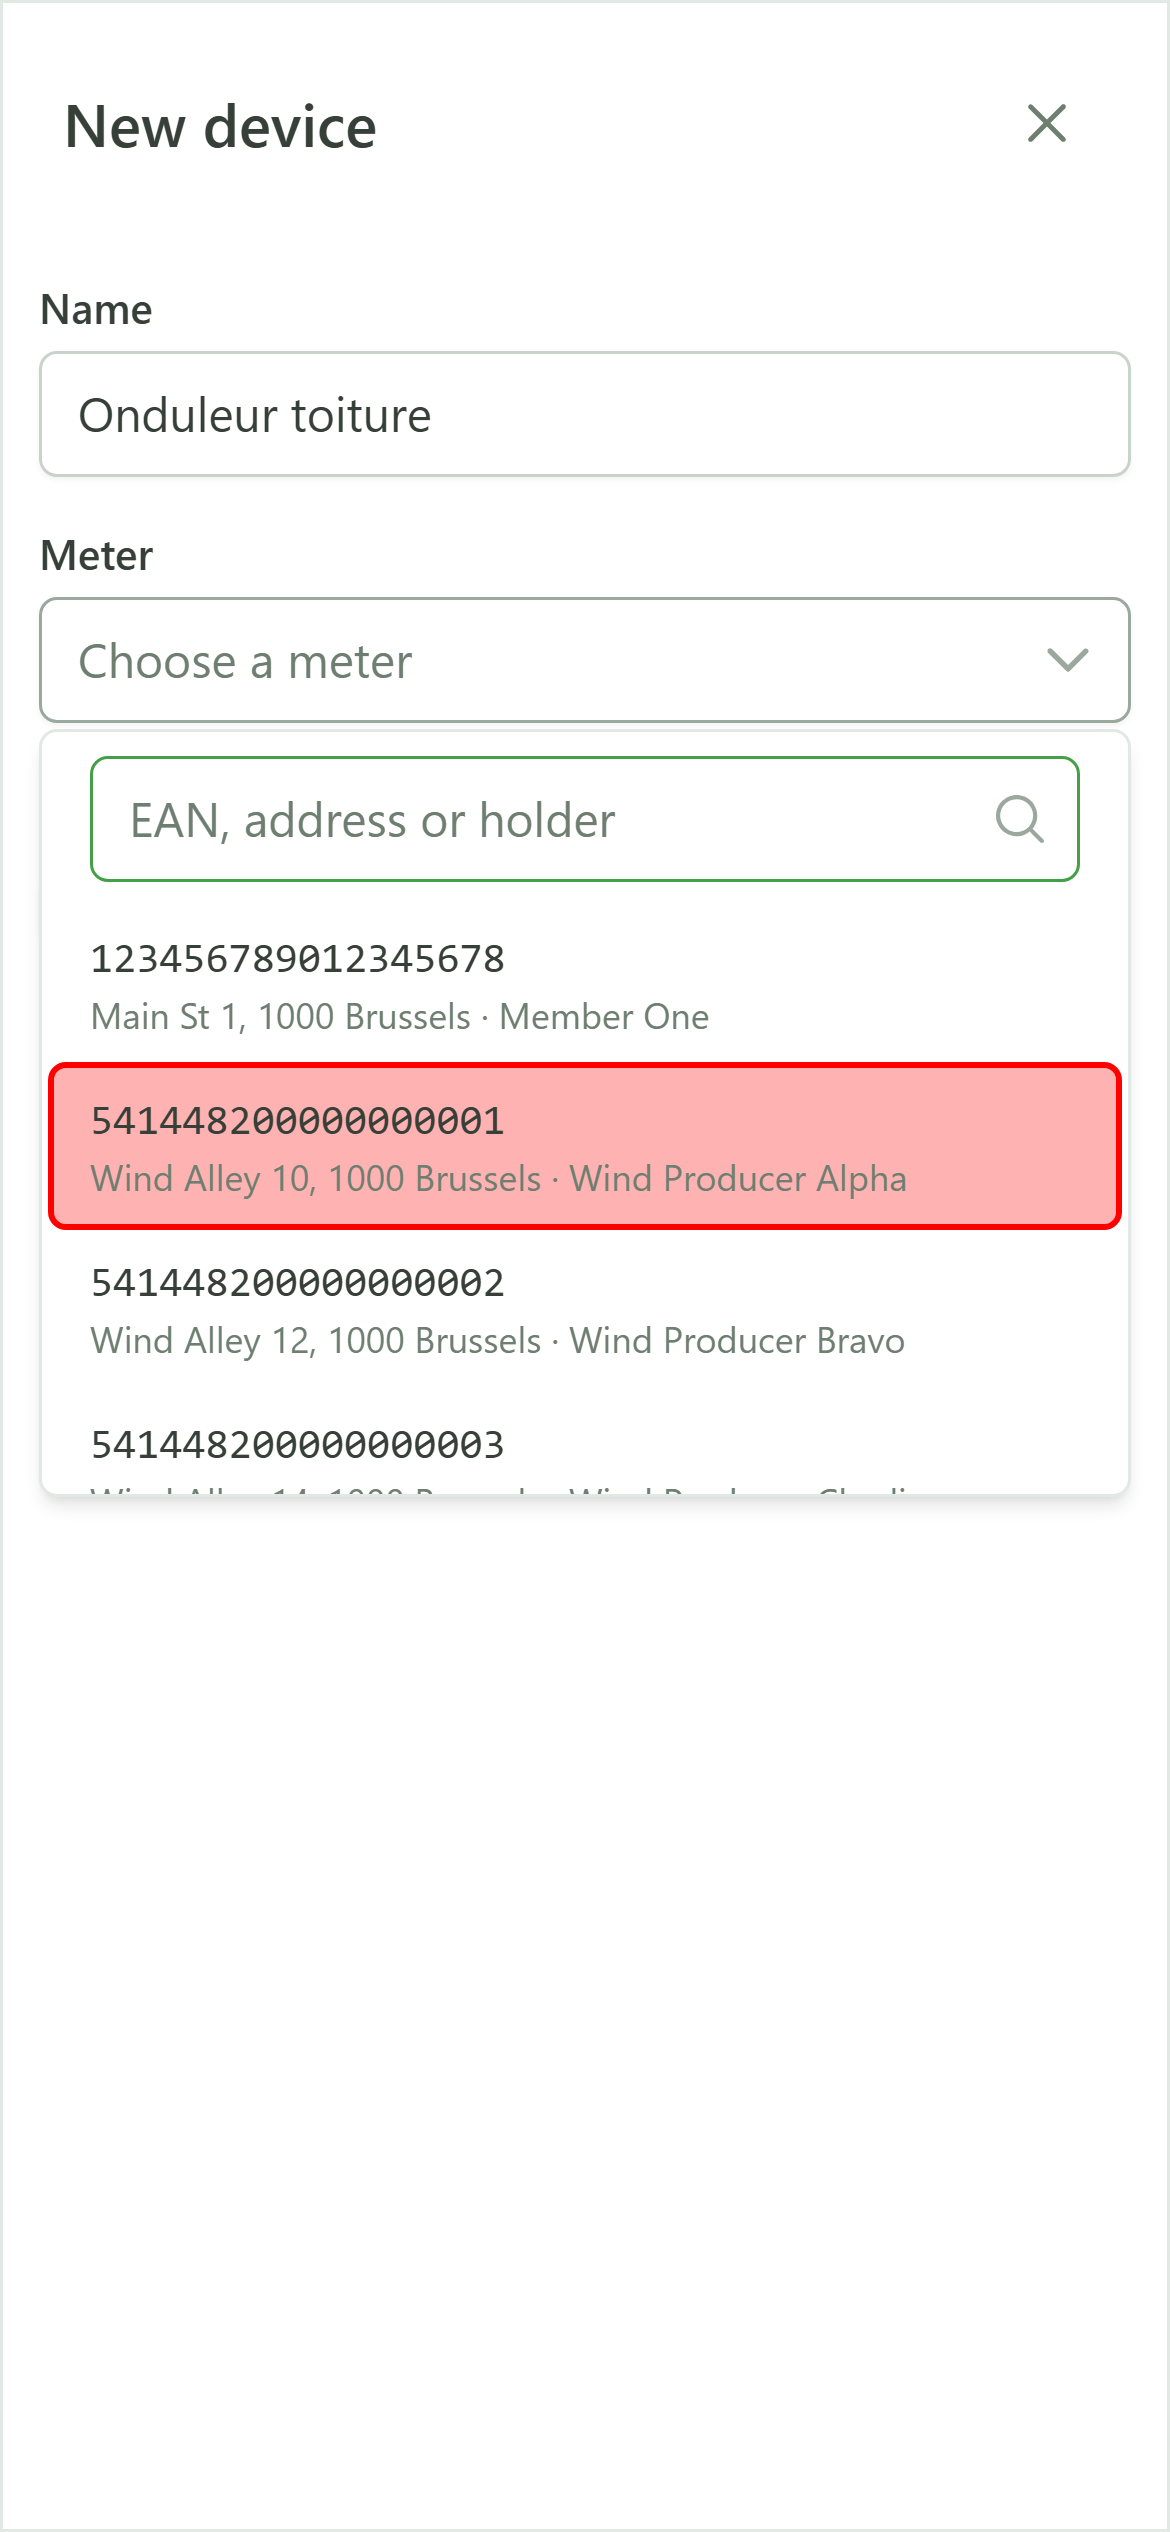
3 Name the device and choose its meter
New device
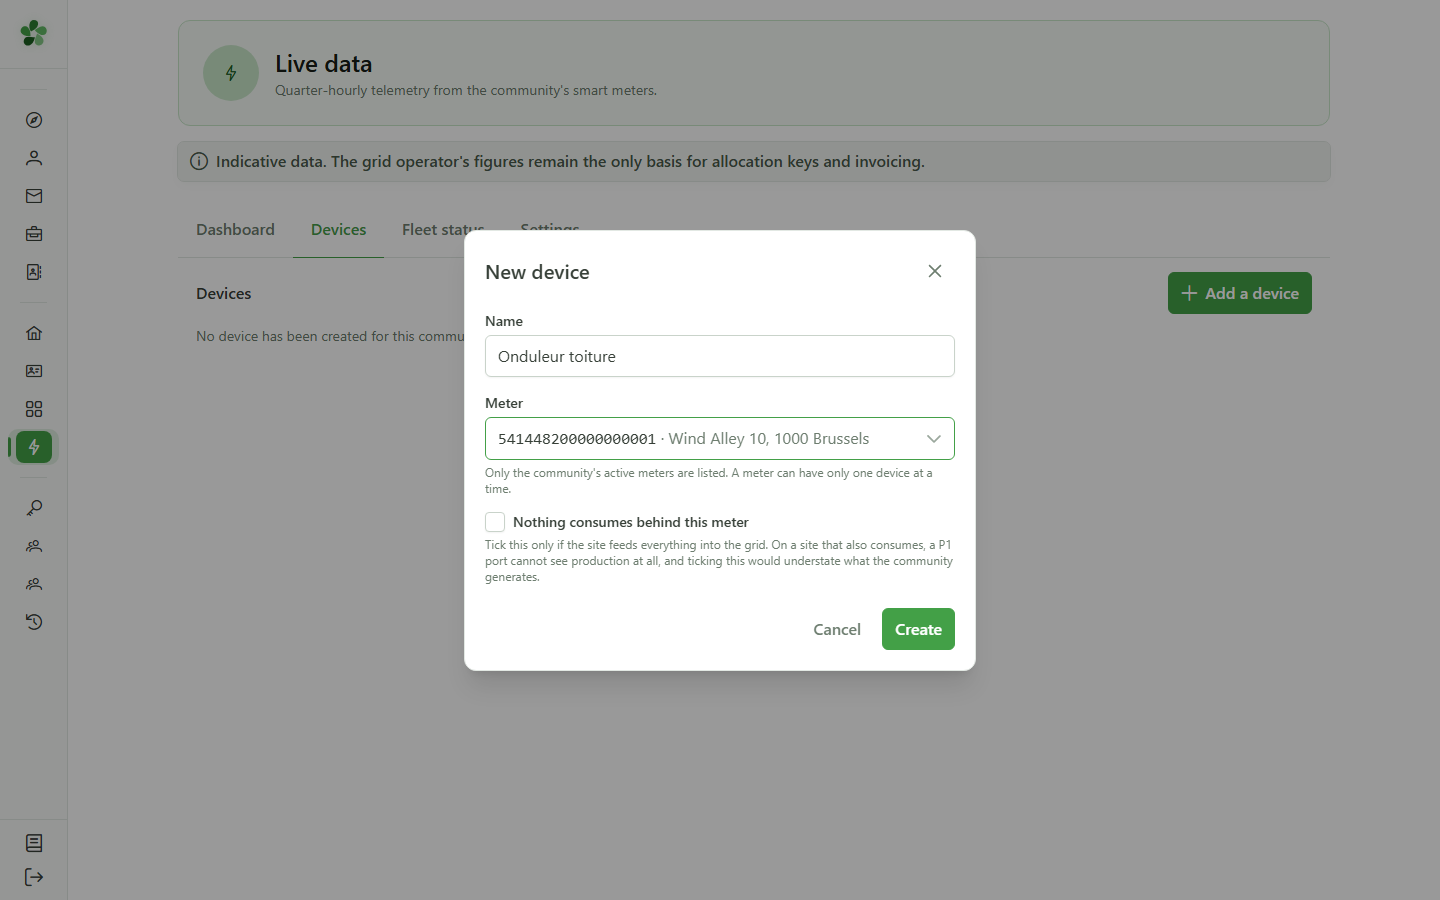
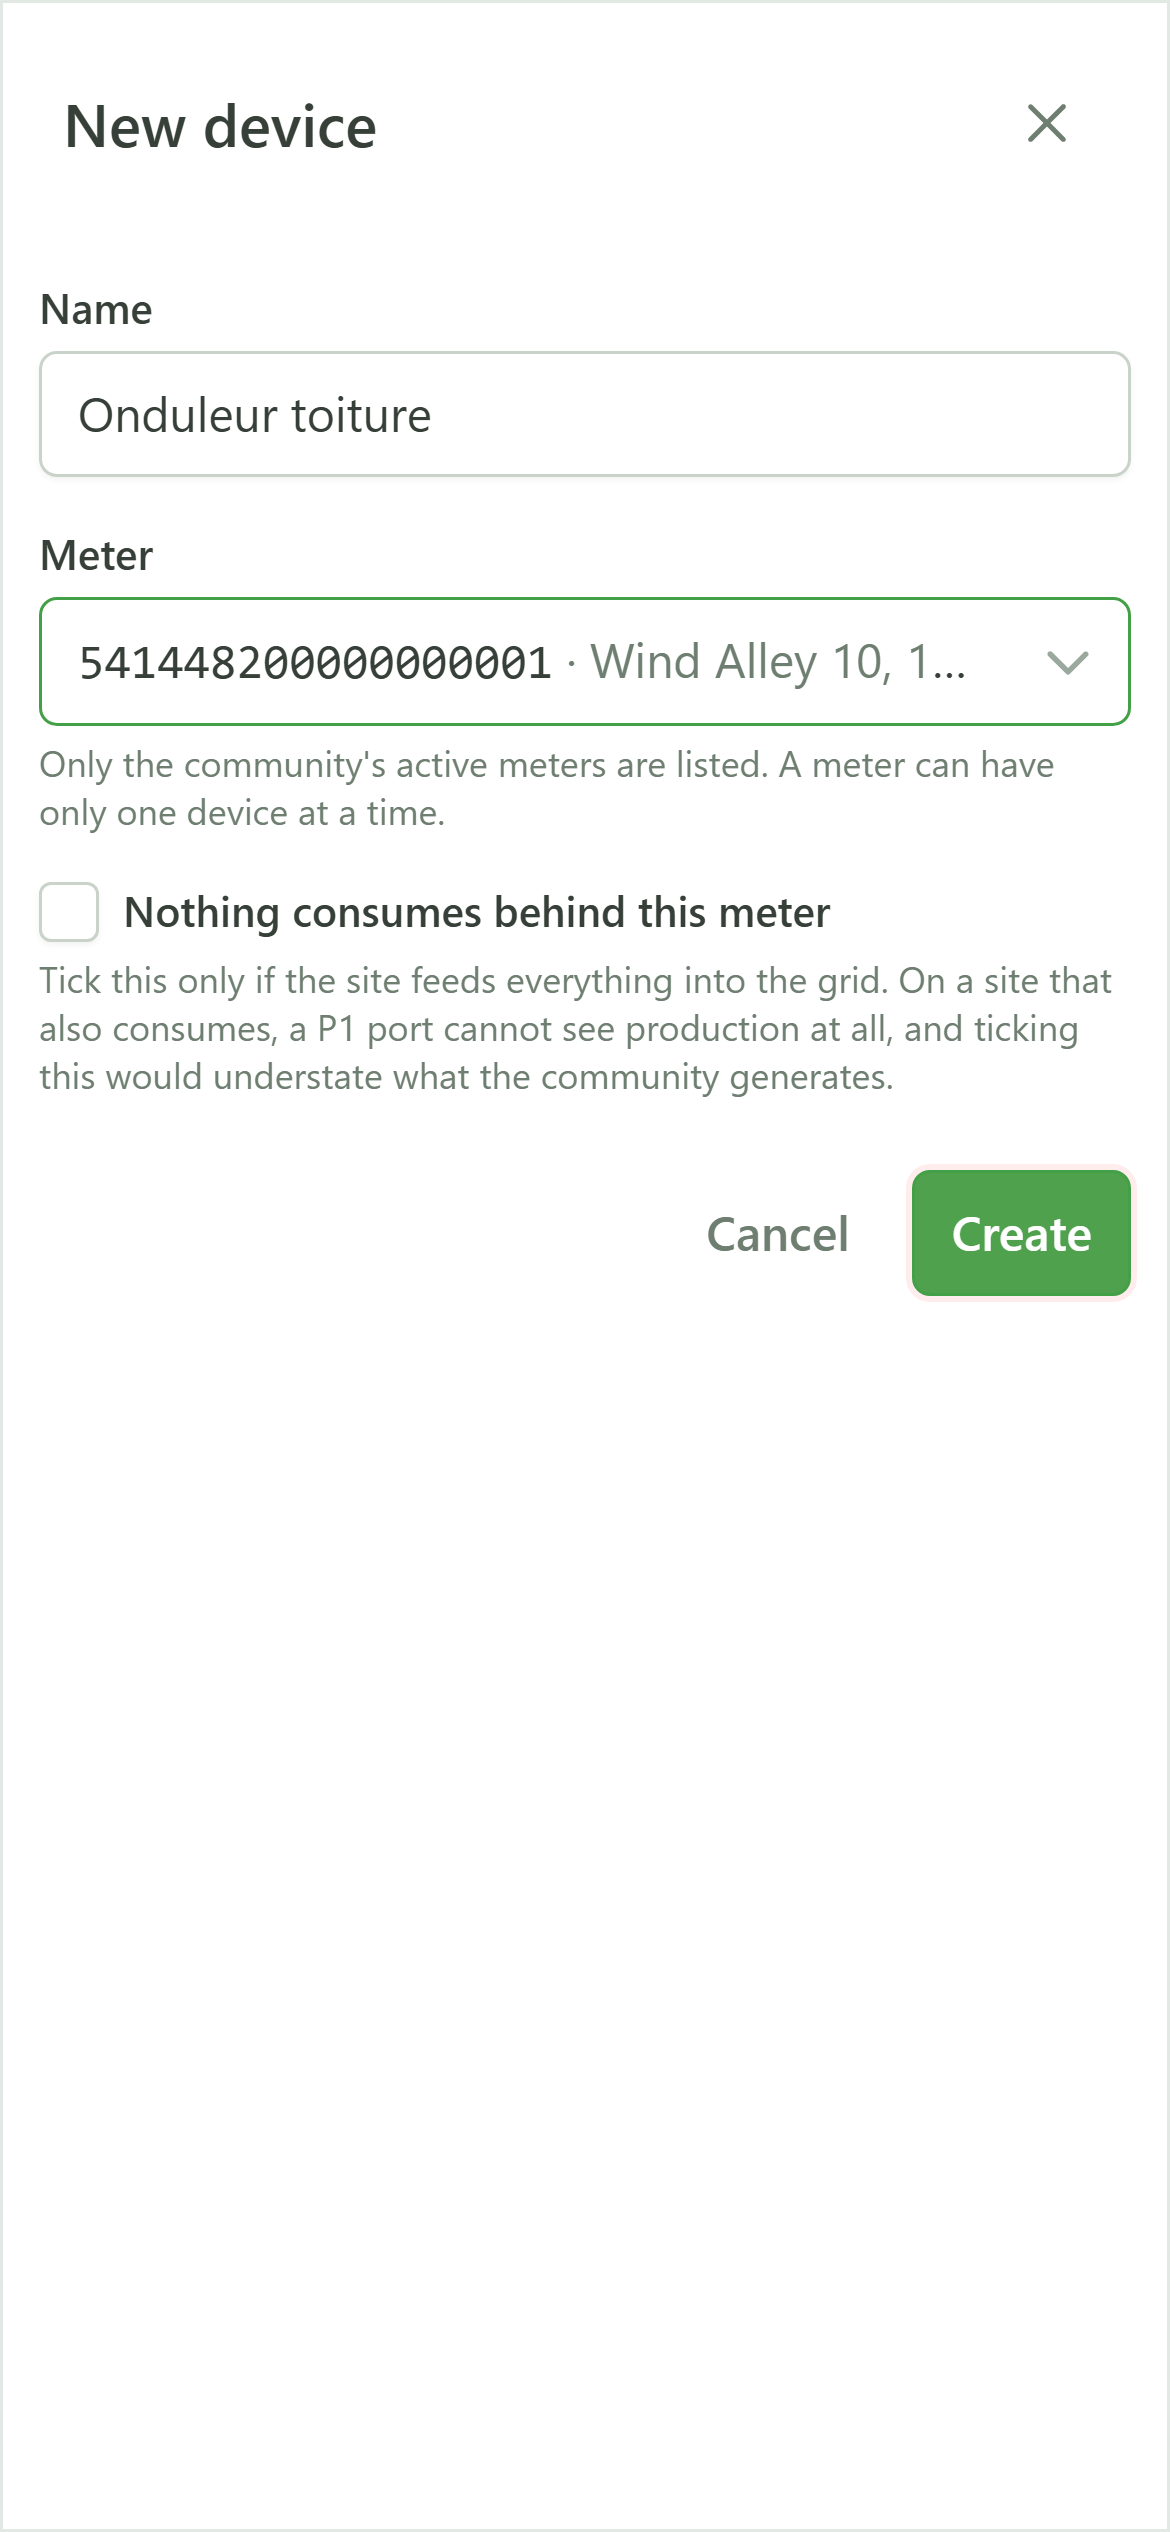
Give the device a meaningful name, then choose the meter it is connected to from the list. The list shows the community's active meters, each with its EAN, address and holder. A meter that already has a device is greyed out: each meter can have only one active device — revoke the old one to free the meter.
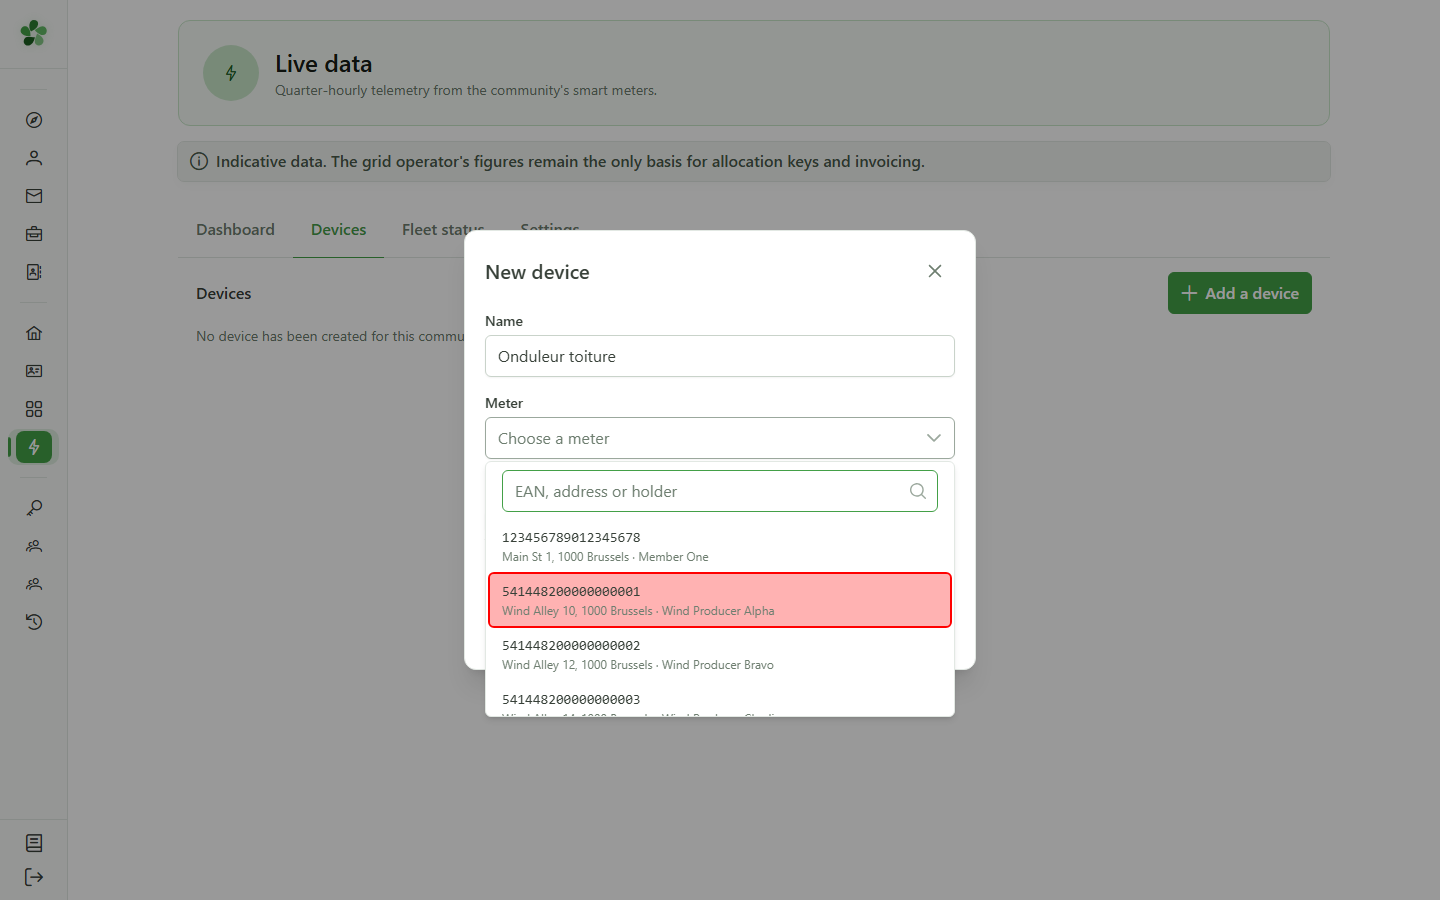
4 Create the device
New device
Click "Create". Only tick "pure injection" for a site that consumes nothing: ticked by mistake, it would understate the community's production without any visible error.
5 The enrolment code
Enrolment code
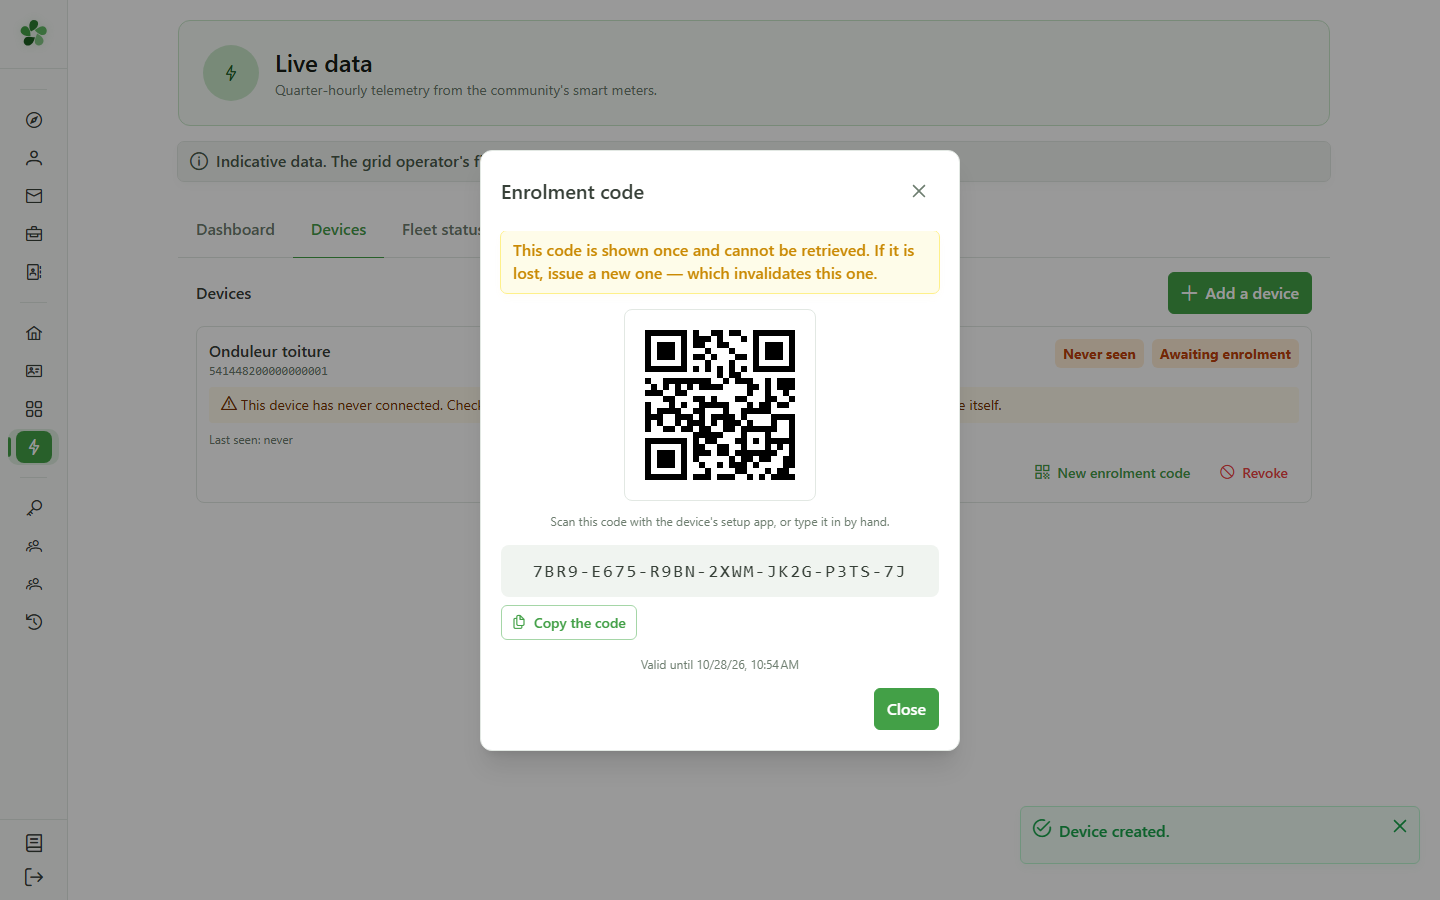
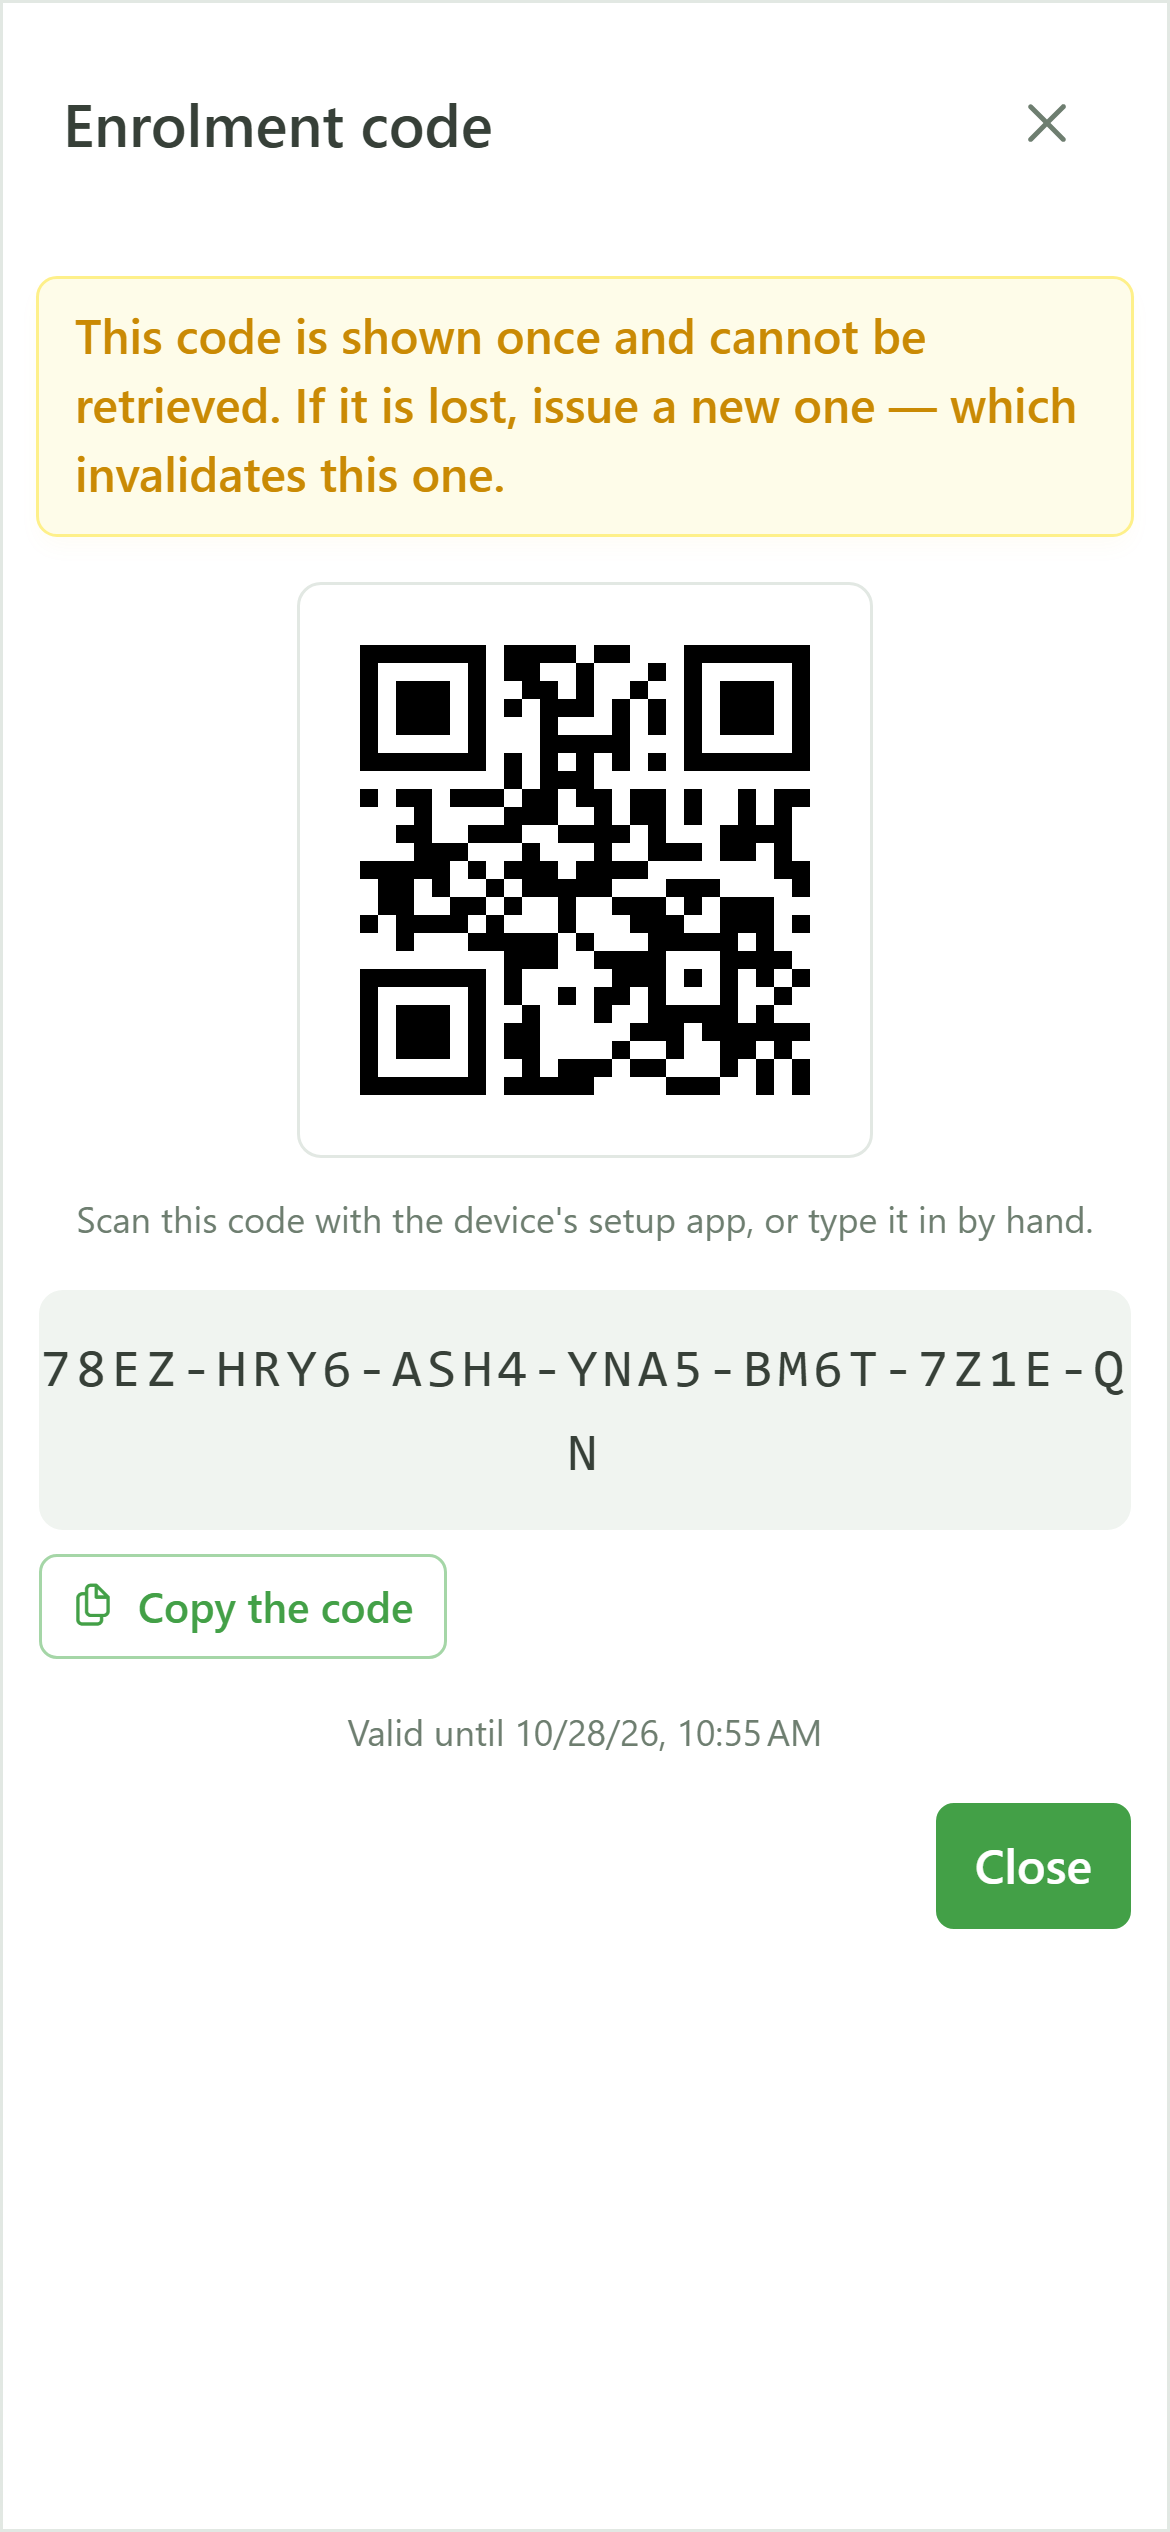
The device is created and its enrolment code shows immediately, as text and as a QR code. Type it (or scan it) into the device. It is shown only once, works only once and expires after 72 hours; if it is lost, issue a new one from the list — the old one then stops working.
6 Awaiting enrolment
Devices
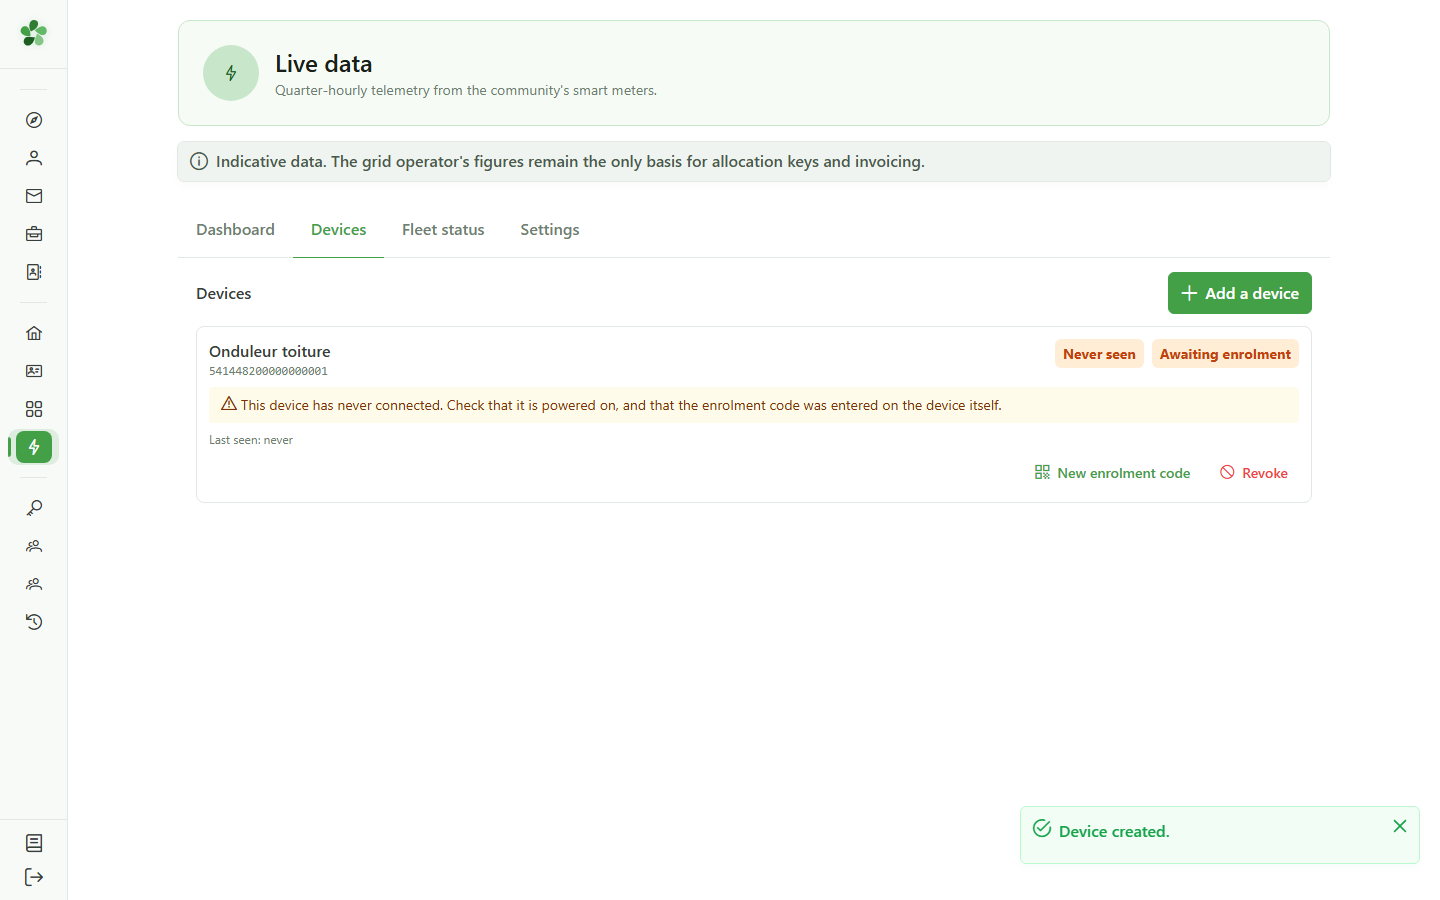
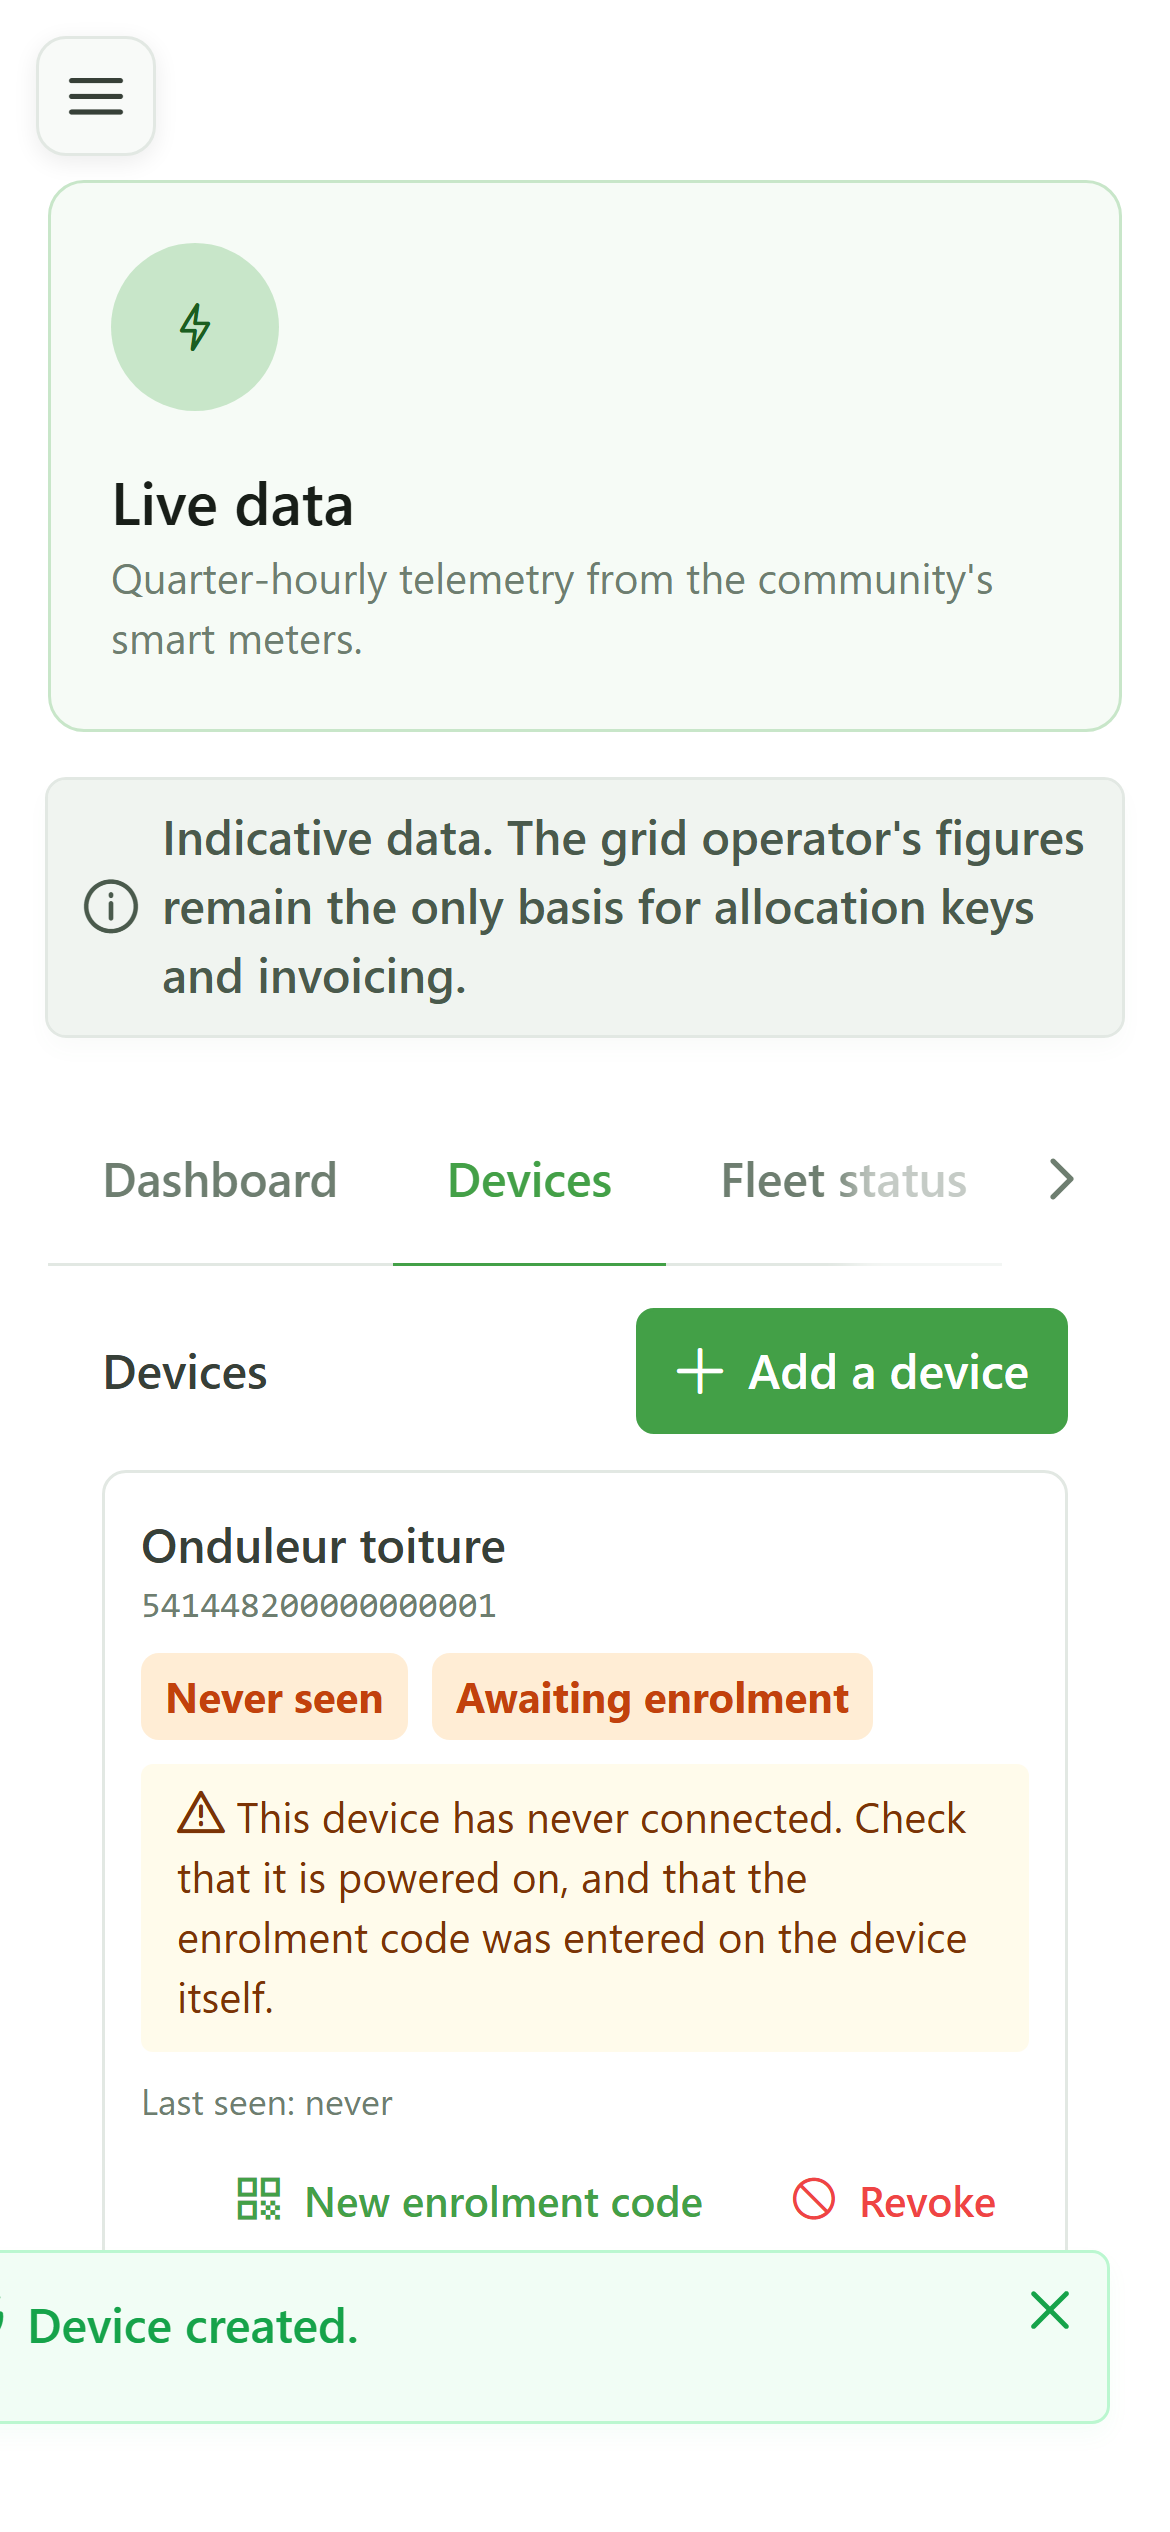
Until the device has used its code, it is "awaiting enrolment" and "never seen". The box below says what to check: is the device powered and connected to the network?
7 The device is reporting
Devices
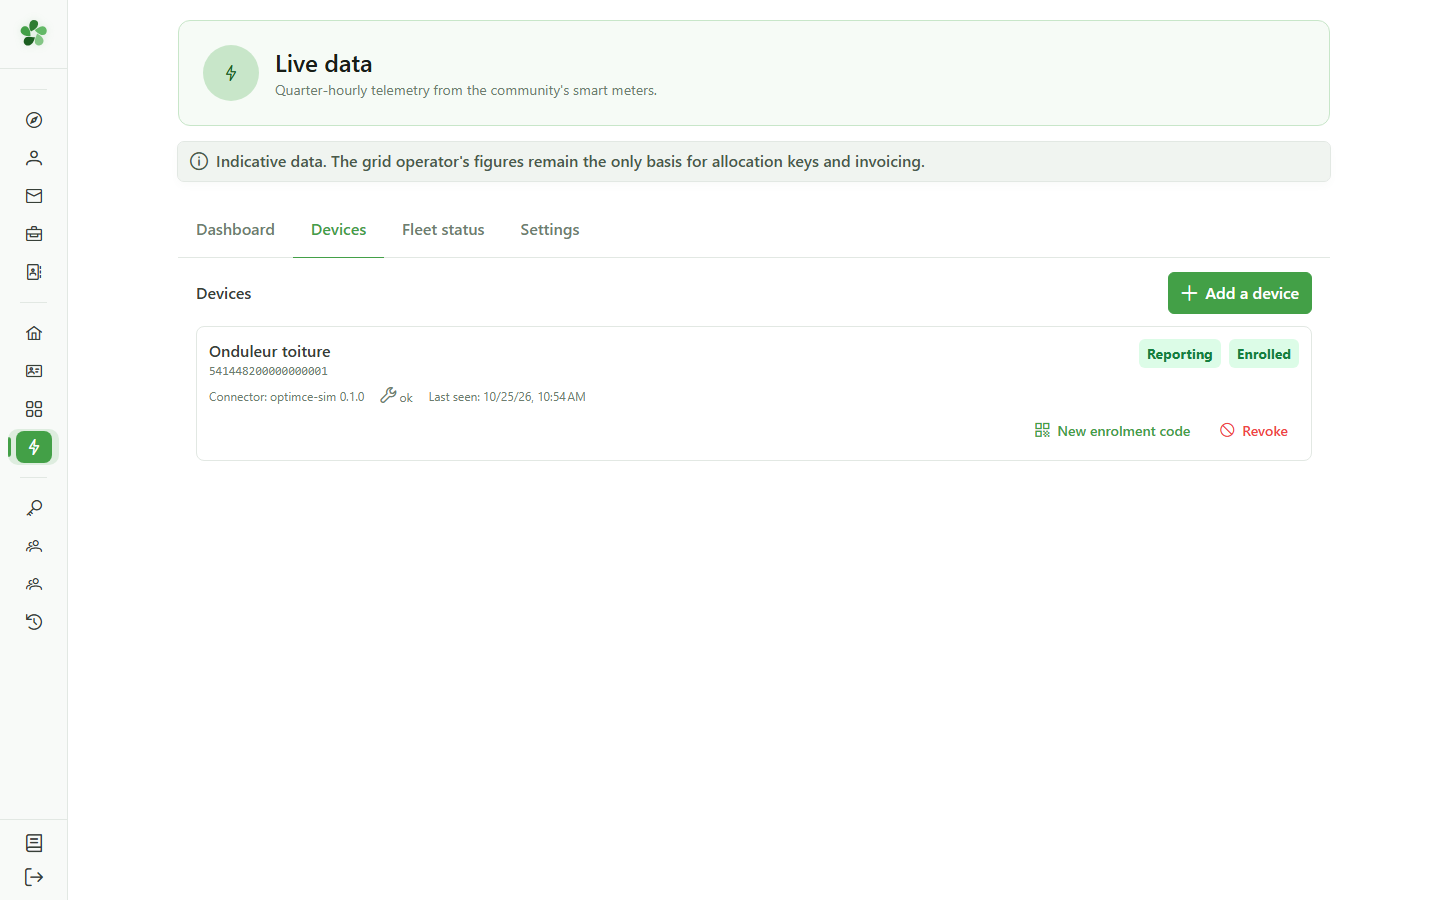
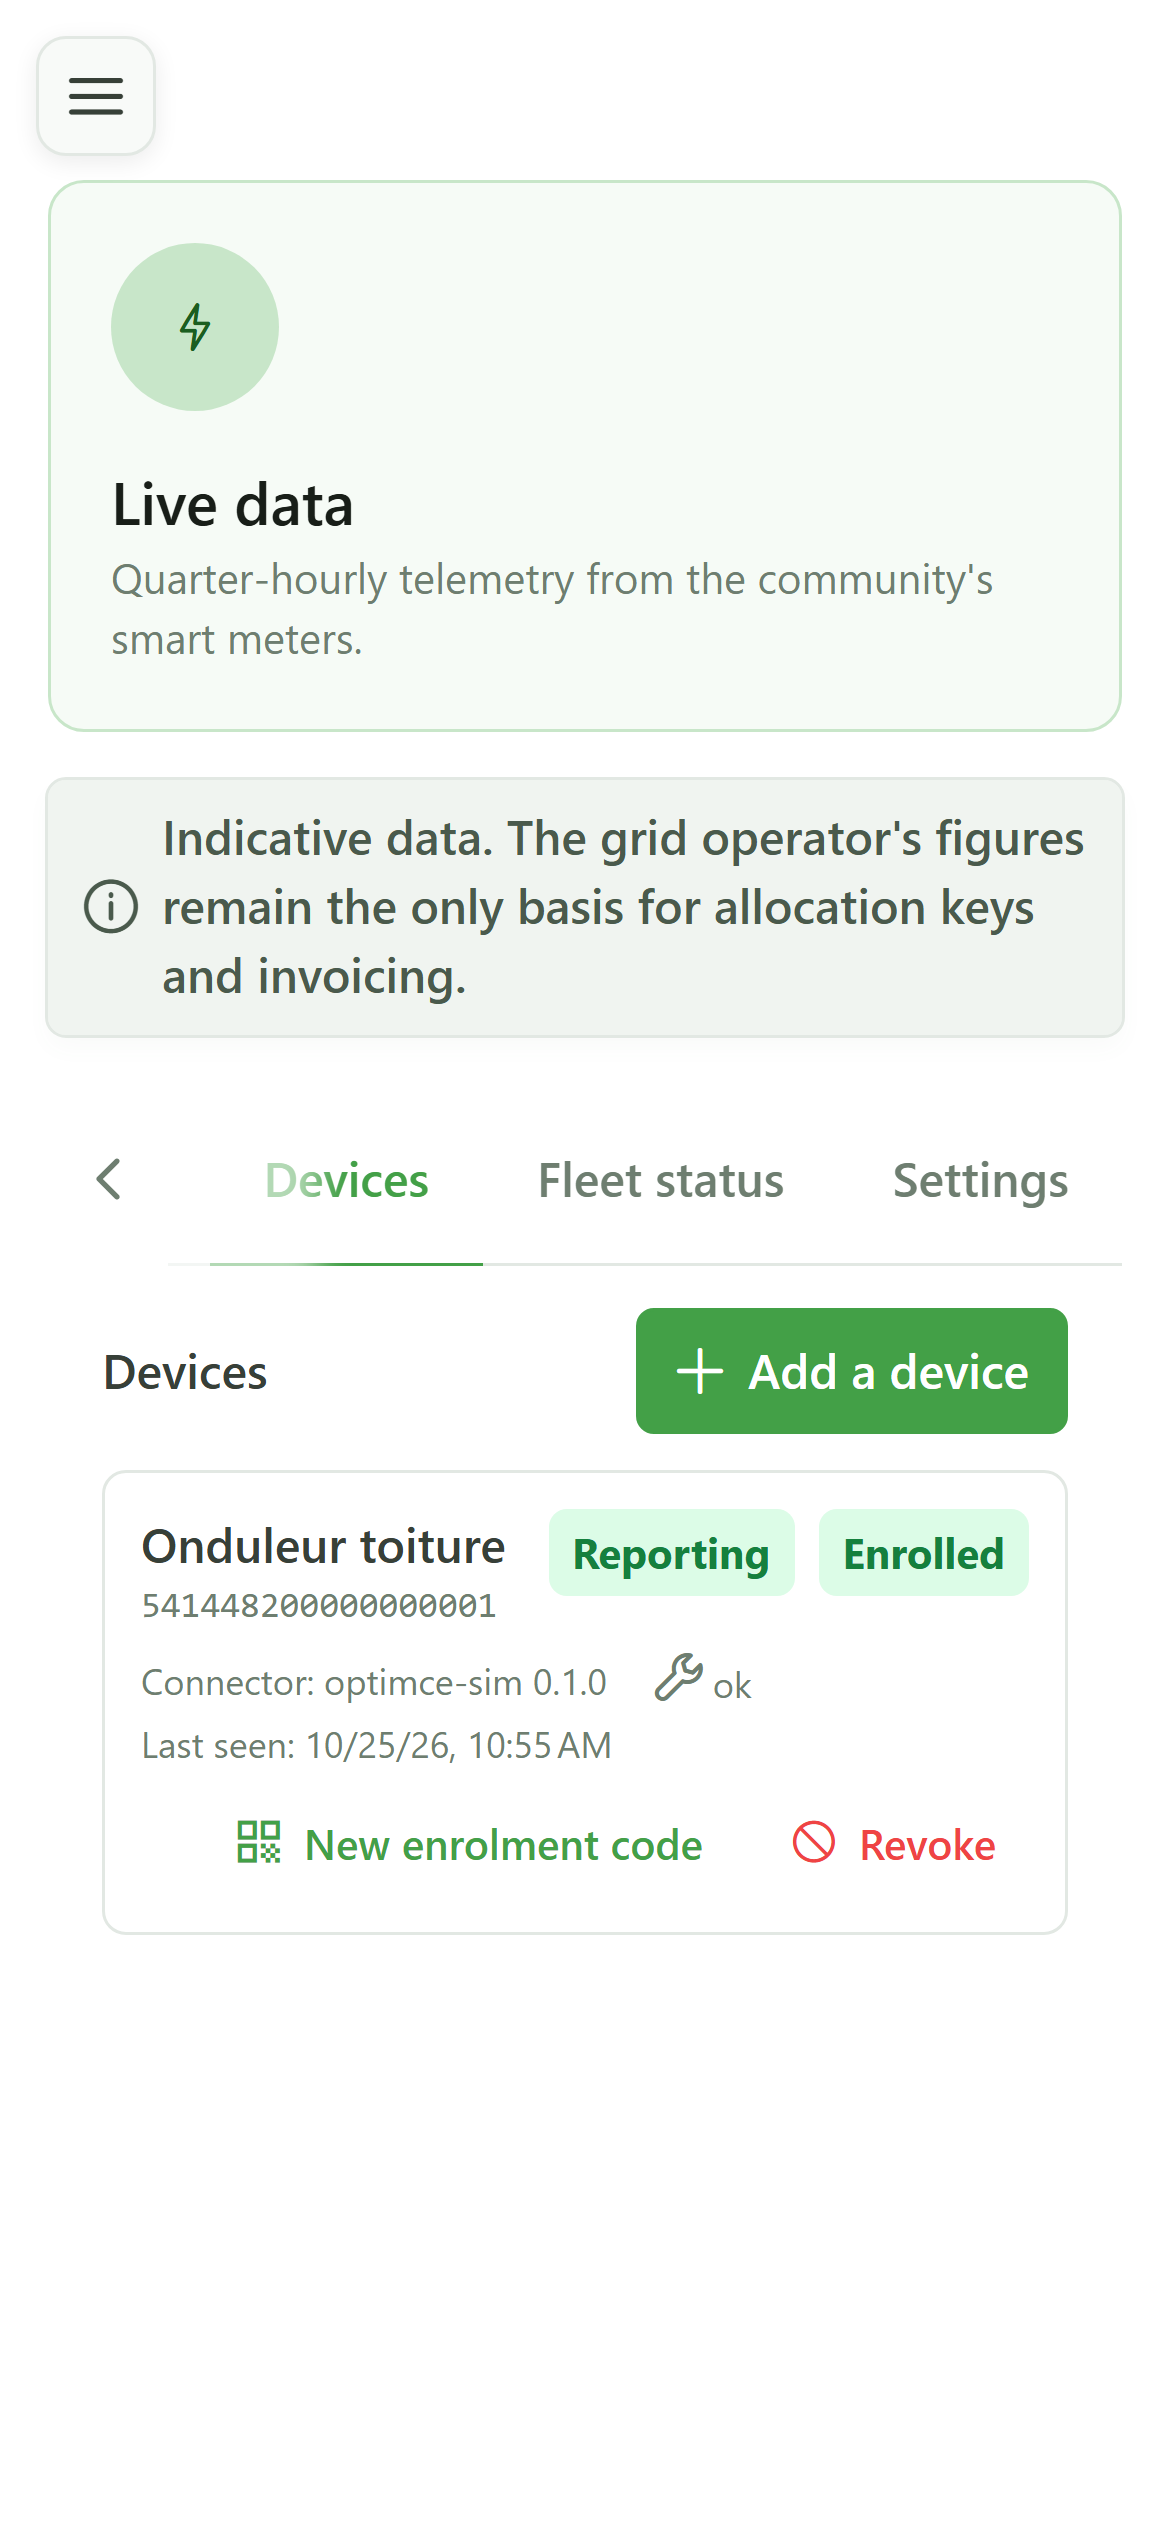
As soon as the device has used its code, it is "enrolled" and "reporting". The row also shows its software name and version and when it last reported. A device that goes silent, disconnects or sends only zeros turns red with what to do about it.
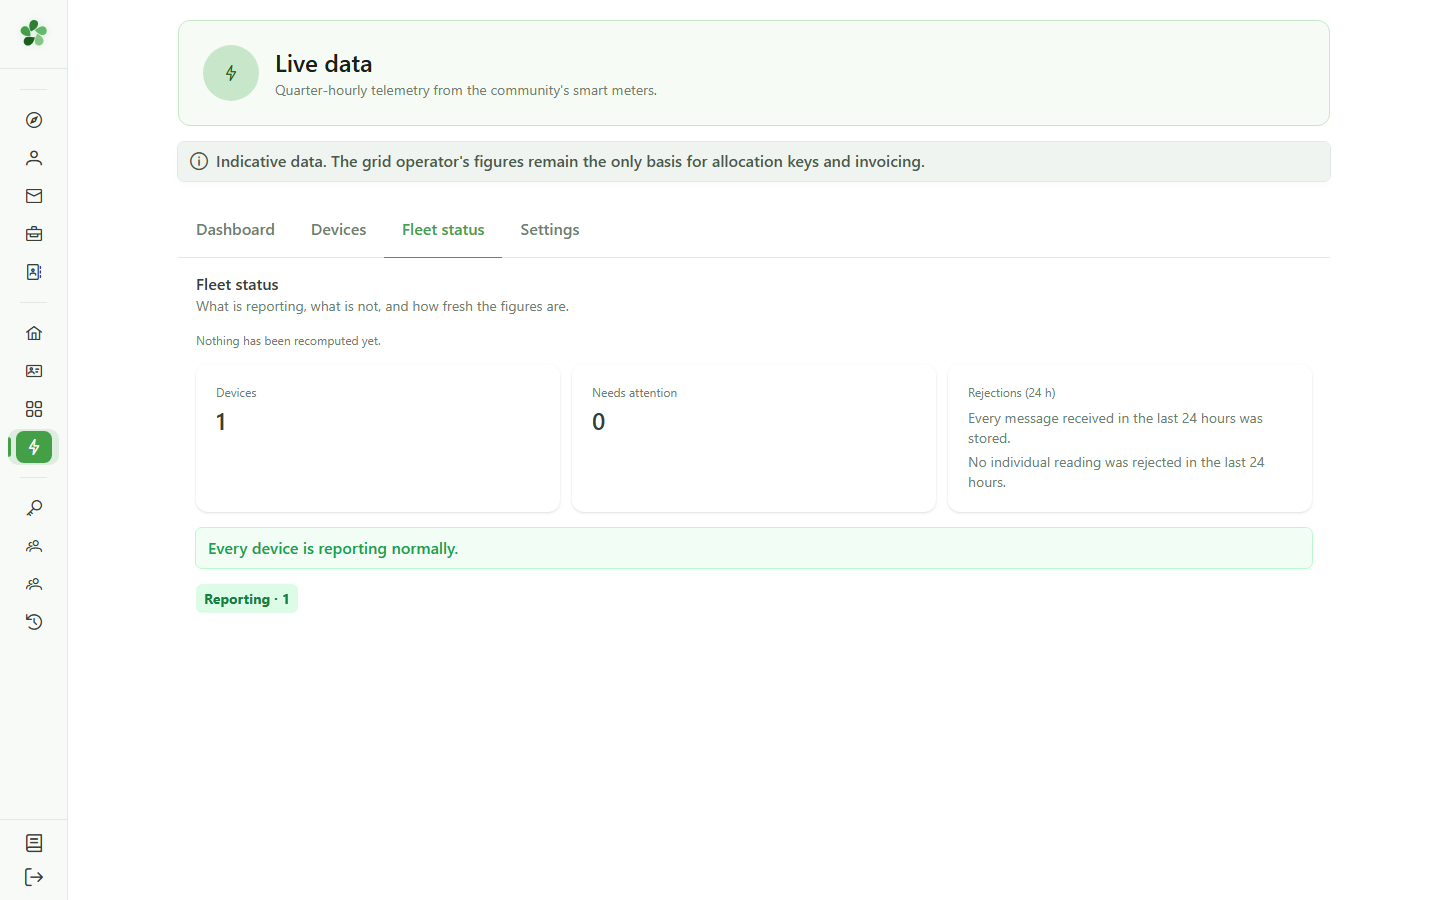
8 The fleet is healthy
Fleet status
The "Fleet status" tab confirms it: every device is reporting normally and no reading was rejected. The dashboard figures follow at the next computation, every quarter-hour.
Connect a device
Guide utilisateur
User guide
Gebruikershandleiding
Benutzerhandbuch
1 Open the Devices tab
Live data
In the Live data console, open the "Devices" tab. A device is the box plugged into a member's meter (P1 port) or inverter: it sends a reading every quarter-hour.
2 Add a device
Devices
Click "Add a device".
3 Name the device and choose its meter
New device
Give the device a meaningful name, then choose the meter it is connected to from the list. The list shows the community's active meters, each with its EAN, address and holder. A meter that already has a device is greyed out: each meter can have only one active device — revoke the old one to free the meter.
4 Create the device
New device
Click "Create". Only tick "pure injection" for a site that consumes nothing: ticked by mistake, it would understate the community's production without any visible error.
5 The enrolment code
Enrolment code
The device is created and its enrolment code shows immediately, as text and as a QR code. Type it (or scan it) into the device. It is shown only once, works only once and expires after 72 hours; if it is lost, issue a new one from the list — the old one then stops working.
6 Awaiting enrolment
Devices
Until the device has used its code, it is "awaiting enrolment" and "never seen". The box below says what to check: is the device powered and connected to the network?
7 The device is reporting
Devices
As soon as the device has used its code, it is "enrolled" and "reporting". The row also shows its software name and version and when it last reported. A device that goes silent, disconnects or sends only zeros turns red with what to do about it.
8 The fleet is healthy
Fleet status
The "Fleet status" tab confirms it: every device is reporting normally and no reading was rejected. The dashboard figures follow at the next computation, every quarter-hour.